Background
I have watched small businesses come and go over the years, and had several first-timers at my own events.
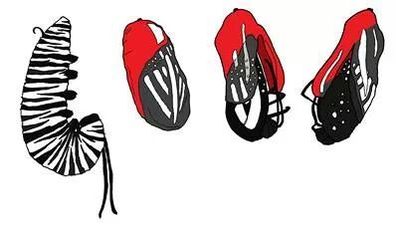
I like to use the life cycle of a butterfly as a good example of how things can work out for a nascent business – as long as the caterpillar stallholder stocks up on plenty of knowledge, planning, and products before taking its shot at butterflydom, they have a reasonable shot at success.
To help identify levels of experience, we classify our makers according to the following criteria:
Level 0 – Caterpillar – not approved to sell at Wrought but has potential
Level A – Chrysalis or other new sellers – approved to sell on half-sized stalls
Level B – Butterfly – Standard approved sellers
Level C – Sellers approved for showcase spots – experienced makers who have the capability to stock and fill a showcase stall space professionally and attractively, and who can demonstrate a skill or give workshops onsite.

Course Content
- Pricing and signage – the thumbnail test
- Photography for the web – simple tips from a non-photographer
- The market kit – a checklist
- Price point and price range – an overview*
- Dress for success – how to have your stall ace the interview
- Dress to impress – personal presentation and how it should fit with your stall
- Fresh – how to keep your stall display feeling freshly-picked
- Layers – creative repurposing – making a stall display out of other things
- Layers – good bones – how to give your stall infrastructure
- Layers – building and transporting your stall displays
- Layers – access, security, and visual interest
- Flavour – developing your brand
- Flavour – create a fan base
- Hook – reel them in – turning customers into friends
- Selling at Wrought – how does a Wrought maker interact with customers?
* Copper Catkin Consulting courses will give an overview and guidelines on setting product pricing and price ranges. Individual price-setting requires detailed analysis, and is better done one-on-one with a specialist – this service is not offered by Copper Catkin Consulting.
Physical workshops – Workshop #1 – Stall display – Butterfly level
4.5 hours (includes half hour meal break)
Prerequisites
- enough stock for a full table
- all 5 short courses
- 5MMM
- At least one Wrought market (if Chrysalis seller)
Recommended:
- All available butterfly courses
Bring:
- Stock and any displays, price tags, signage, etc that you plan to use, as if going to an actual market
- Floor-length tablecloth (tables provided)
This workshop focuses on teaching you to improve your own display for stallholders with any level of market stall experience. The aim is to take your current ideas and take them to the next level. We will apply the 5 Copper Catkin Consulting display principles and then brainstorm ideas for improvement, concluding with a goal-setting exercise.
Outcome:
Stallholders will have a strong concept for their display, and a plan (with goals and deadlines) for making any changes required. Stallholders will be held accountable for meeting their targets by themselves, and the rest of the group.
Physical workshops – Workshop #1 – Selling at markets – Butterfly level
- all 5 short courses
- 5MMM
- Caterpillar sales course (if new seller)
- At least one Wrought market (if Chrysalis seller)
Recommended:
- All available butterfly courses
Bring:
- Comfortable shoes
This workshop is recommended for sellers with any level of market experience, or difficulty making successful market sales. Even with retail experience, selling at markets can be difficult.
As with the caterpillar course, we will focus on role-playing in pairs to get comfortable with different customer types, then we will brainstorm our ideal customer for our products. We will review cash handling and the mechanics of a sale, with more detail about inventory management, payment methods, and customer delighters.
We will also practice dealing with difficult customers, disengaging from talkers, and how to cope when friends visit our stall.
Outcome:
Stallholders will leave with a clear idea of how to interact with a range of customer types, and a better sense of their own ideal customer, and how to attract them and turn them into loyal followers. They will also have confidence in their ability to manage the sales process, and gain some tips and tricks to delight the customer.