IMPORTANT NOTICE - due to the effects of the covid-19 lockdown, shipping times are considerably impacted. Please be patient. We offer contactless deliveries in the Wellington region to help ease the load on the couriers. Dismiss
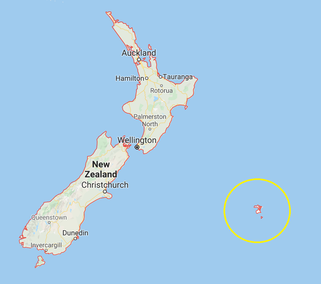
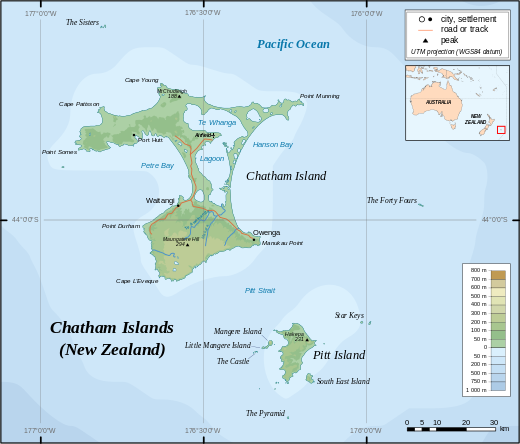
Pitt Island is the second largest island in the Chatham Archipelago, New Zealand. It is called Rangiauria in Māori and Rangiaotea in Moriori. Source: Wikipedia
We have seen several other species from the Chatham Islands in this series:
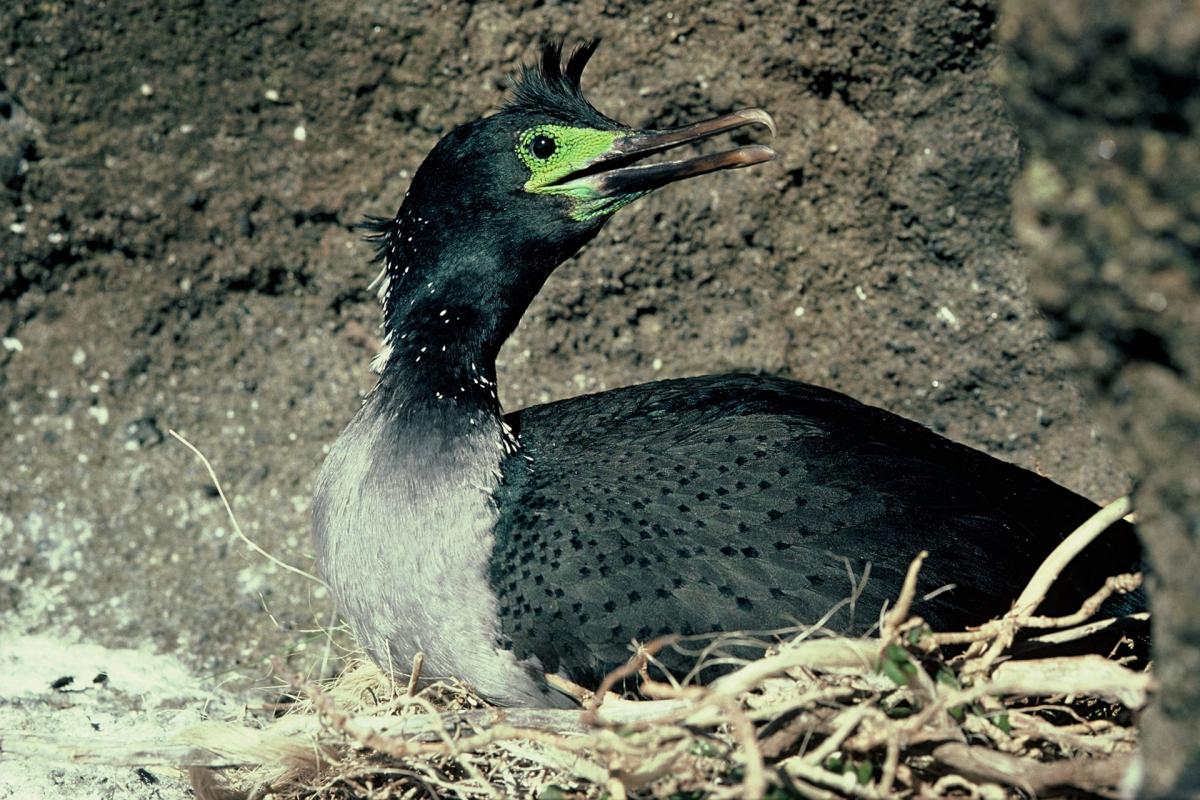
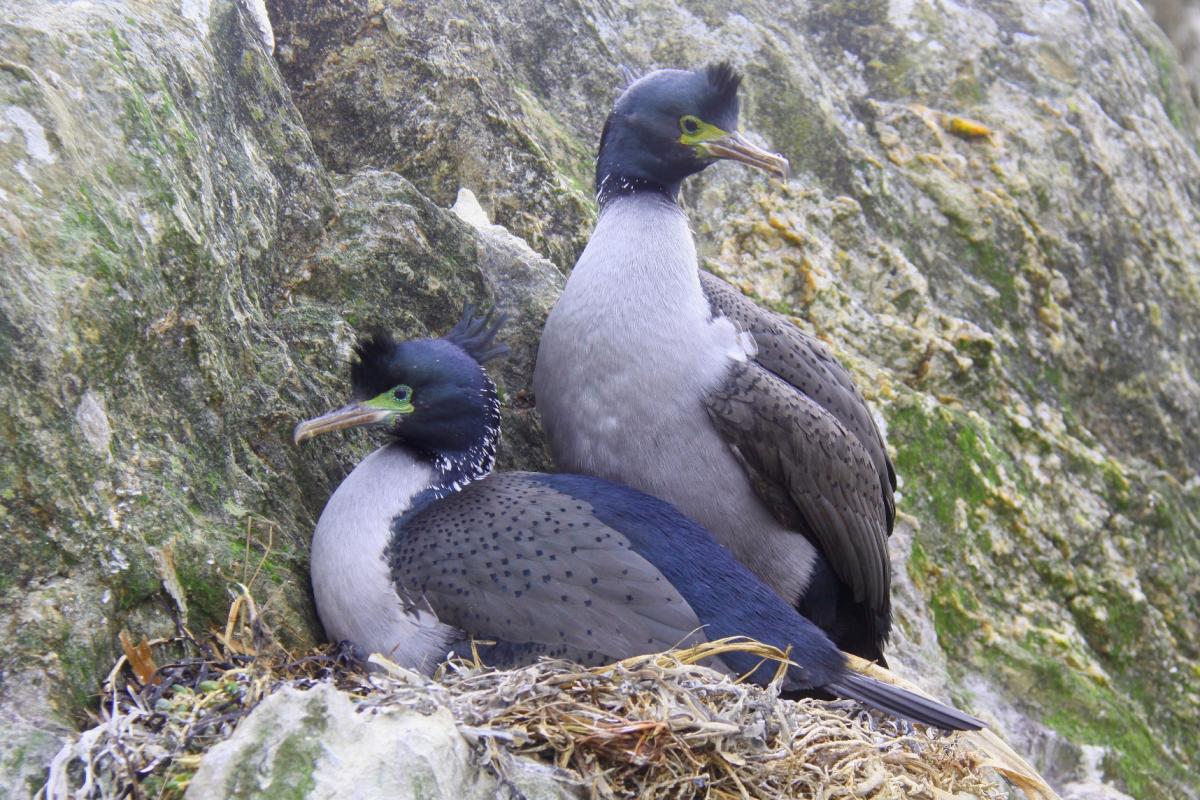
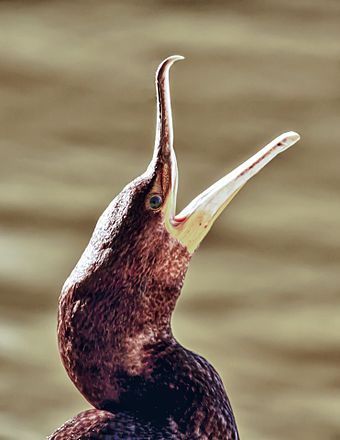
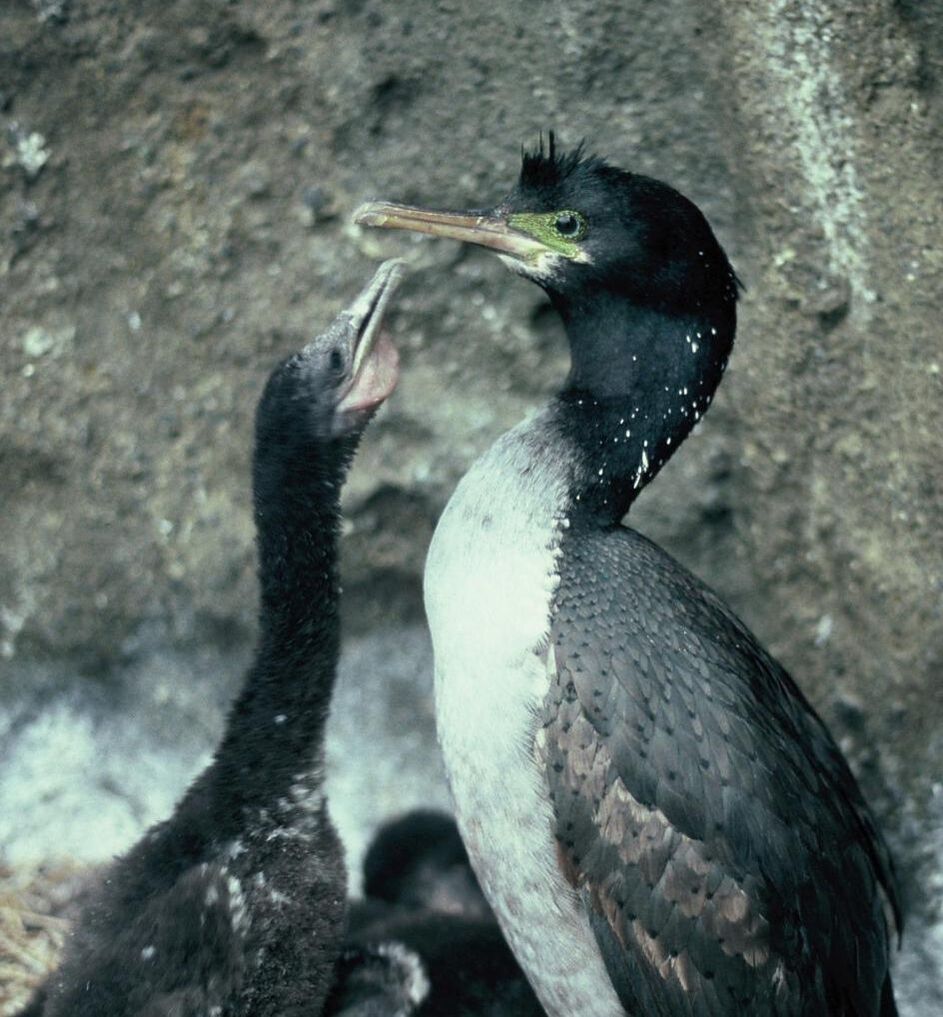
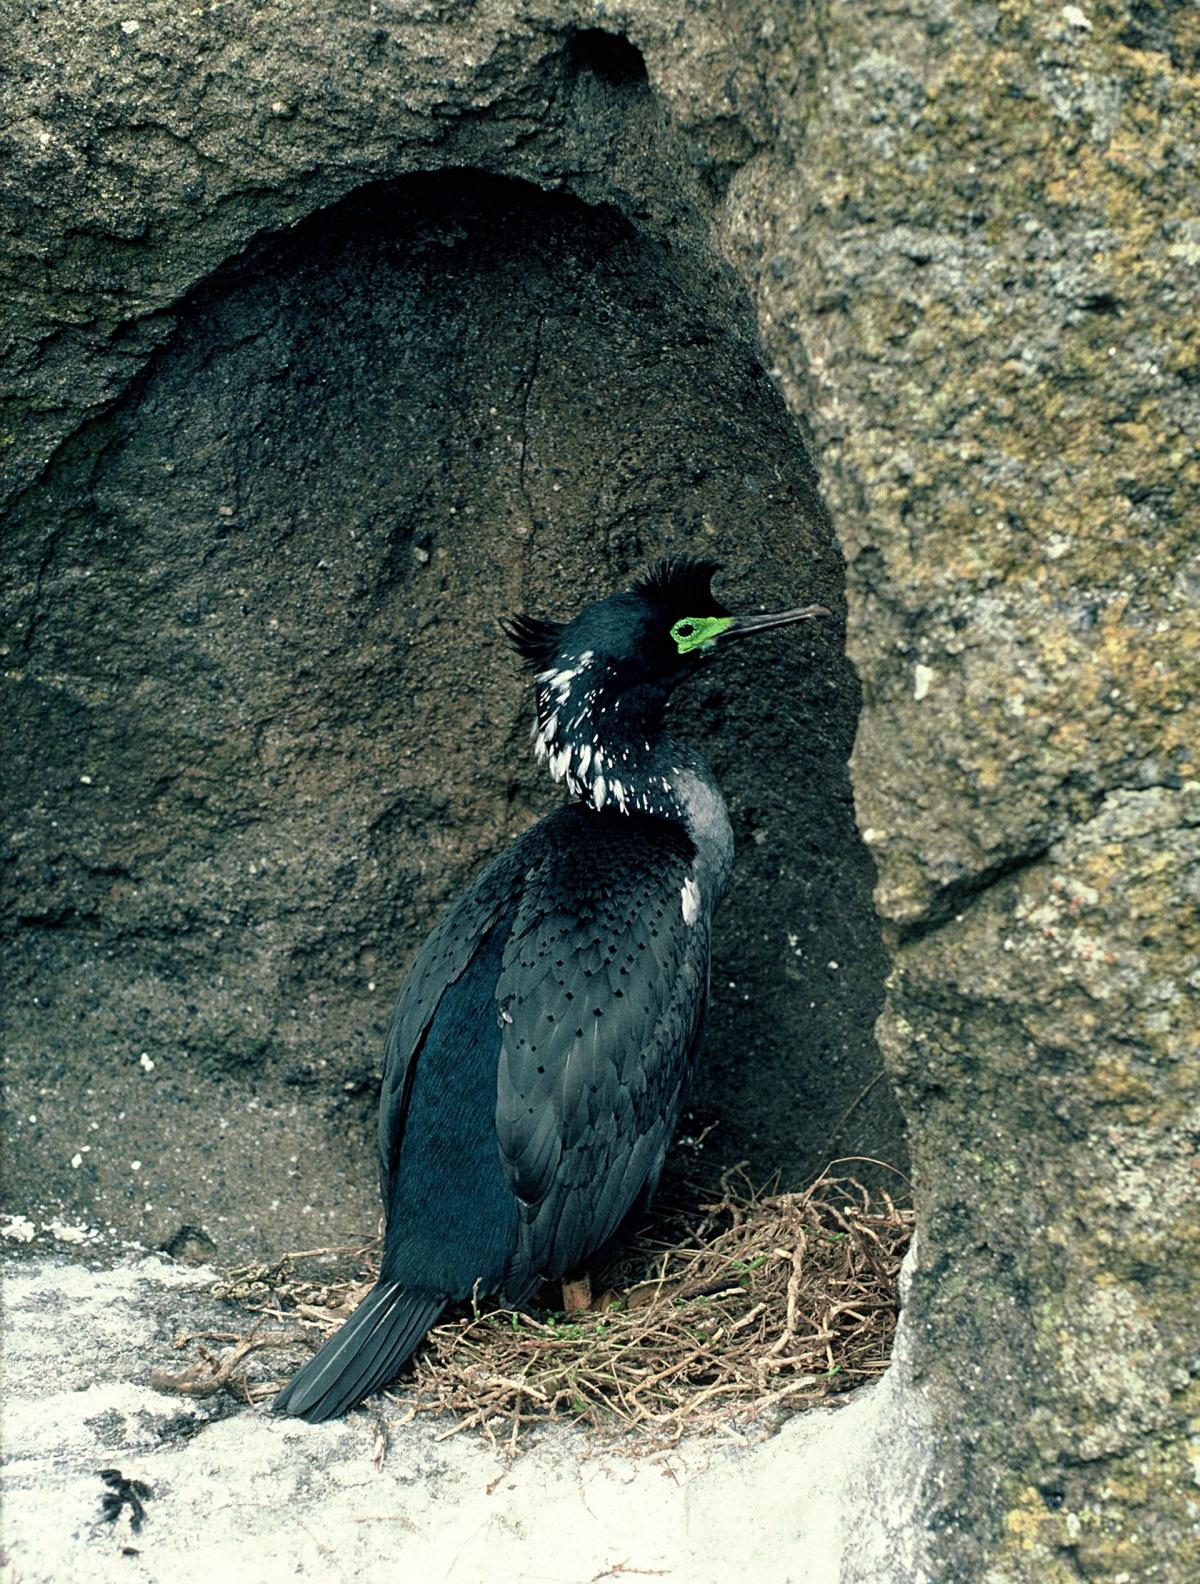
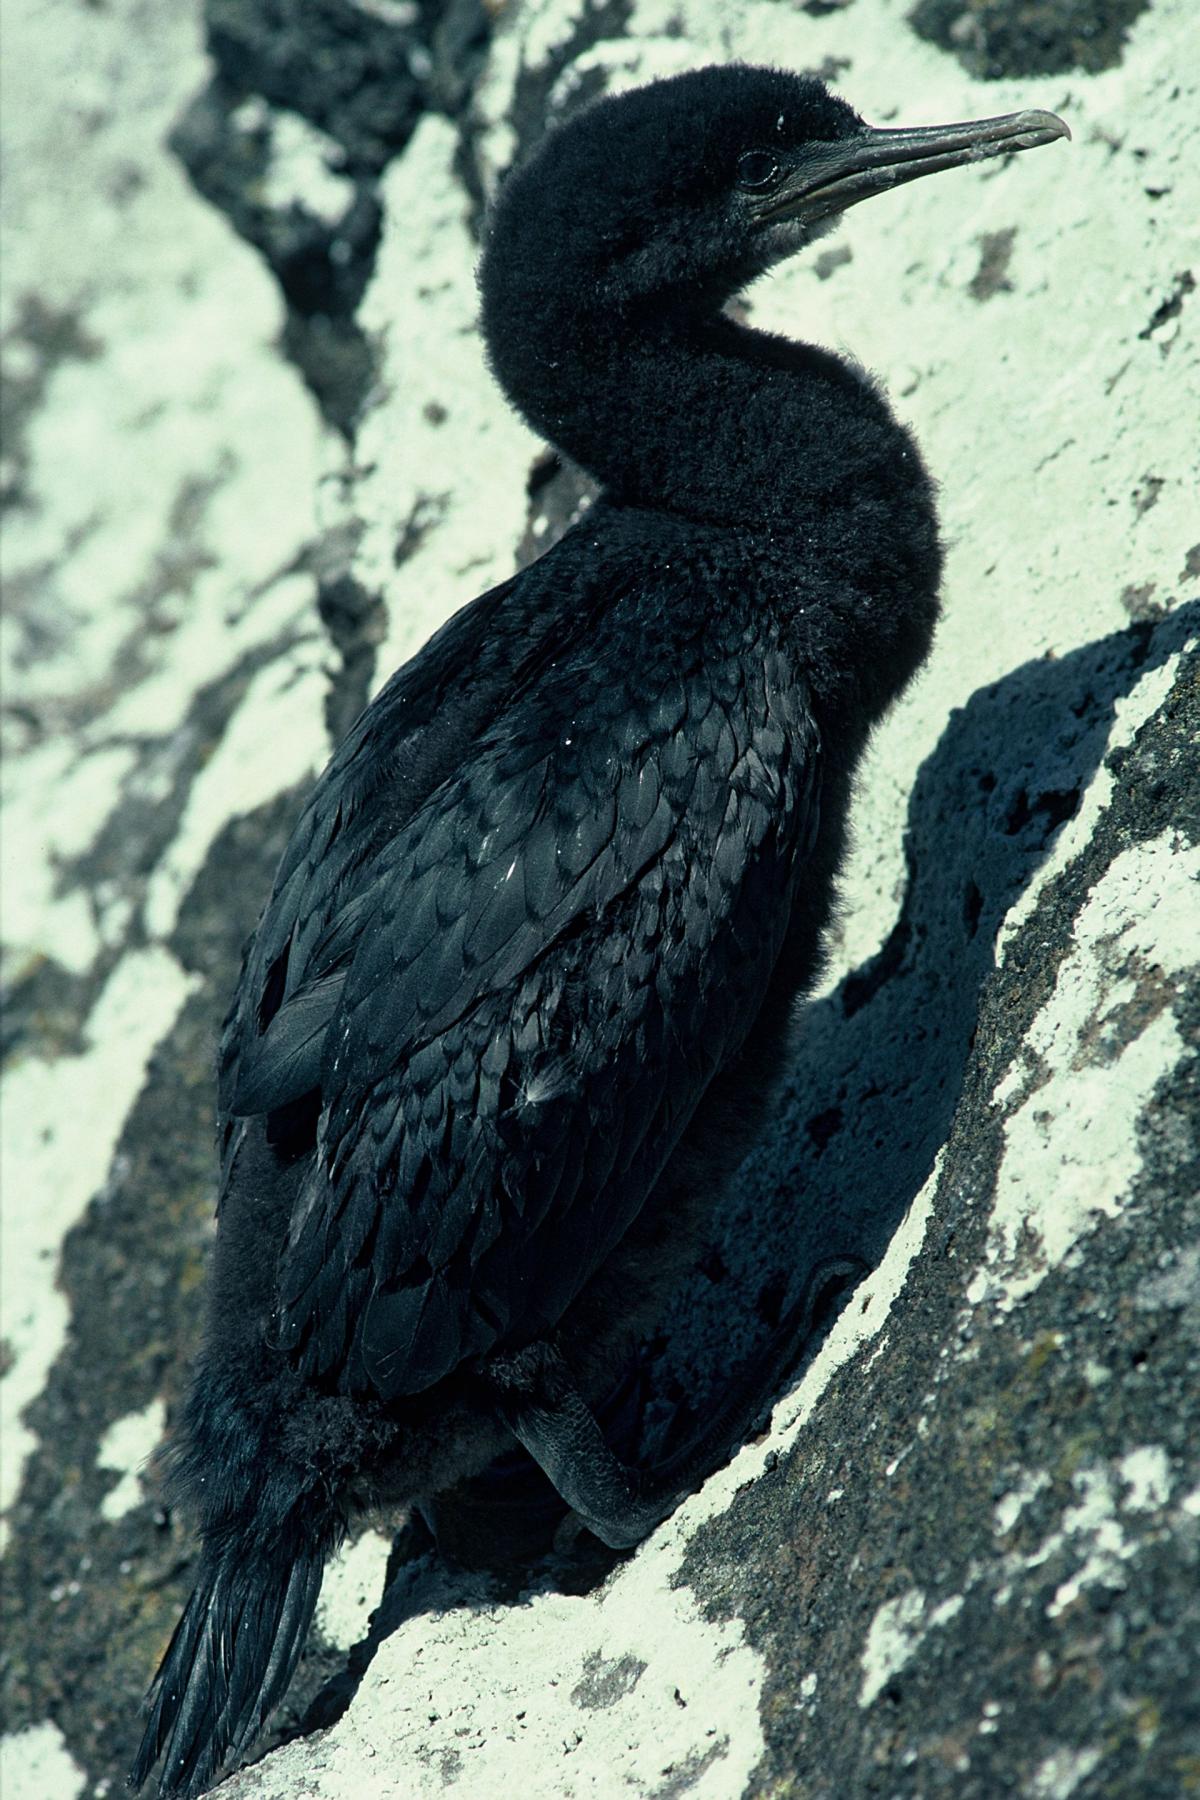
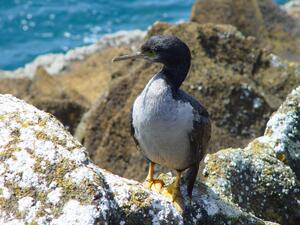
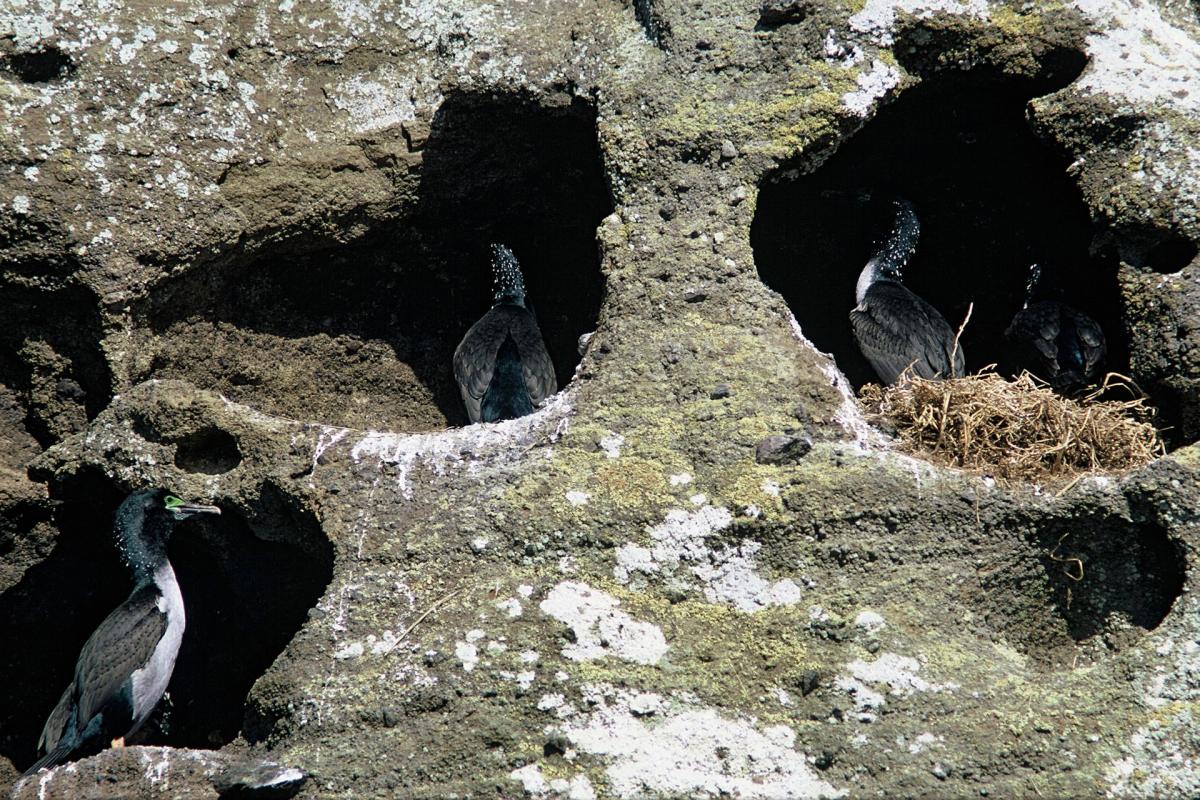
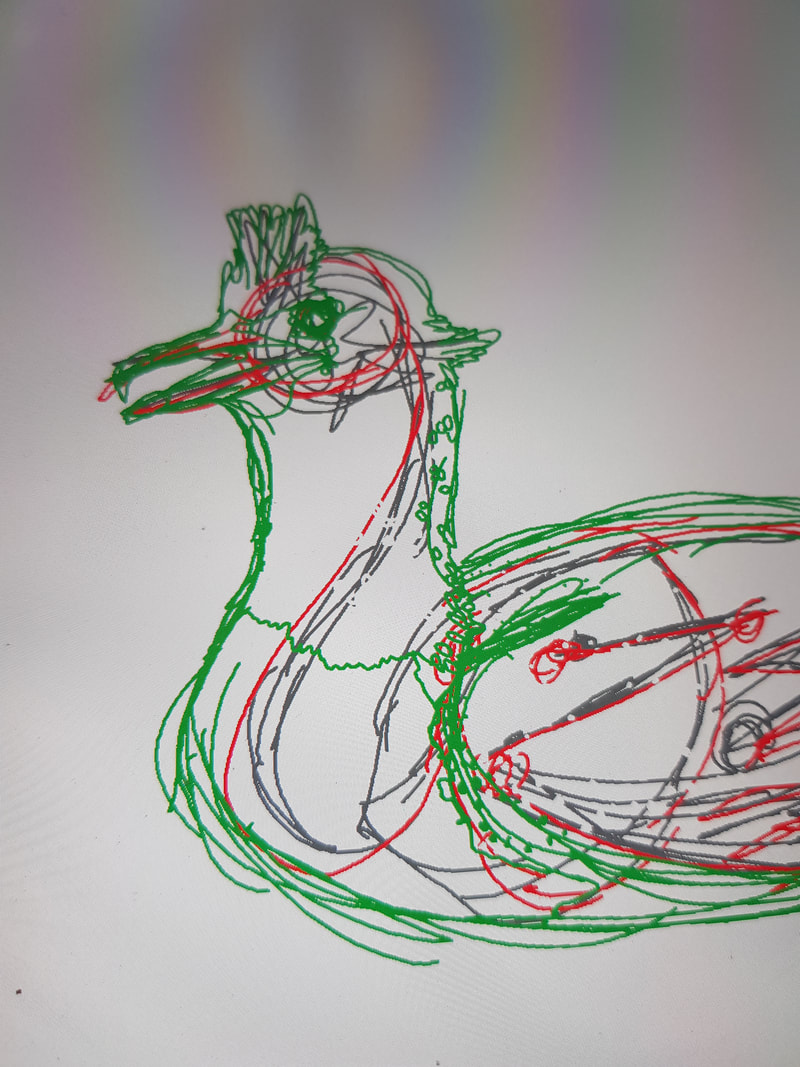
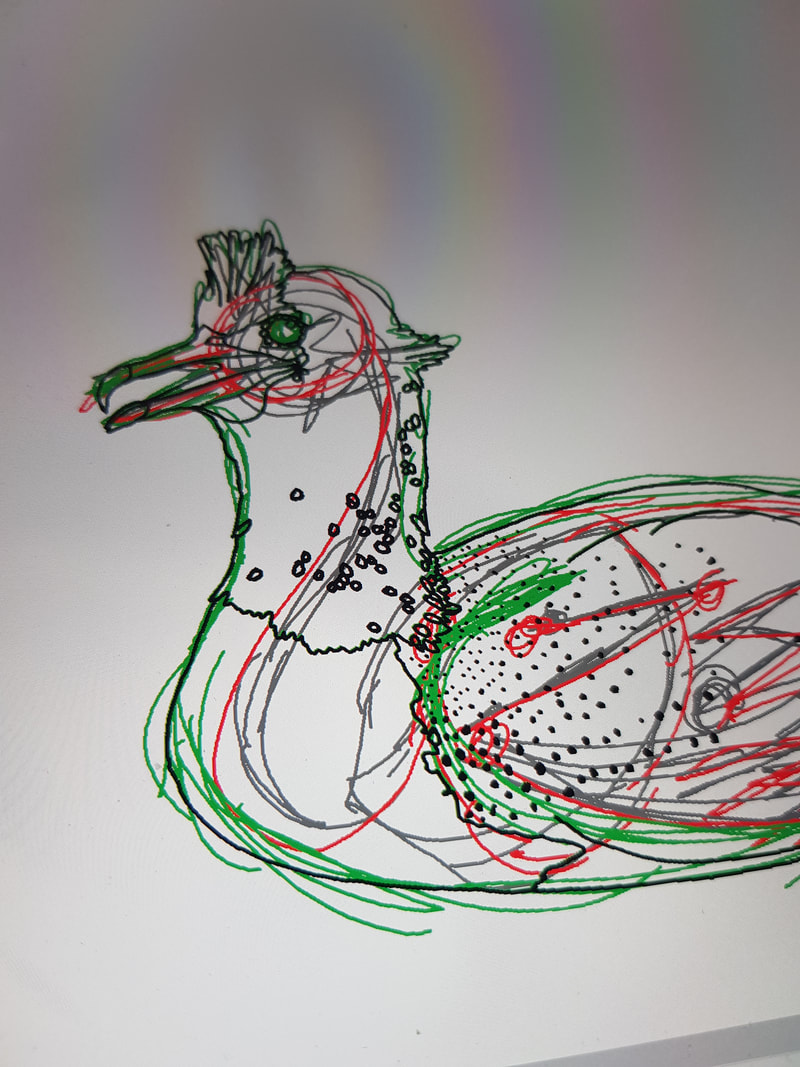
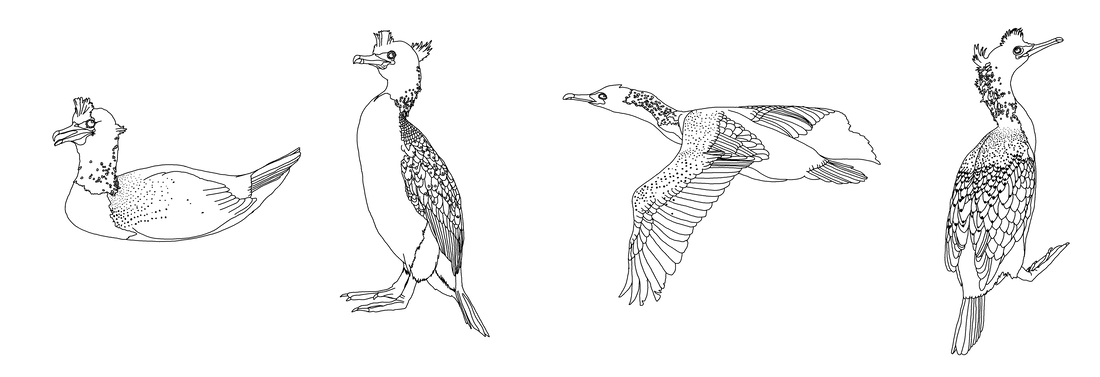
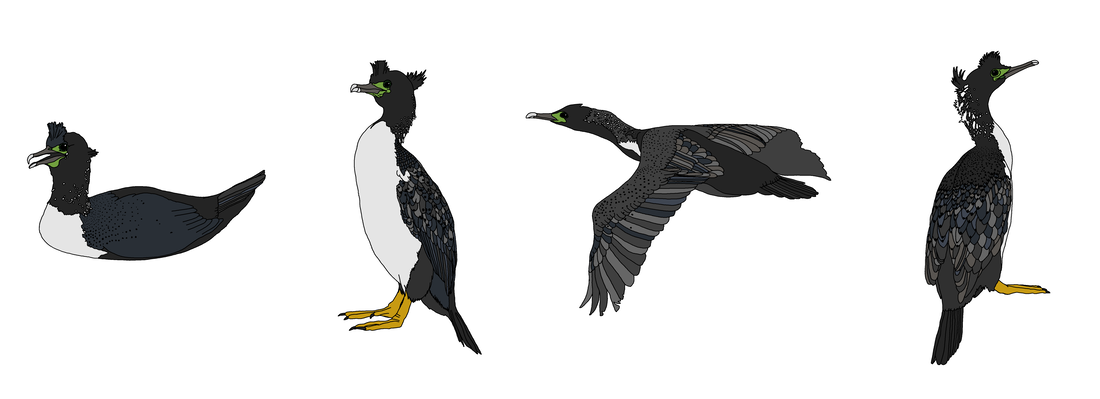
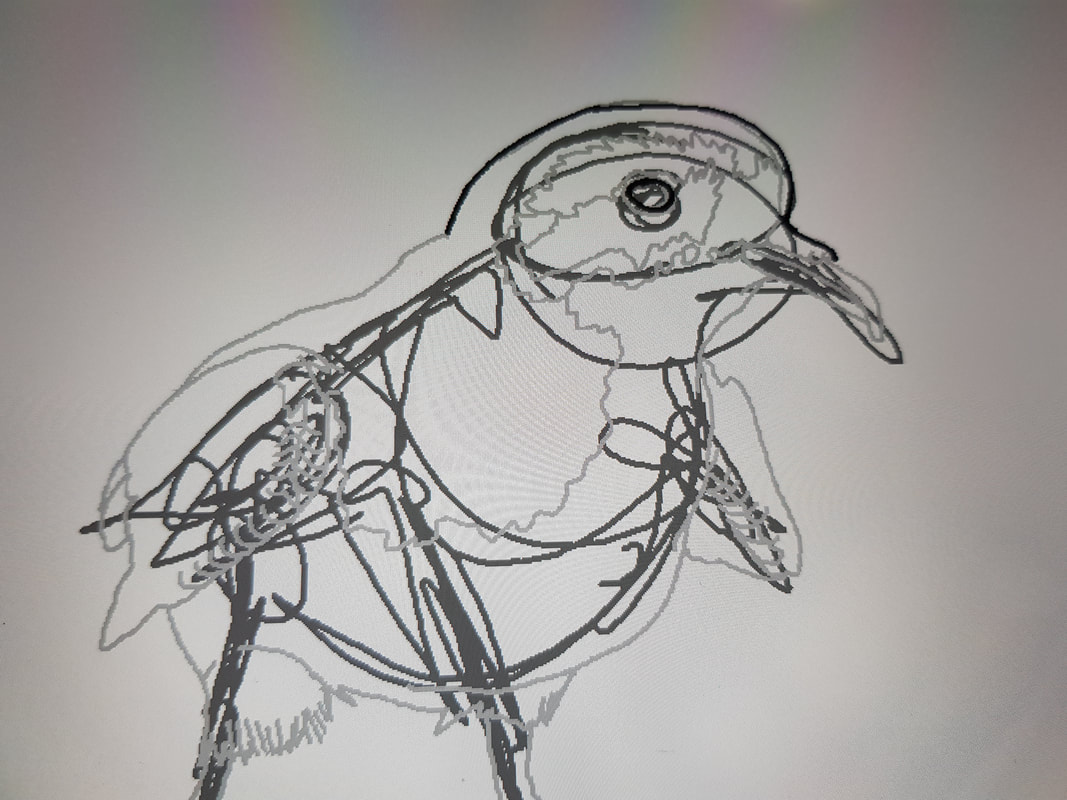
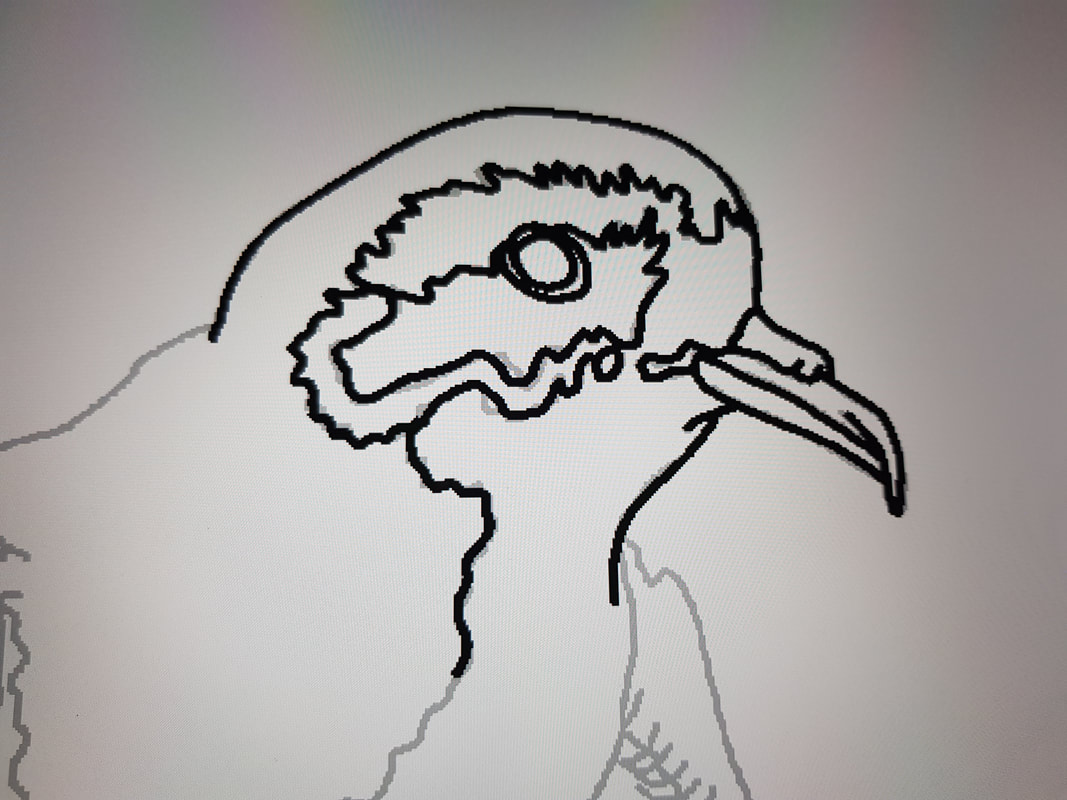
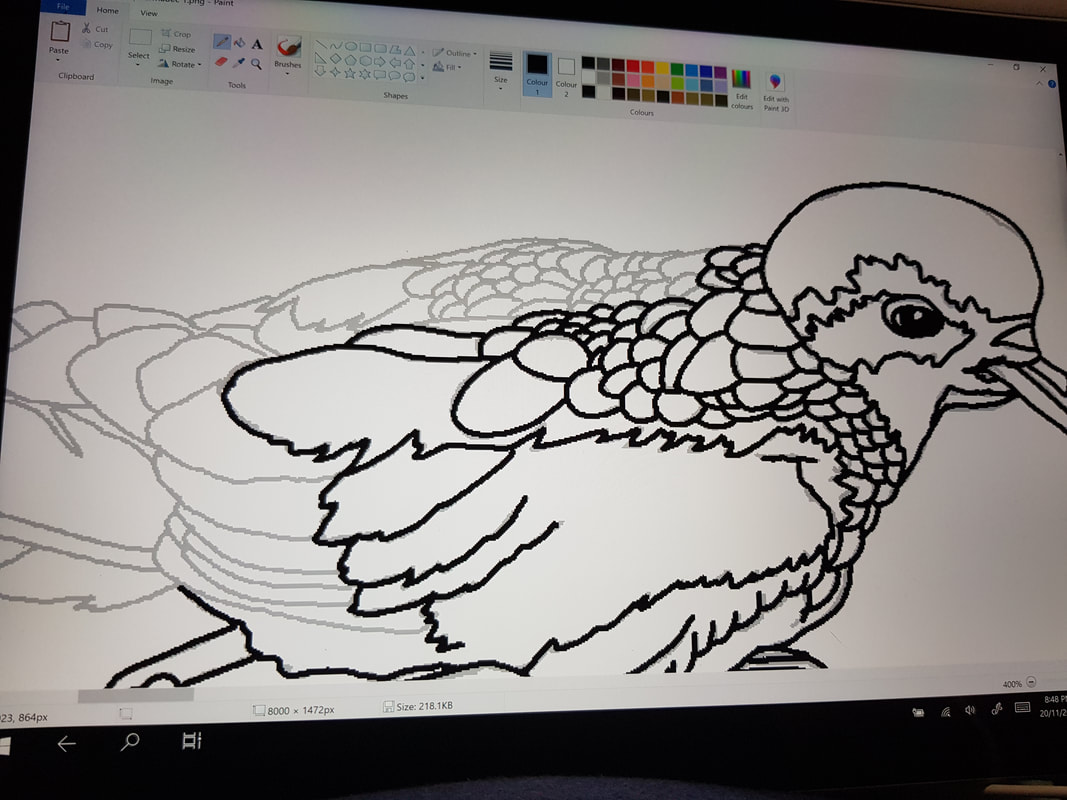
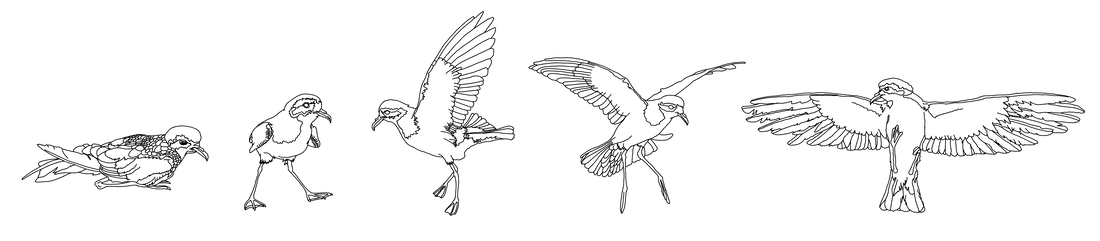
The Pitt Island shag is a critically endangered shag restricted to the Chatham Islands. As the only small slender grey shag with yellow feet in the islands, it is easily recognised. Despite its declining population, it can readily be found breeding and roosting in small groups along the rocky coast line throughout the group. It is a marine species that breeds and roosts on rocky headlands and offshore islets and within parts of the brackish Te Whanga Lagoon. Source: NZ Birds online
No consistent distinction exists between cormorants and shags. The names ‘cormorant’ and ‘shag’ were originally the common names of the two species of the family found in Great Britain, Phalacrocorax carbo (now referred to by ornithologists as the great cormorant) and P. aristotelis (the European shag). “Shag” refers to the bird’s crest, which the British forms of the great cormorant lack. As other species were encountered by English-speaking sailors and explorers elsewhere in the world, some were called cormorants and some shags, depending on whether they had crests or not. Sometimes the same species is called a cormorant in one part of the world and a shag in another, e.g., the great cormorant is called the black shag in New Zealand (the birds found in Australasia have a crest that is absent in European members of the species). Source: Wikipedia
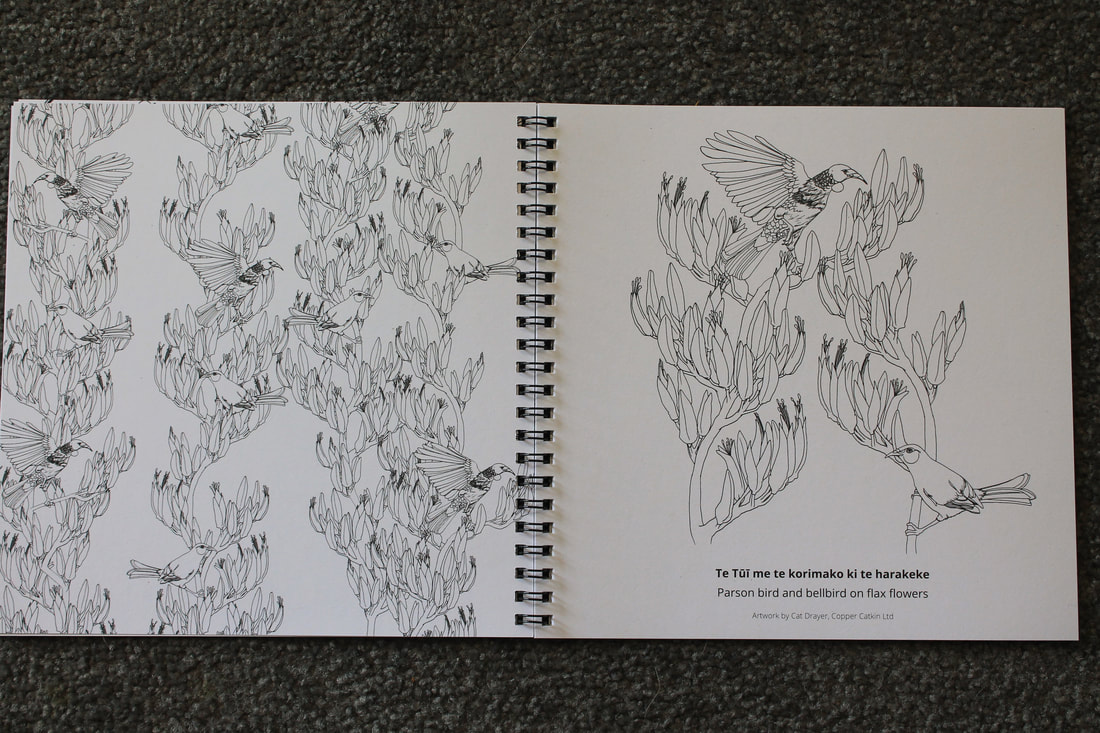
The Pitt Island Shag
A small, slender grey marine shag of the Chatham Islands, with yellow feet and a very slender bill. In breeding plumage it has a blackish head with a prominent double crest. Source: NZ Birds online
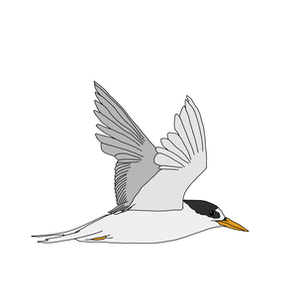
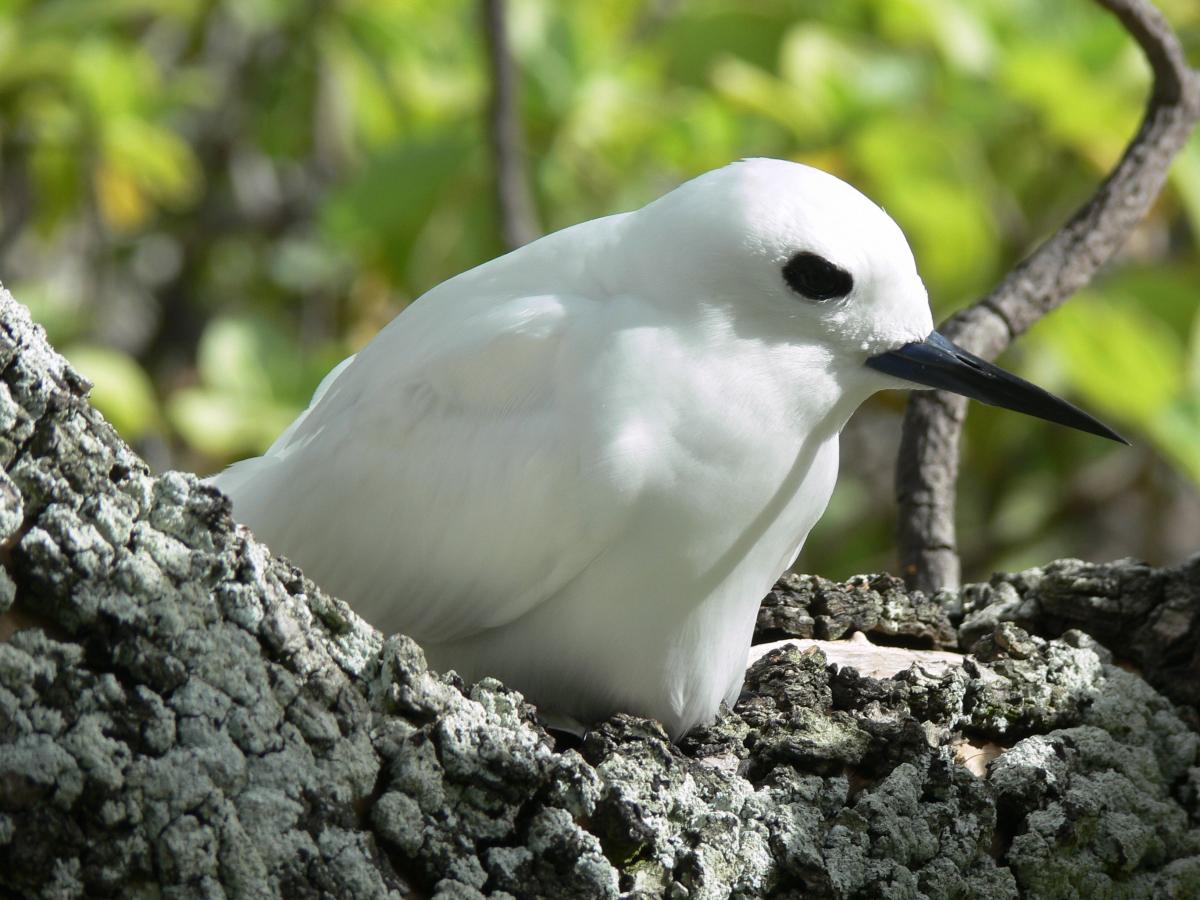
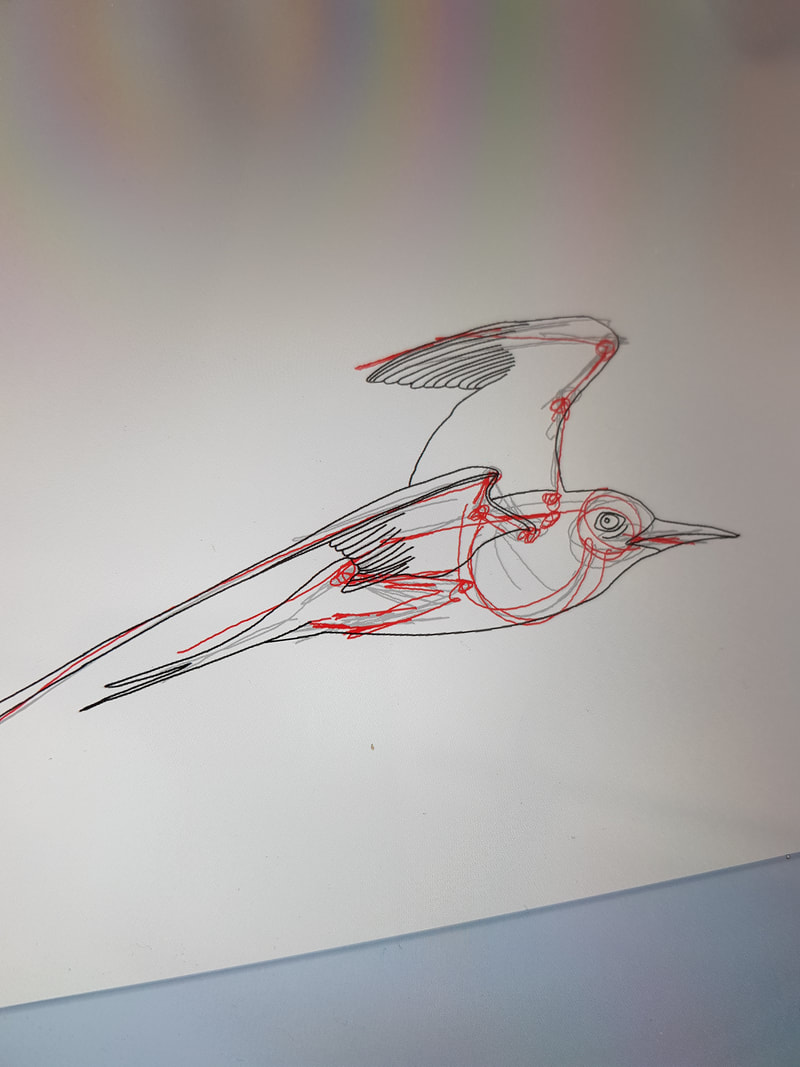
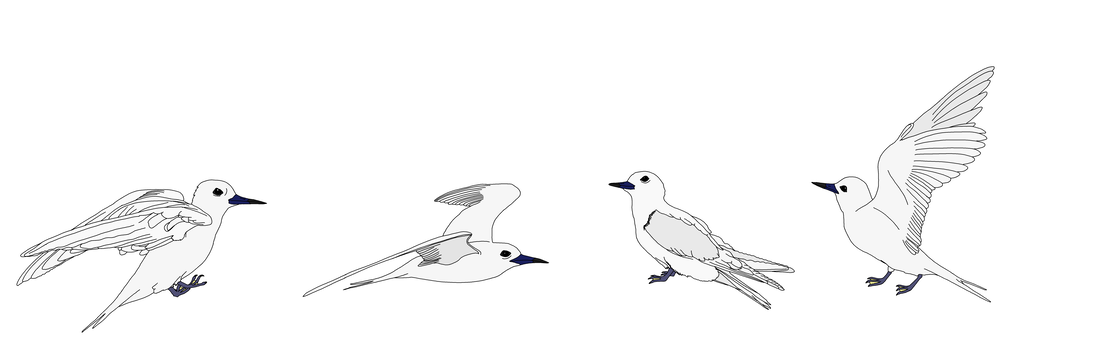
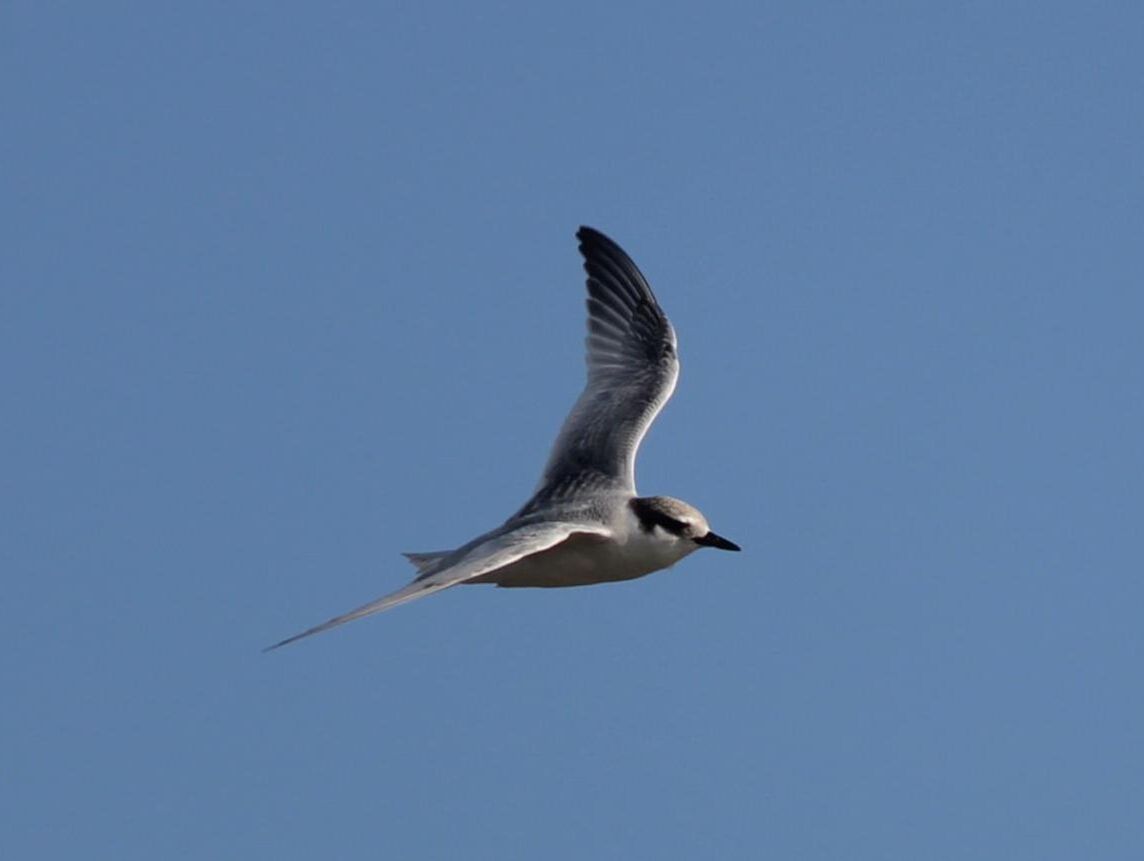
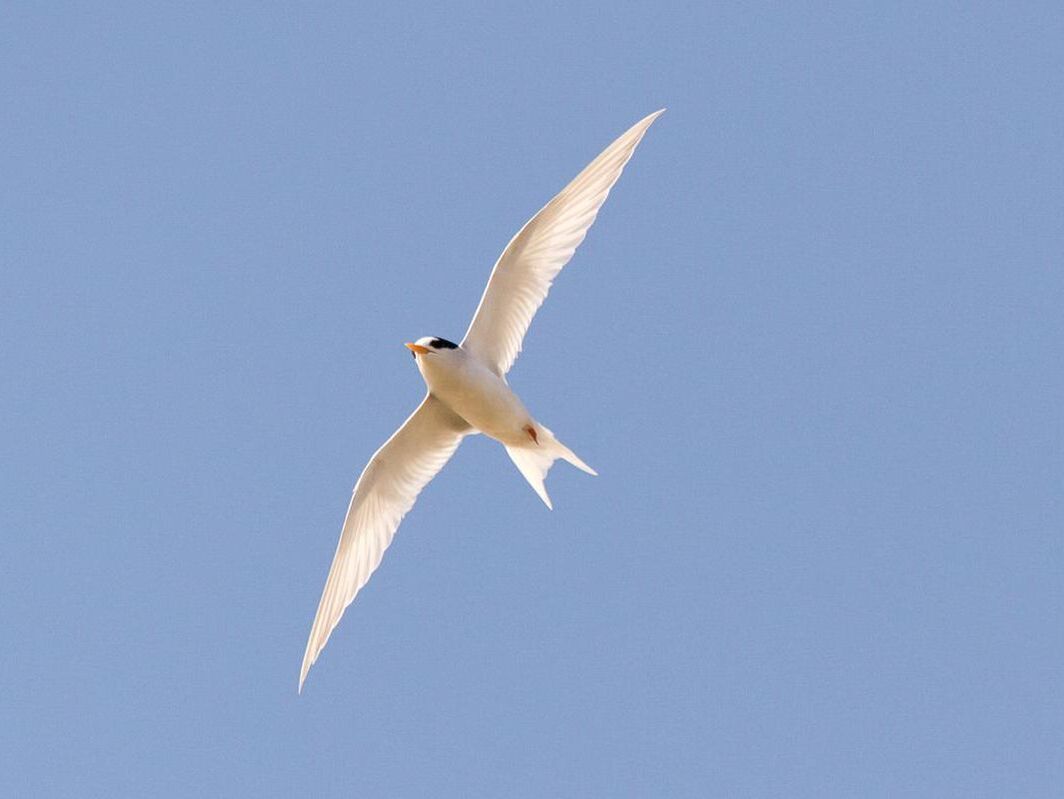
At first glance, the Pacific white tern looks a great deal like the New Zealand fairy tern or tara iti, so the first step is to establish the differences between them.
One of my fairy tern drawings; click on the image to visit the blog post.
A small tern with pale grey upperparts, white underparts, a yellow-orange bill, and bright orange legs. A black cap covers the crown and nape extending forward to surround the eye, forming an irregular patch in front of it, but never reaching the bill; a rounded white ‘notch’ projects into the black cap above the eye and connects with the white forehead. Source: NZ Birds online
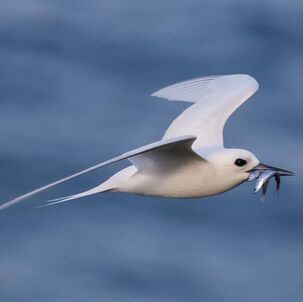
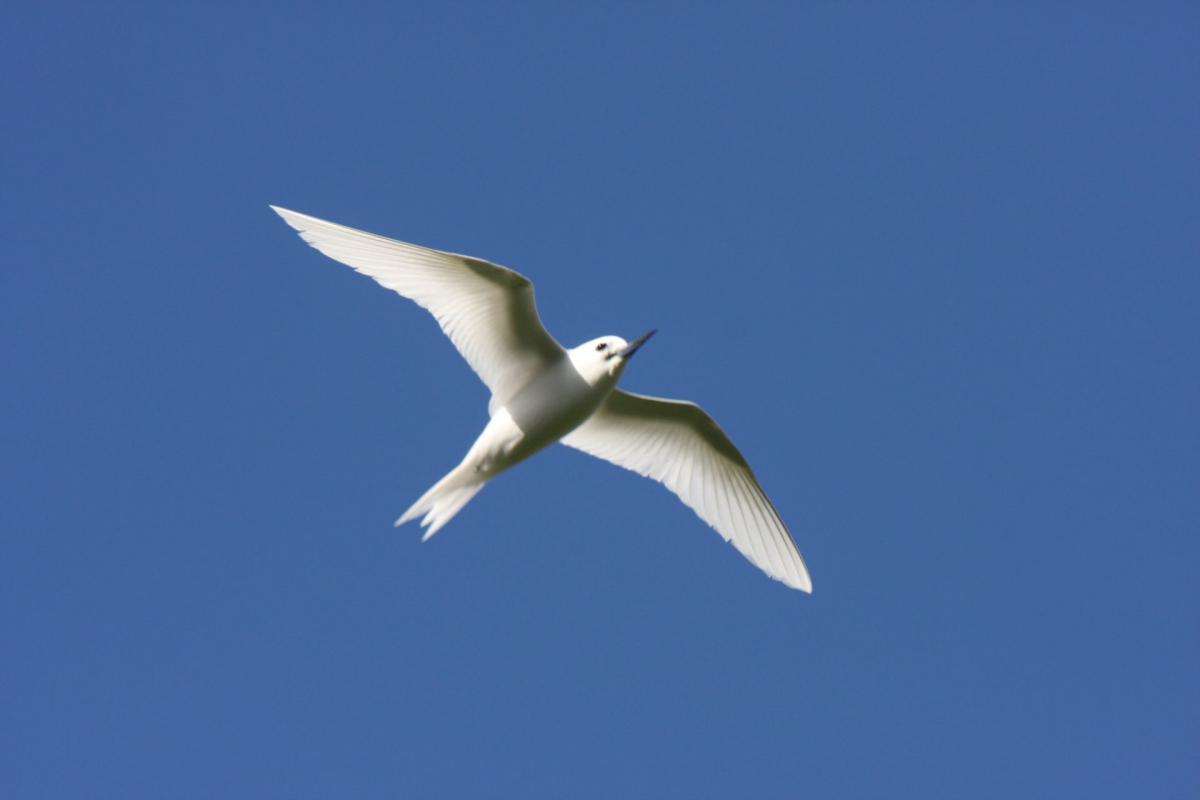
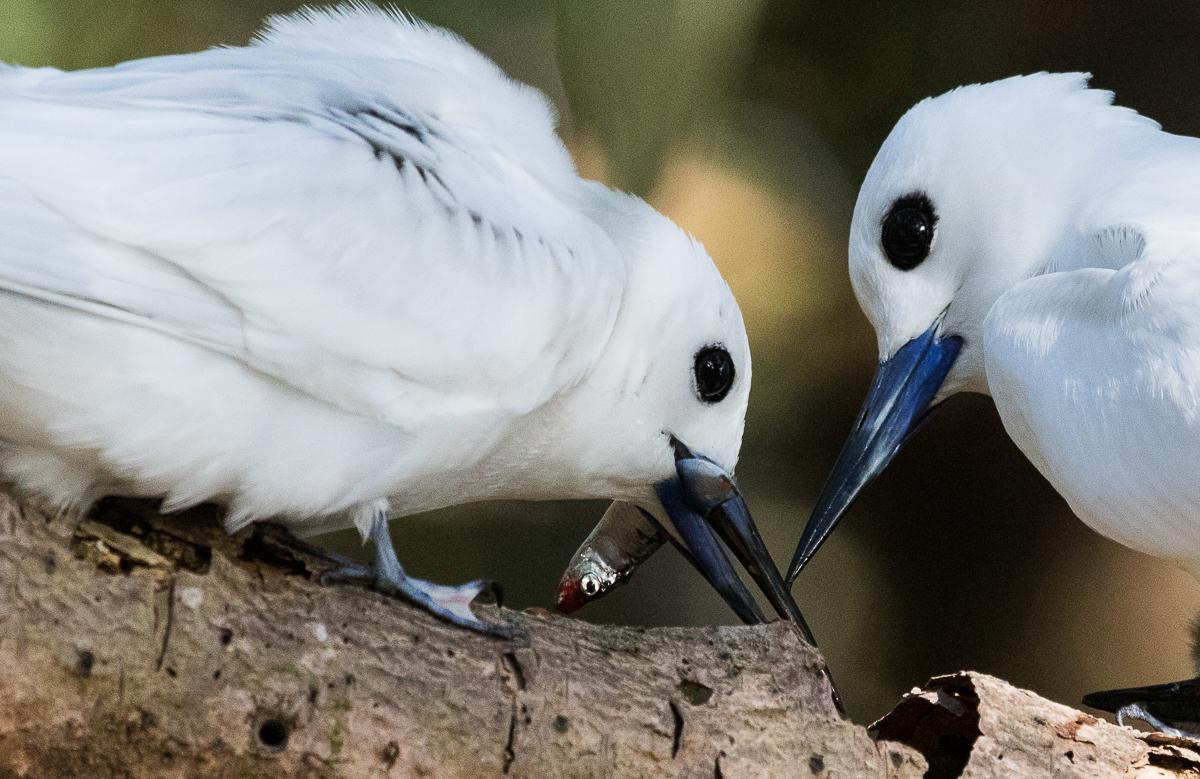
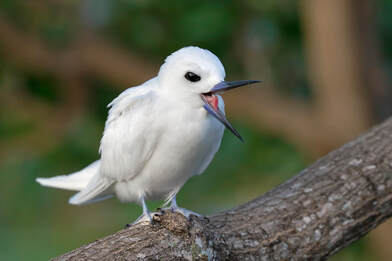
A slender almost all-white medium-sized tern with long tapering wings, a short forked tail, and a blue-and-black bill that curves upwards to a point. The legs are black grading to bluish-grey with yellow webs on the feet and the prominent dark eyes have a small black patch surrounding them that extends towards the bill, making the eyes appear larger. Source: NZ Birds online
Right, so basically, the white tern is like a fairy tern in goth makeup – all white except for exaggerated black lines around the eyes. Other than that, they seem to be structurally very similar.
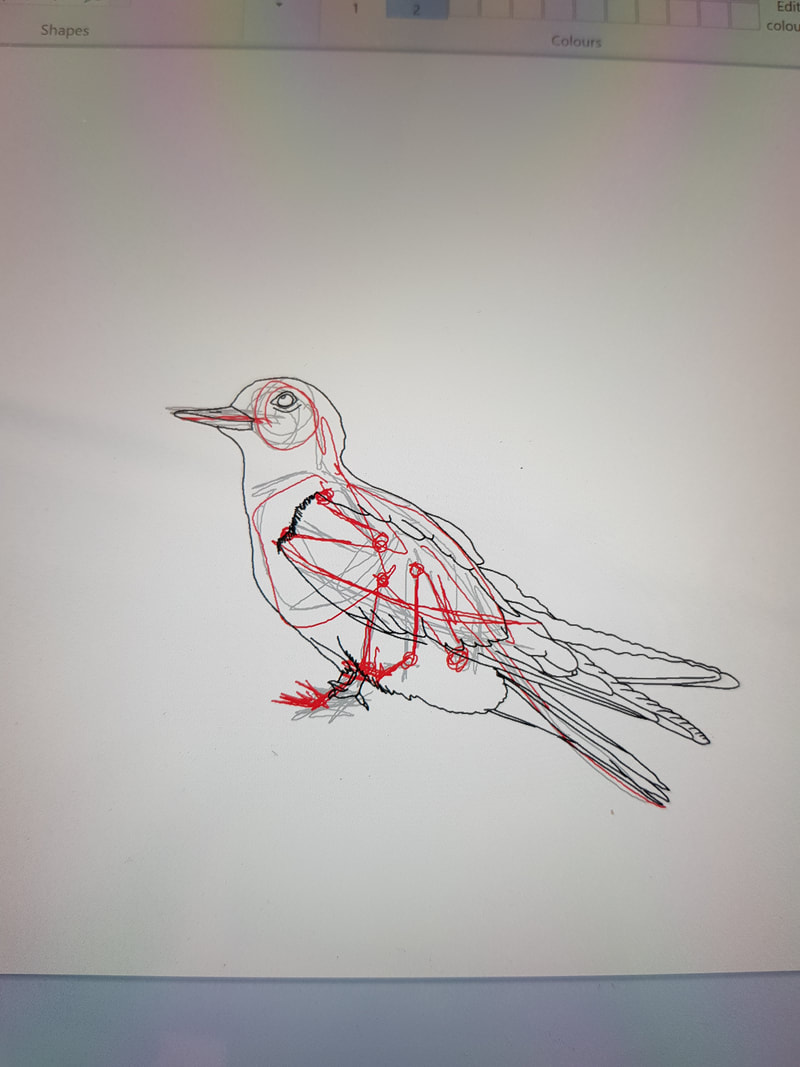
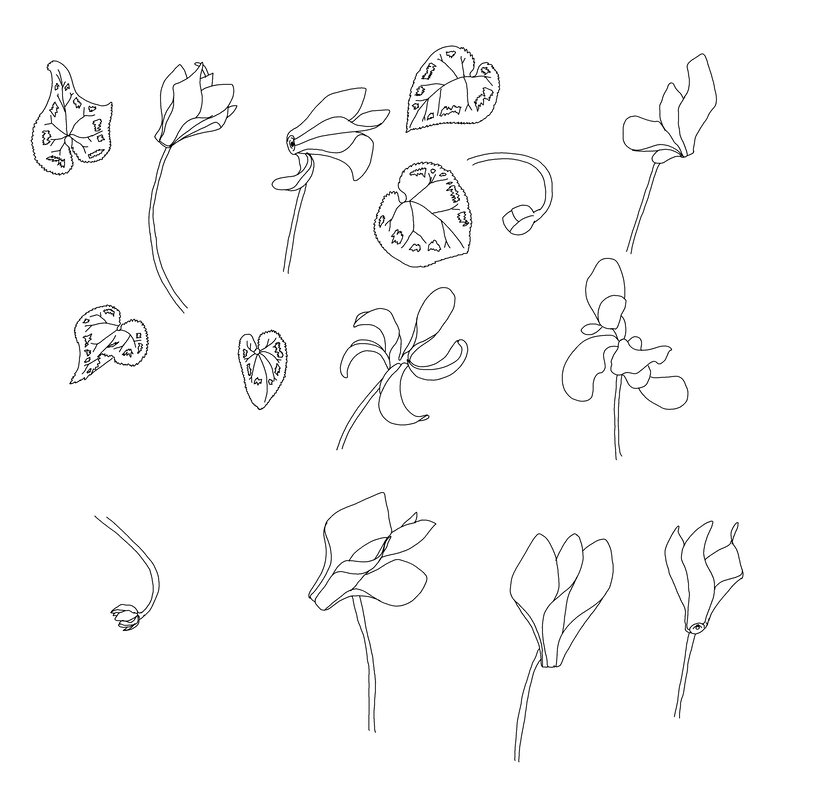
The initial sketches are done, time to fill them out.
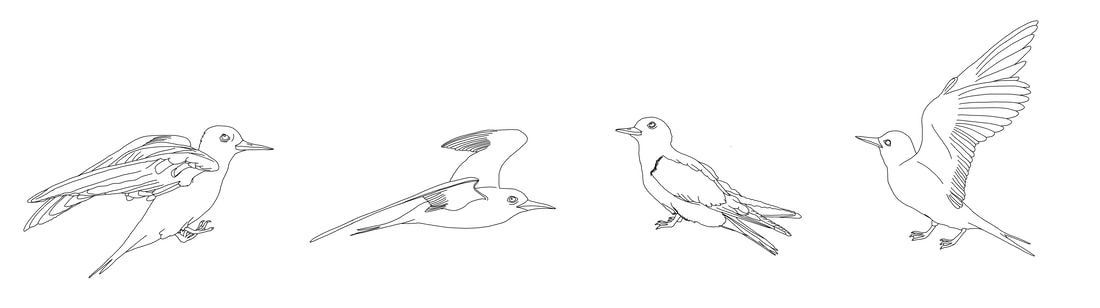
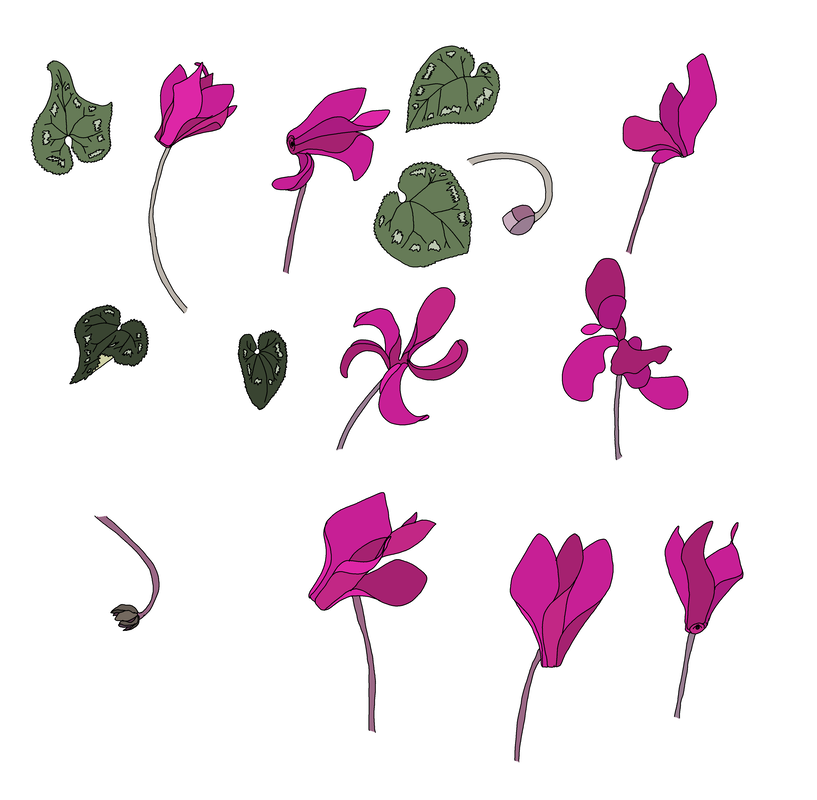
At least the colouring stage isn’t arduous! I made sure that the shades of white matched the tara iti design, and that the little details like beaks and feet were the right colour, and it was sorted!
In the best possible way, it feels like my whole life has been about encouraging other people to find their creative outlets.
Ever since I started drawing, as far back as I can remember, people would ask me to draw things for them. Just like the narrator in Le Petit Prince, when asked to draw a sheep, at first I did exactly what I thought they wanted, but gradually learnt that what people really need is a prompt for their imagination.
âI remember at primary school, other kids would sneak over and ask me to help them draw whatever we were set to do – I learnt quickly to give them something that they could complete themselves, rather than to do the whole thing for them, because
I ran out of time to do my own work,
the other kids were much less resentful when I just helped rather than taking over, and
the teachers were less likely to growl at me if I just gave others a bit of a push rather than doing all their work.
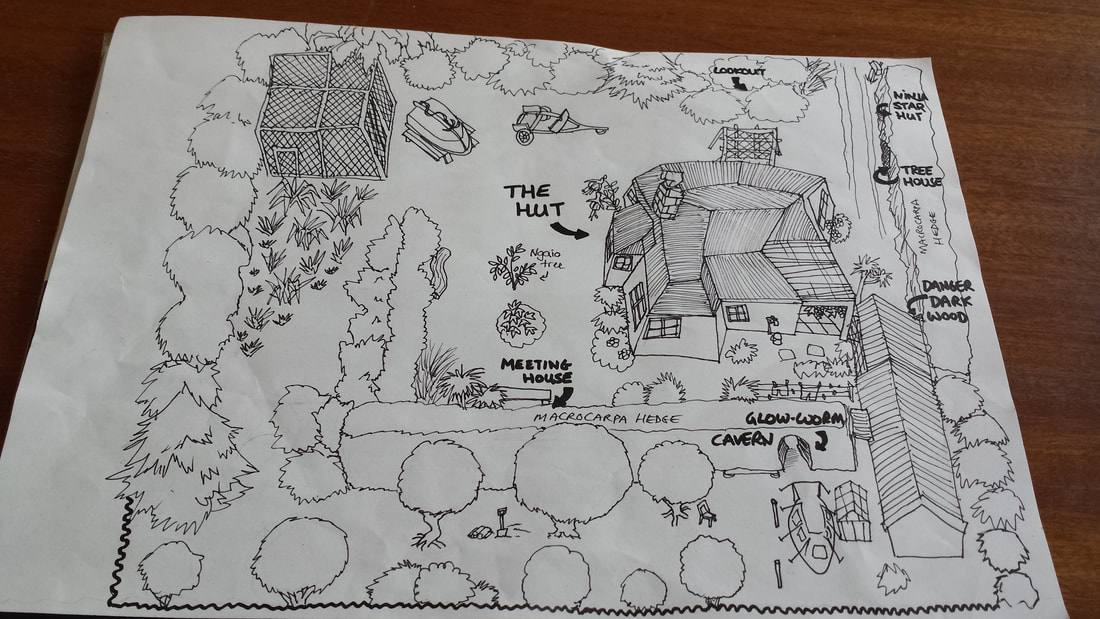
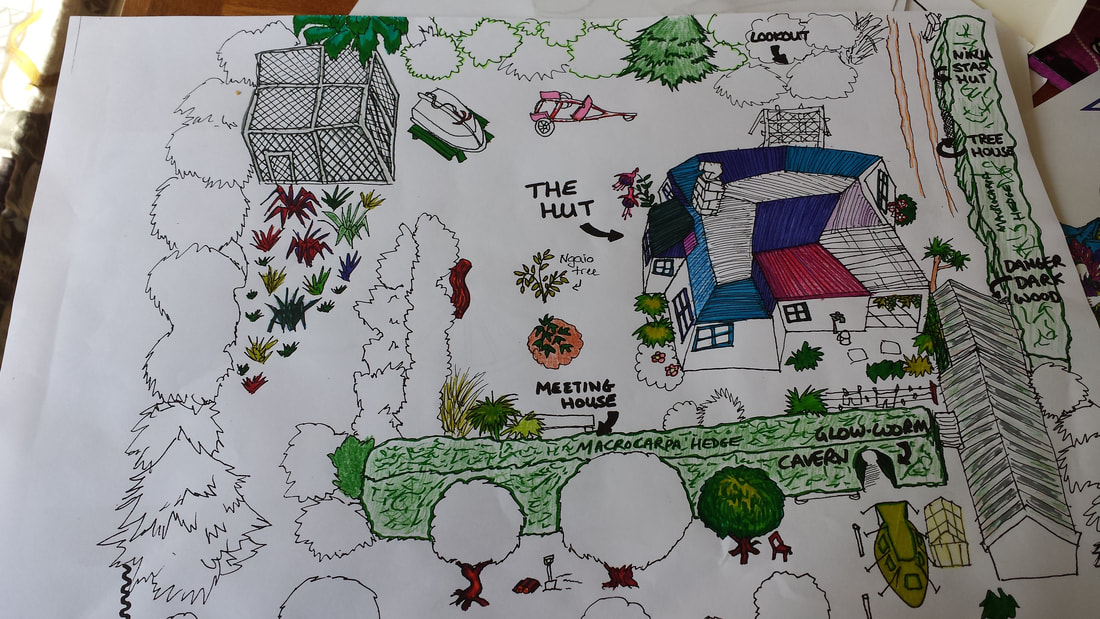
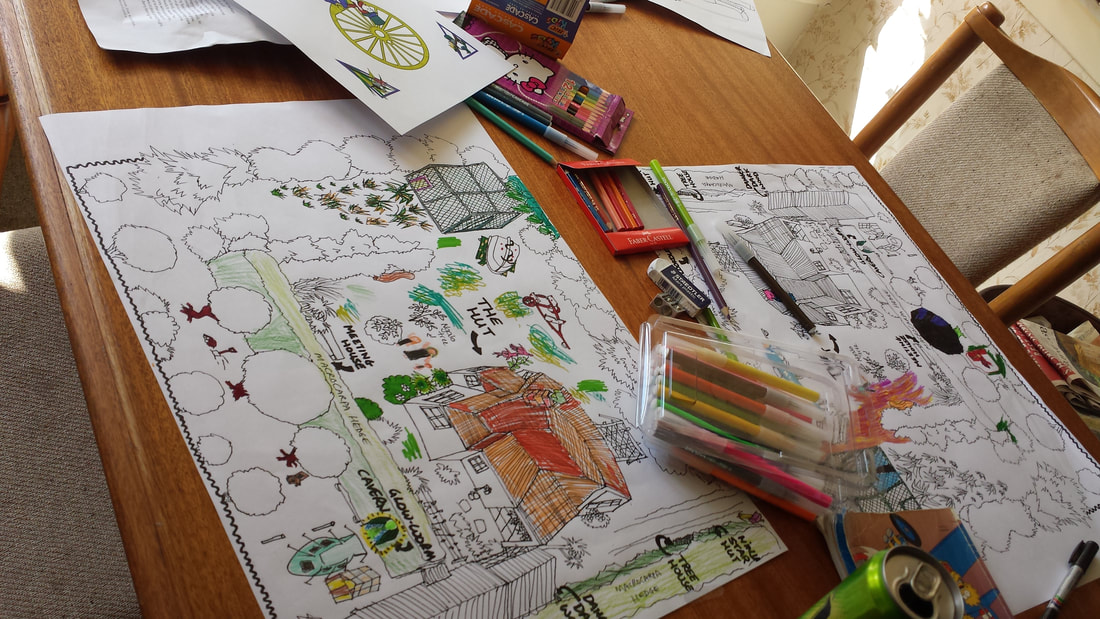
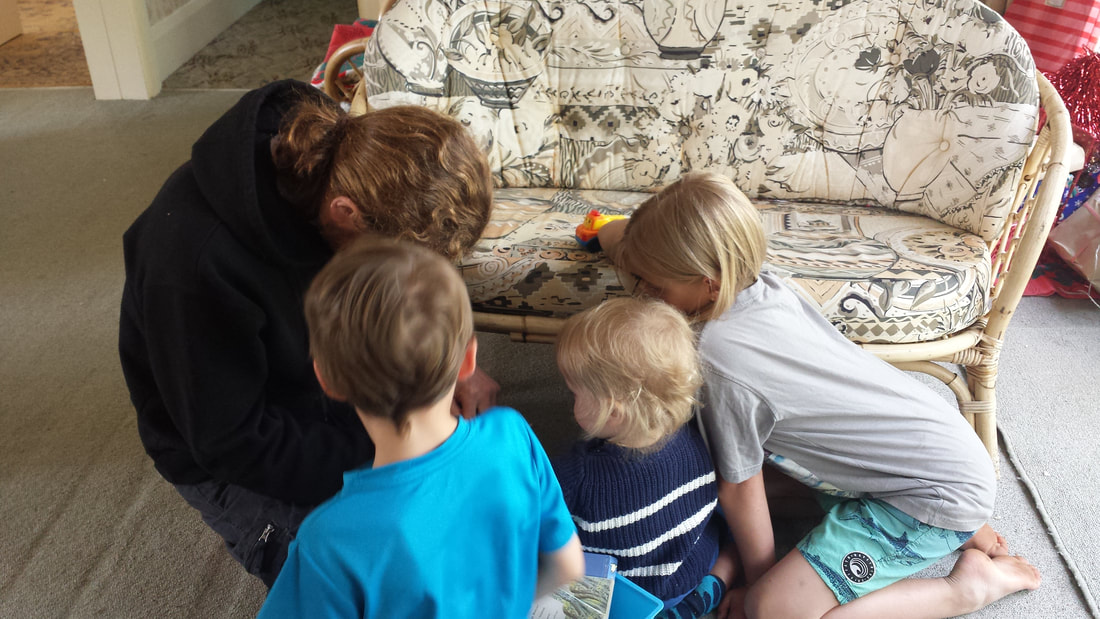
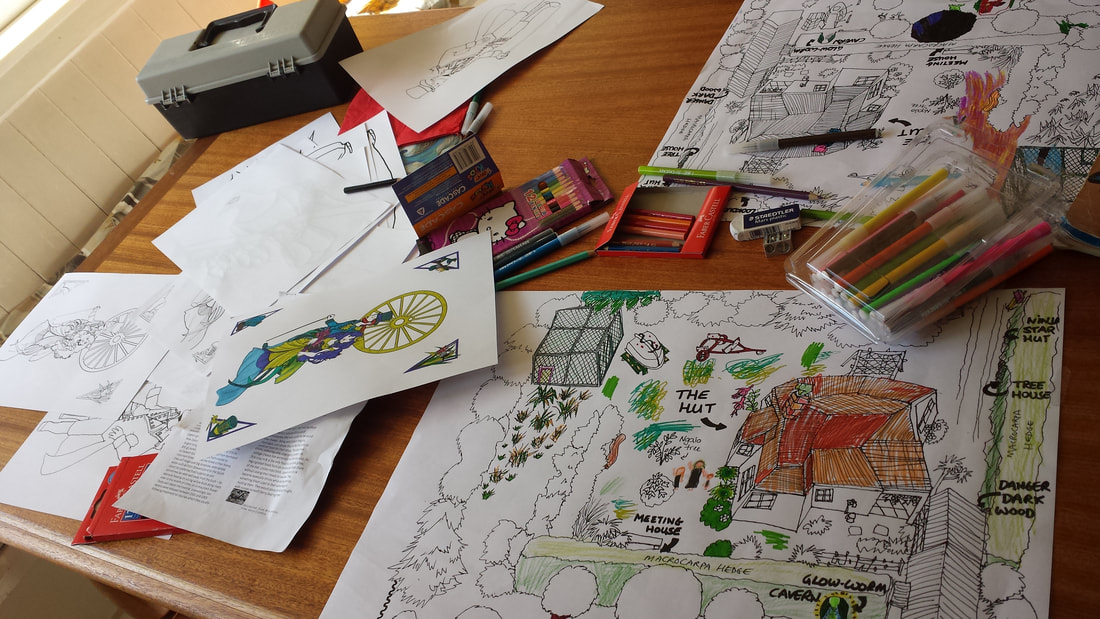
âI have always been the oldest kid in my family – the eldest sibling, the eldest cousin – so I was also generally the one who came up with the things to do – creating workbooks to teach my sibling French when we moved to Belgium, or treasure hunts to keep the kids busy at our family holiday home at the Rakaia River mouth in Canterbury. I still do that as an adult – here’s a project from a few years ago at a family reunion, where the kids and I labelled parts of the property and then I got them photocopied and we all coloured them in.
As I grew older, I heard more and more people telling me that they “just can’t do creative stuff”, which made me so sad.
I often think about those kids in my class, who would sometimes get impatient when I wouldn’t just do their work for them, but who were so happy with the finished pieces that they had made from the starting points that I gave them.
âComing up with gateways to creativity has always been something I enjoyed doing, so I thought – why not try my hand at selling my creations in kitset formats? It’s not like I haven’t done it before!
Phersu Dancing
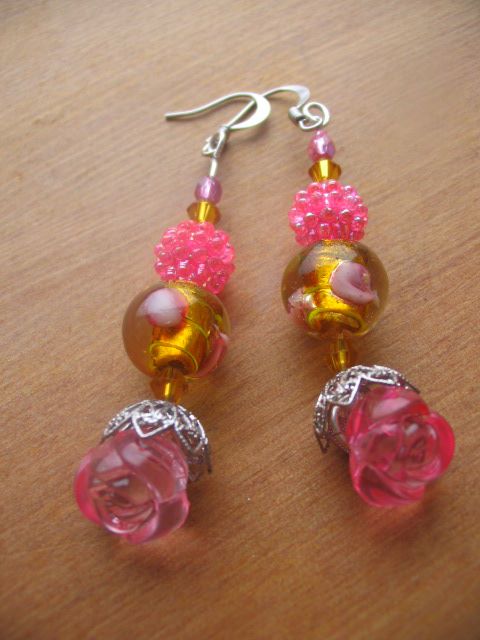
Many of you may know that I used to sell my wares as “Phersu Dancing Jewellery and Treasures”, which became Phersu Dancing Designs. You can read more about that story here.
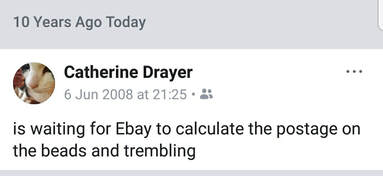
A screenshot from my Facebook memories, from the peak of my bead-buying period.
âAs I was finishing my beading phase and moving into making glass cabochon jewellery, I offered classes, workshops, and earring-making kits, which were quite popular as stocking stuffers. I later packaged the remaining beads up as my Surprise Supplies.
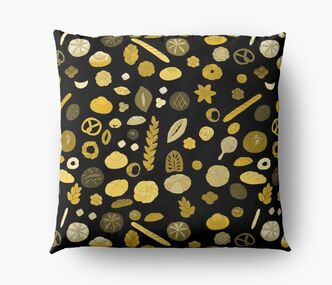
Once I had reincarnated myself as Copper Catkin, I really leaned into my “ligne claire” style, which obviously lends itself really well to being coloured in – it is, after all, what I do with all of my designs, so why wouldn’t anyone else enjoy it? So I started taking my drawings and turning them into something colourable – patches and colour-cut-and-sew cushions came first.
When both of these were reasonably successful, I began planning colouring books – but I would have to make quite a few changes to my existing designs in order to make them suitable for a colouring book format, so it made the most sense to use my next big series of designs for the first book, while I worked in the background to reconfigure my other designs to suit.
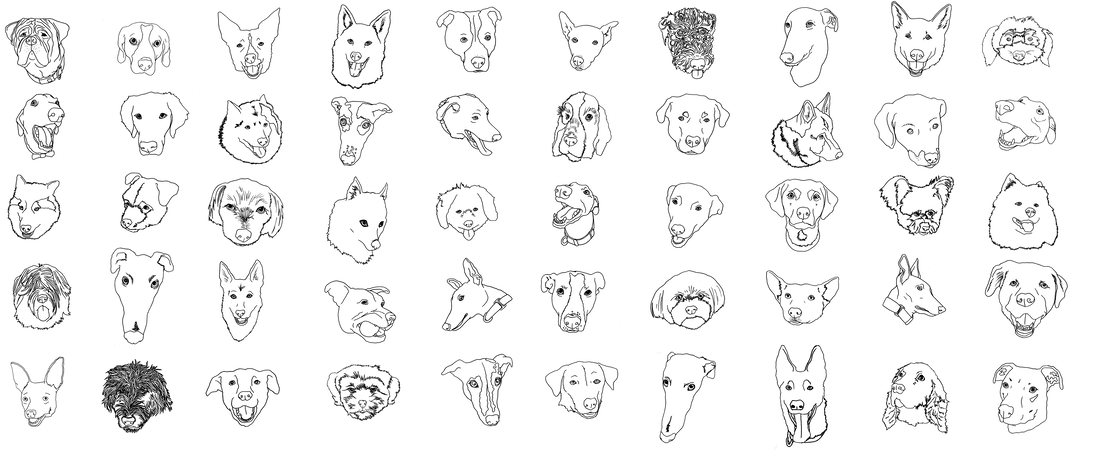
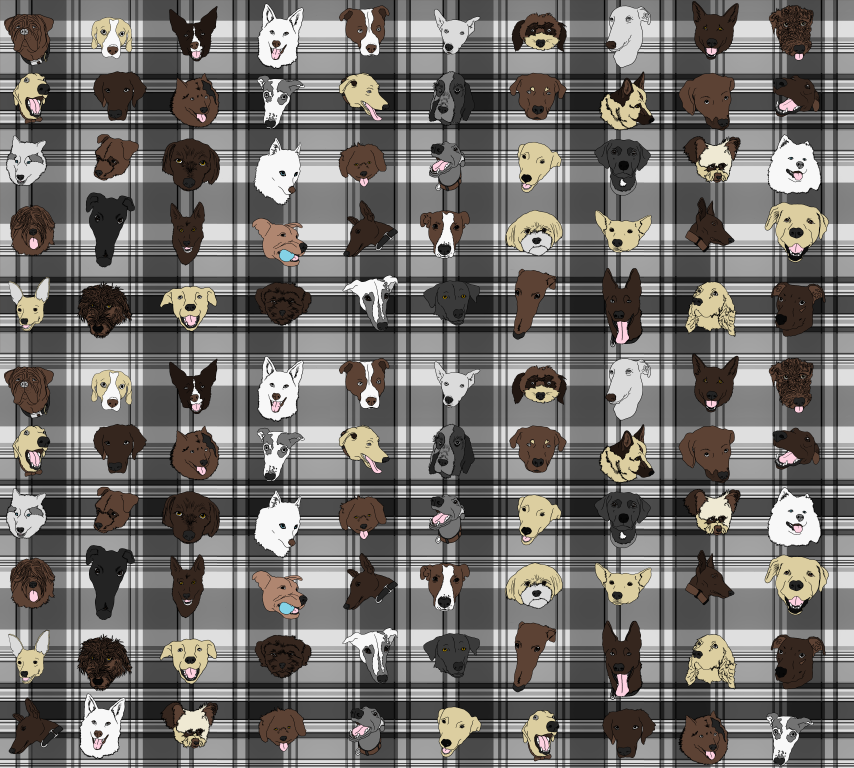
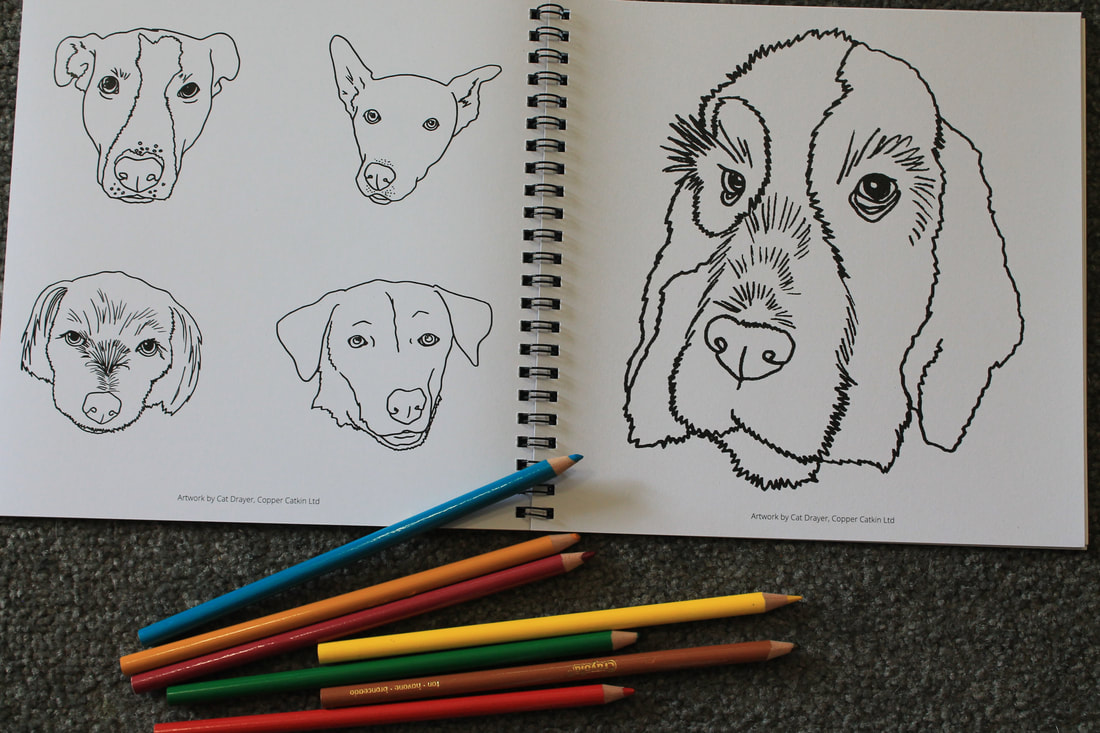
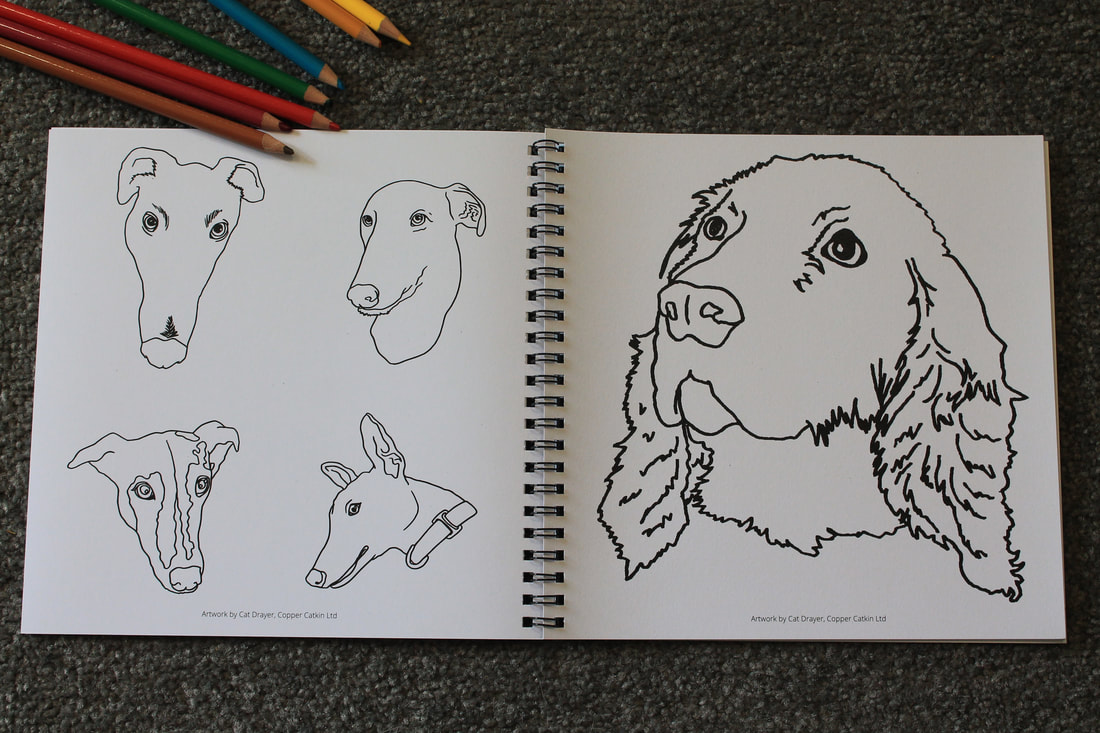
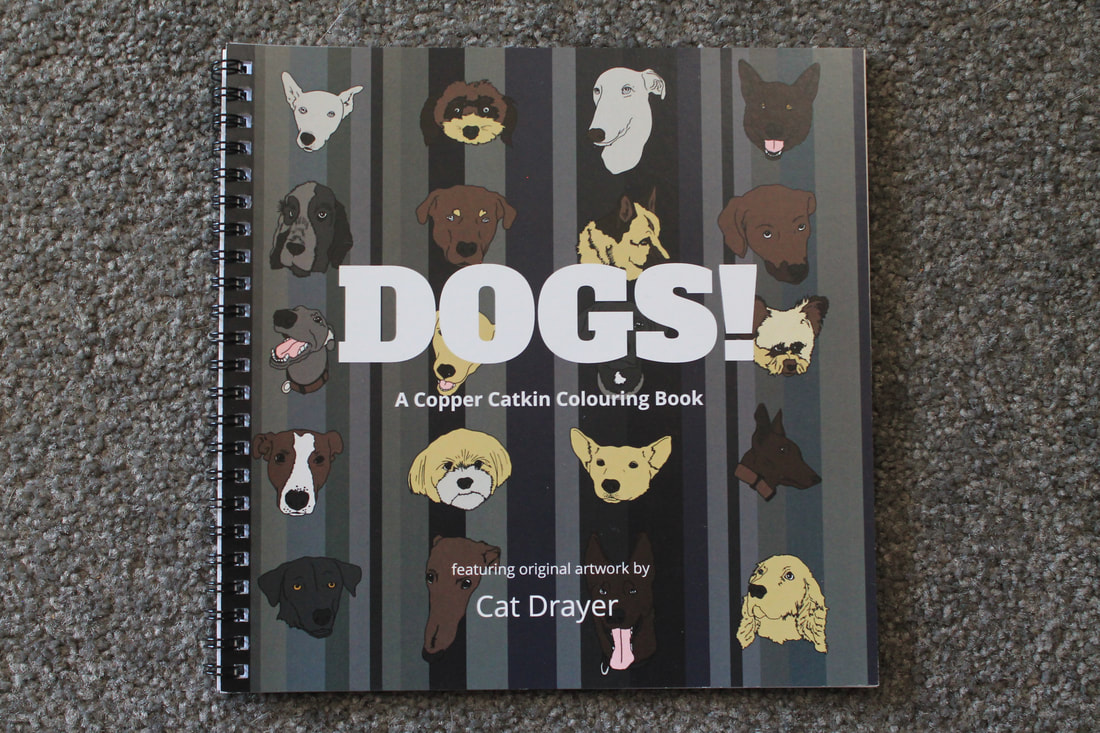
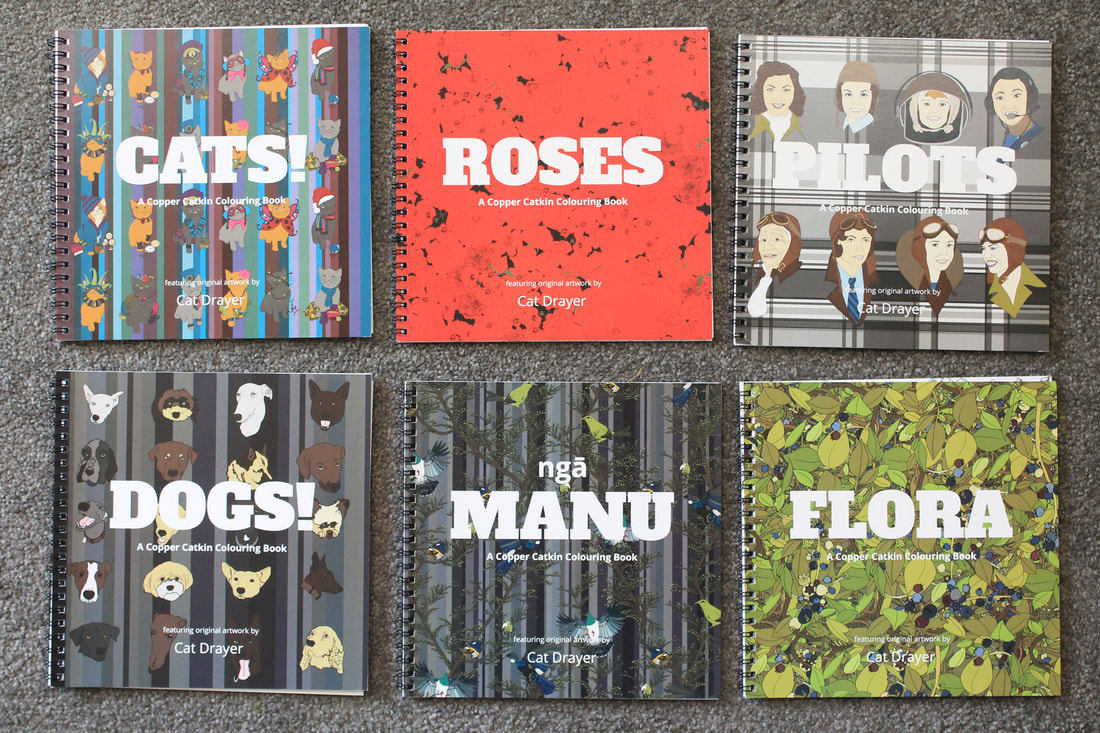
DOGS!
I decided that it would be fun to ask my Facebook page followers to supply me with some models for my next series of drawings, so after some discussion, I decided that drawing people’s pet dogs would be fun – and it would be a cool celebration of Woolfenoot, too! It was remarkably successful – I got more photos than I could possibly draw! I drew the first 50, and had to call it there.
I used a combination of tracing, to make sure that I had the features in the correct position, and freehand portraiture to add the feeling of the dogs’ personalities – copying exactly from a photo can be very difficult, especially when you work with thick, black lines – think about all those terrible tattoo portrait failures that they love to show us on reality TV shows – so the art of it lies in choosing which lines to use, and which lines to omit.
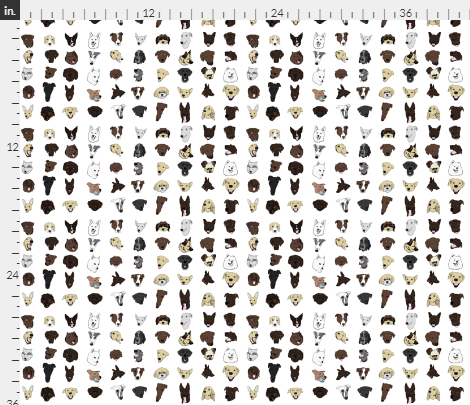
Of course, I made the design into fabrics and accessories, so they are available on Spoonflower and Redbubble.
It was so exciting when my first box of colouring books arrived! Of course I had to do my own awkward version of an unboxing.
Click on the image to shop for this colouring book on Etsy!
I invite you to join me for a flick through the book below.
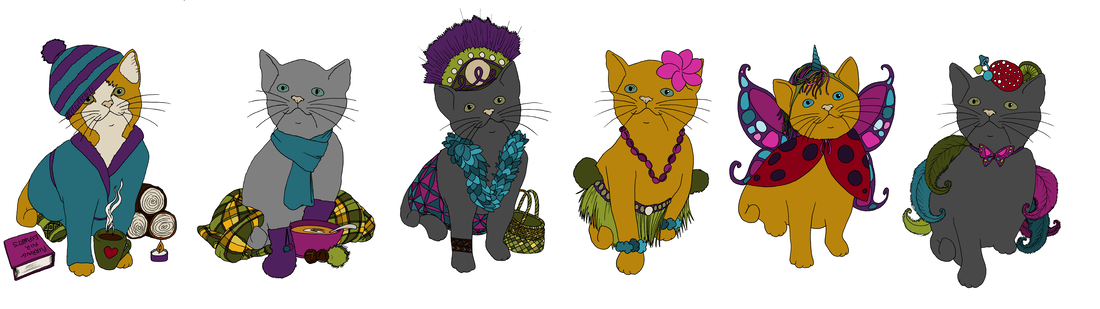
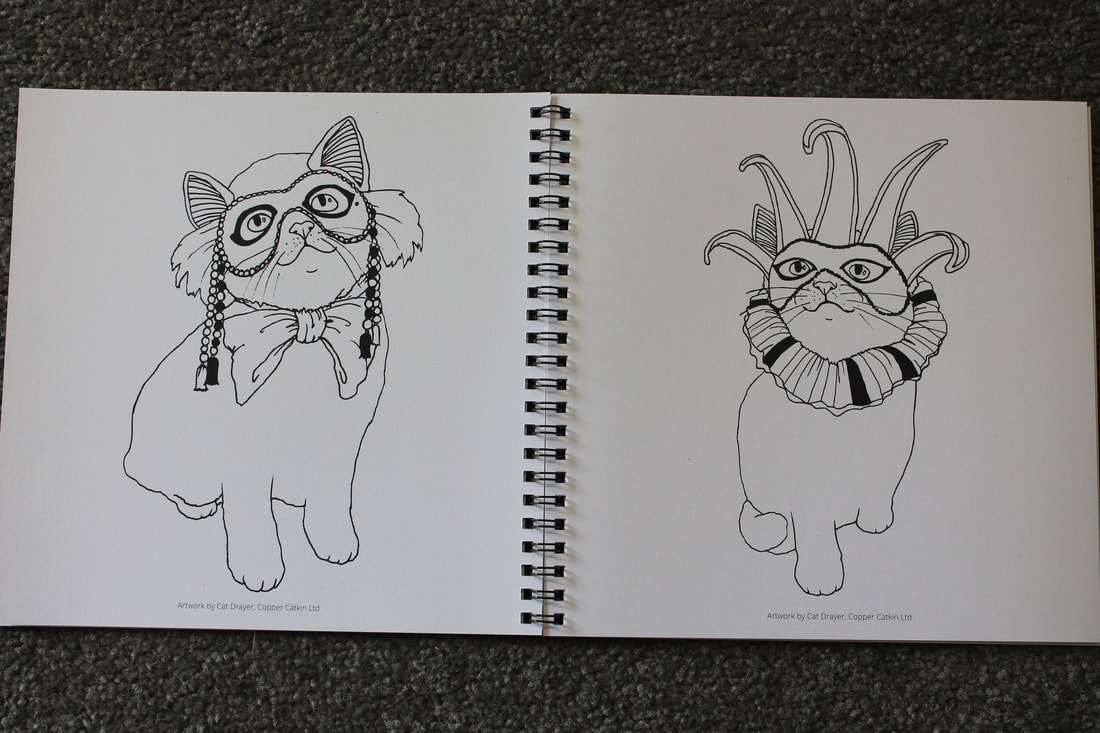
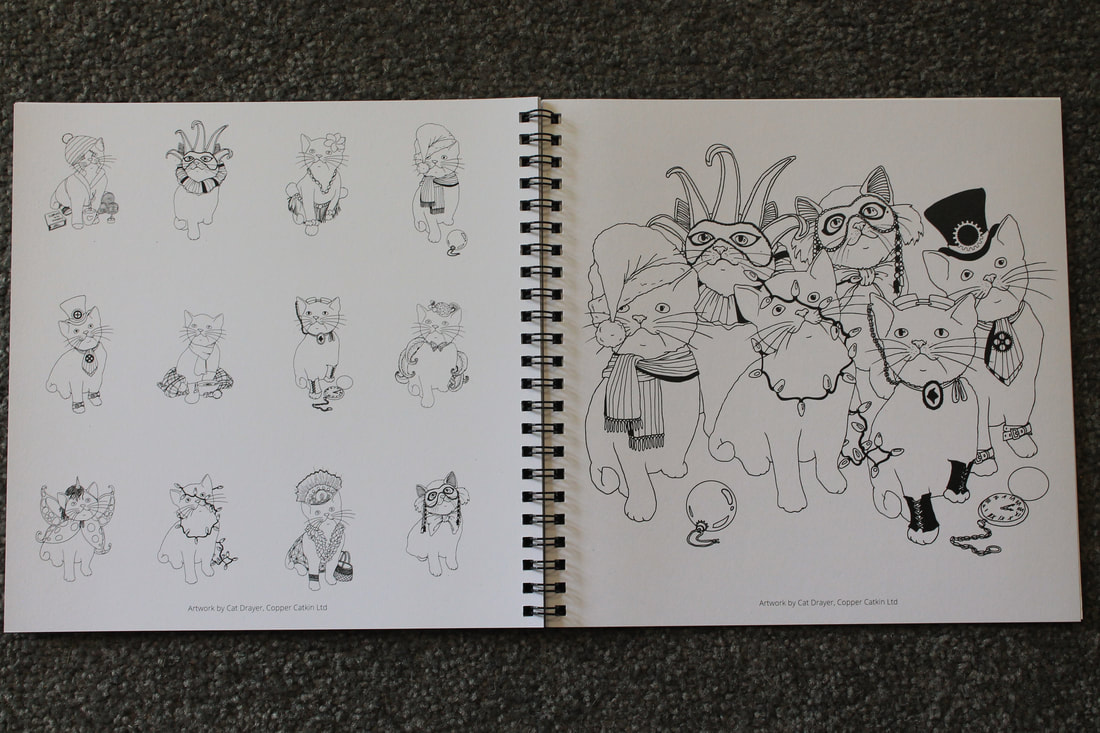
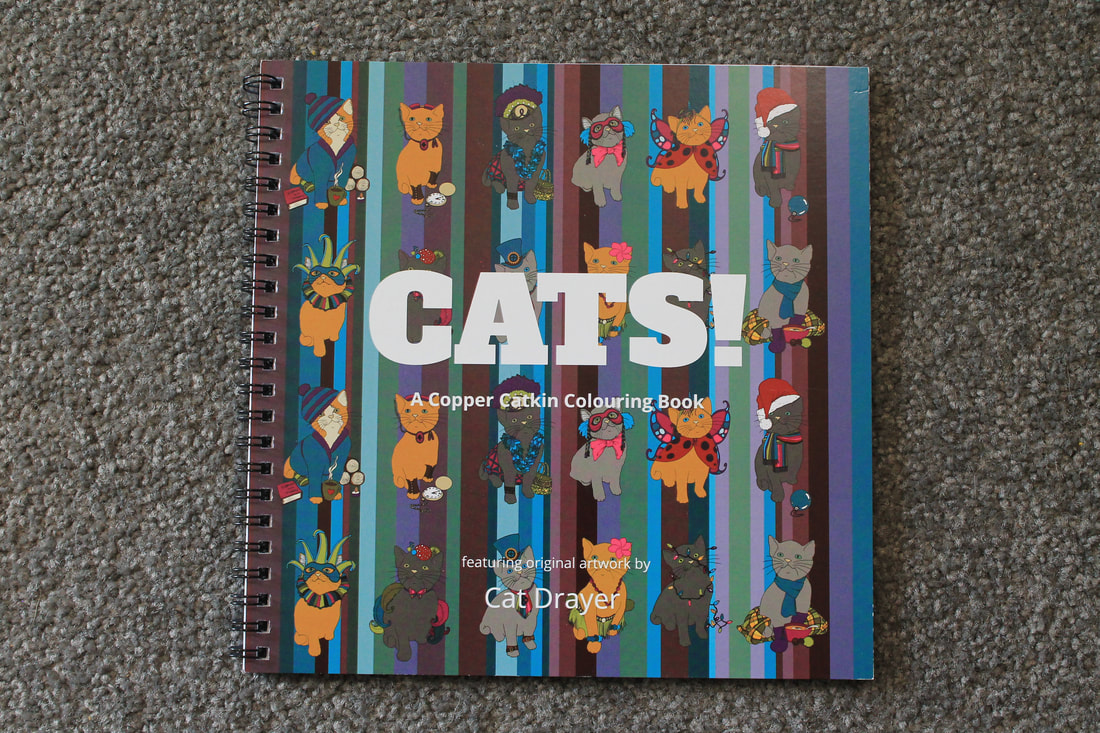
CATS!
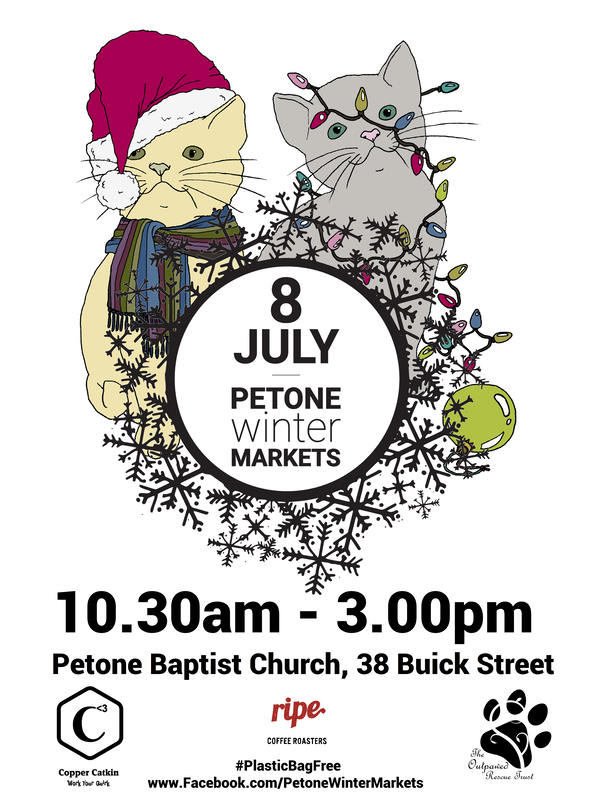
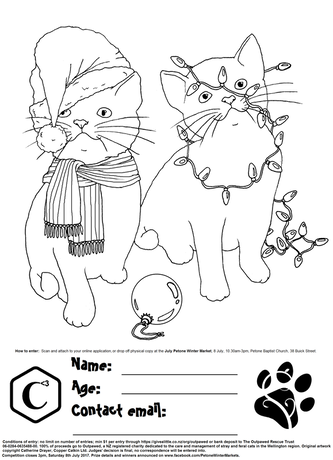
Of course, once the DOGS colouring book was done, I had to follow it up with CATS. I asked the team from Outpawed along to the Petone Winter Markets, where they agreed to provide food in the form of a bake sale in exchange for a fundraising opportunity, so it made sense to draw cats for the posters.
The photo of my model kittens
The very first poster
To help publicise the event and raise more funds, we also used the posters as a colouring competition, so I knew that they worked well as colourables.
Read more about my “cats” design here.
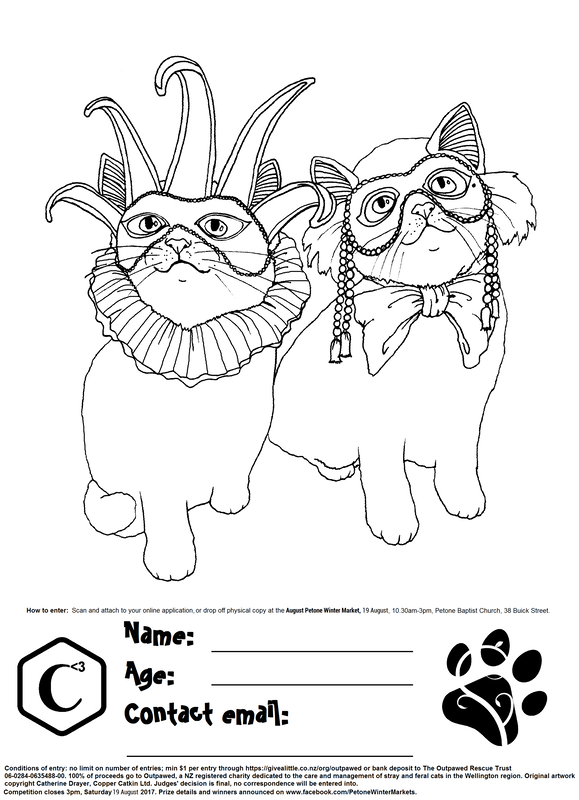
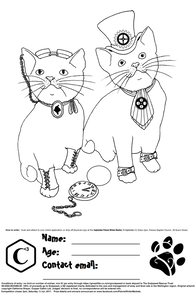
The cats from the 2018 posters also went into the book. Here they all are in full colour:
I had also done a few extra designs as options for the market themes, so they were included in the colouring book as special bonuses.
Click on the image to shop for this colouring book on Etsy!
Come and have a tour of that book with me in this video!
The next four books
My other books came all in a big rush – I had been gathering and editing the images for some time, and so they were all ready to order together. I now had a range of six different colouring books, all ready in time for the Omaka Airshow.
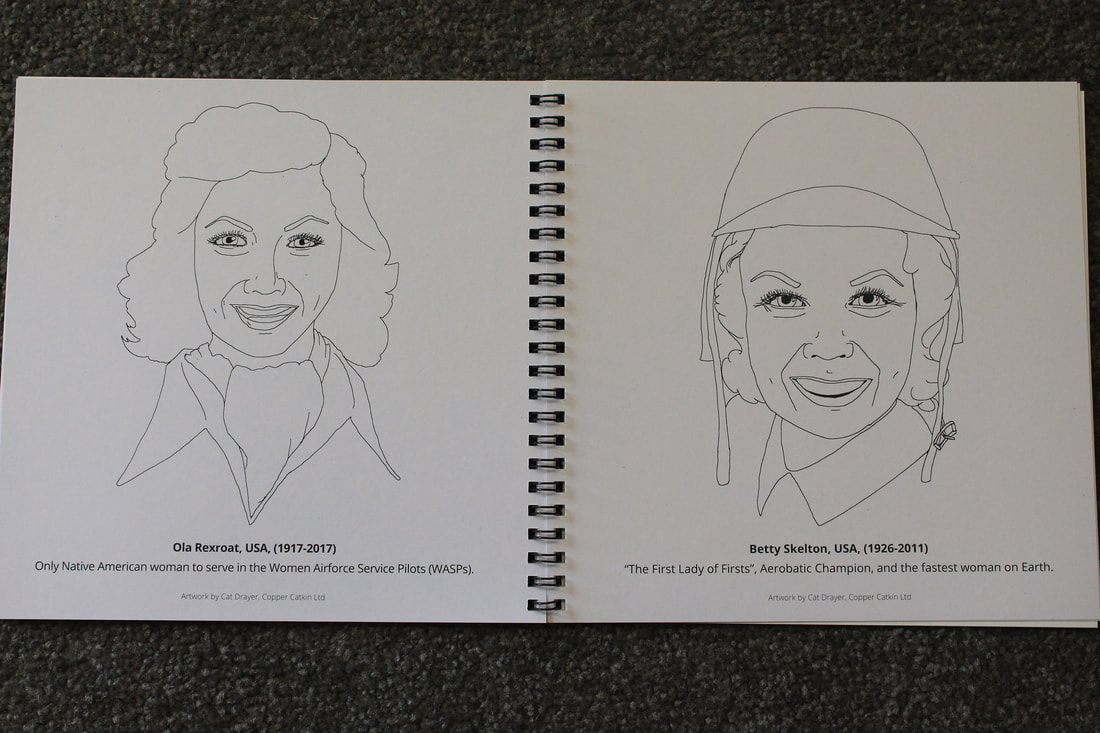
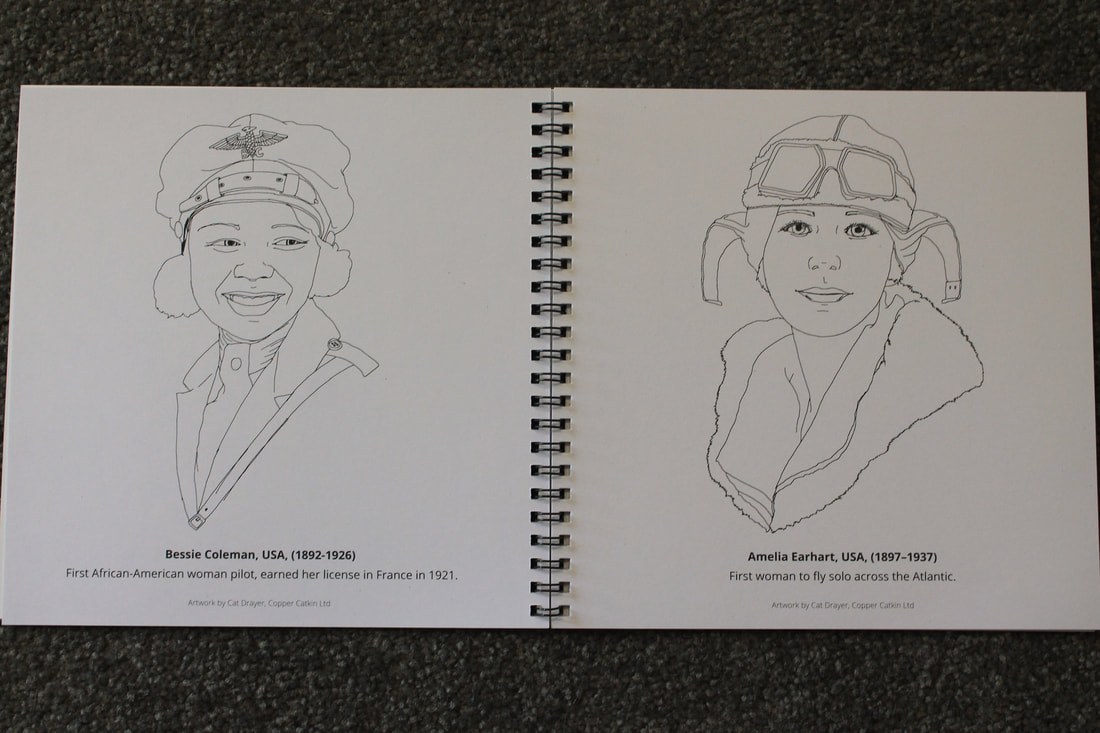
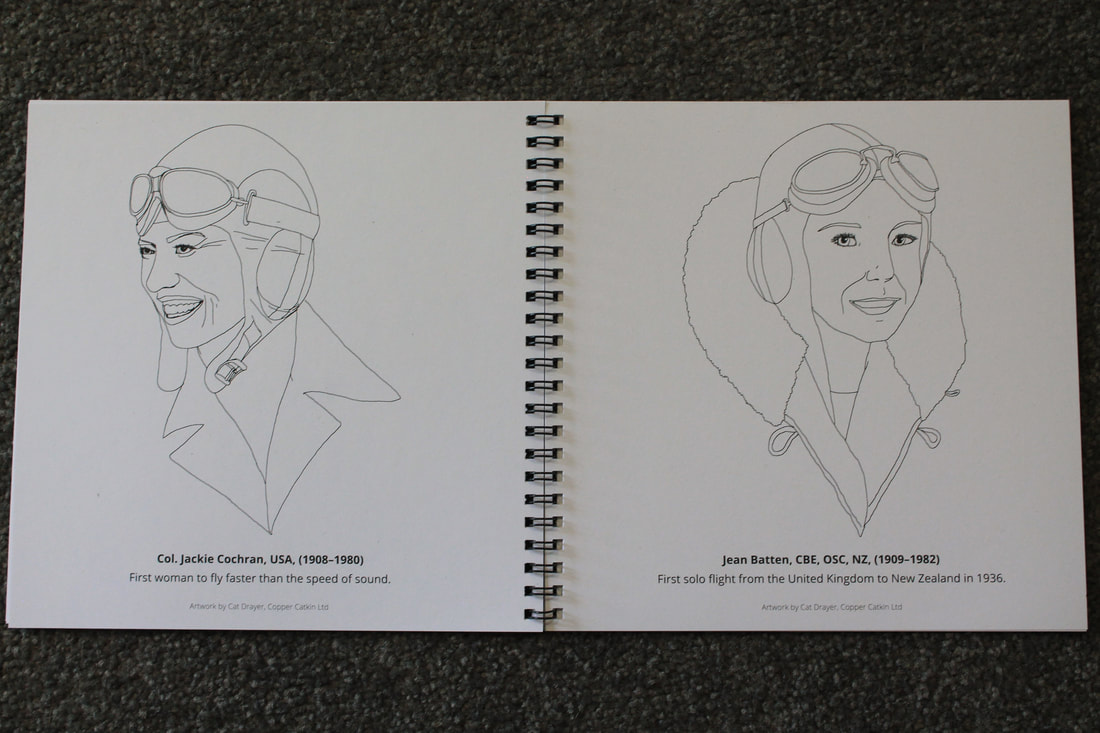
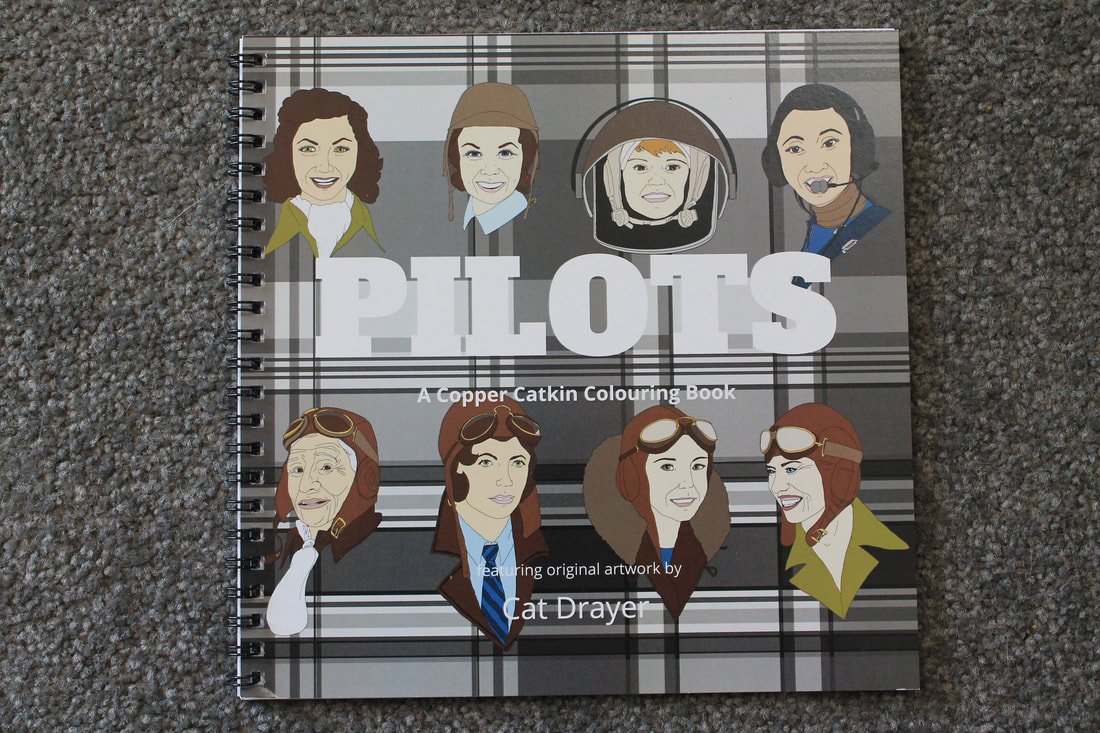
PILOTS
Speaking of Omaka, their “Women in Aviation” theme was the main driver behind this series of designs. I had actually already started to consider it, but when the theme was released, I knew that it was time to revisit and refresh my original “aviatrix” designs.
You can read more about this design in my aviatrices post, too, if you want some more background.
Click on the image to shop for this colouring book on Etsy!
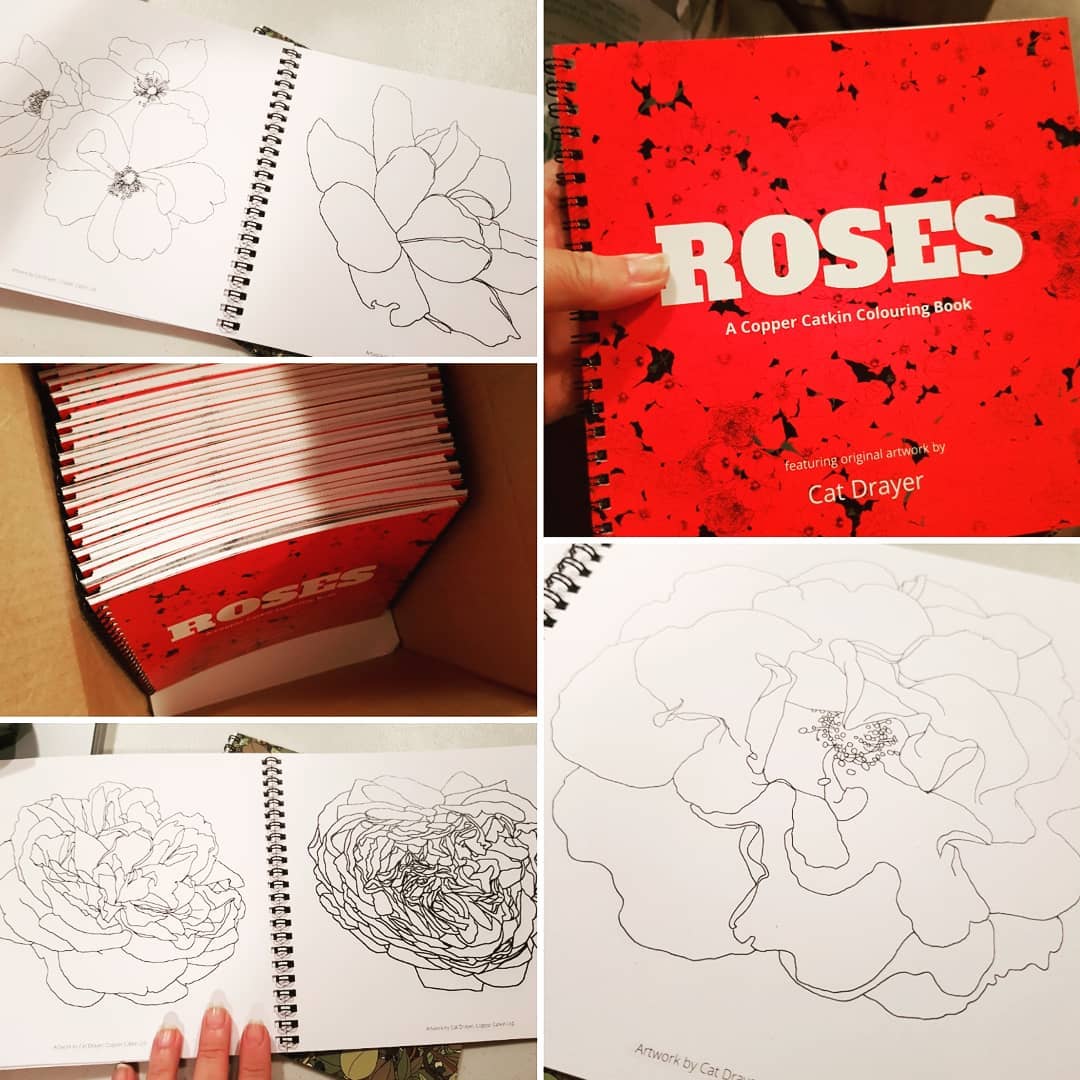
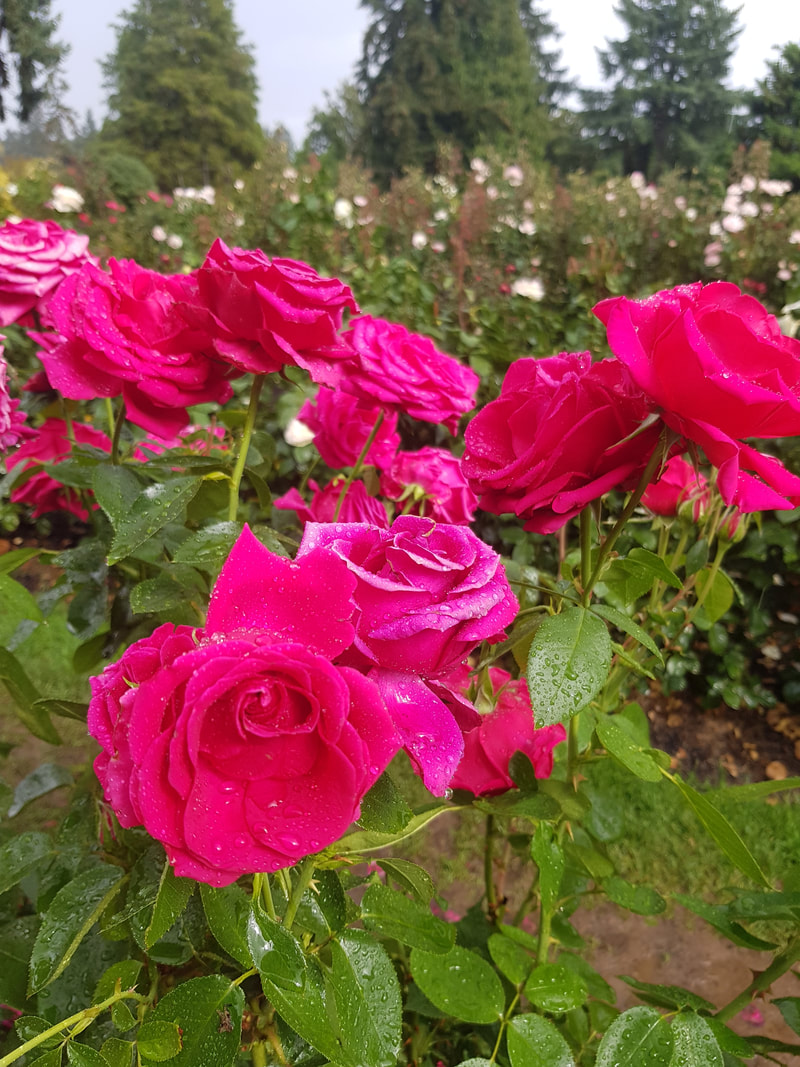
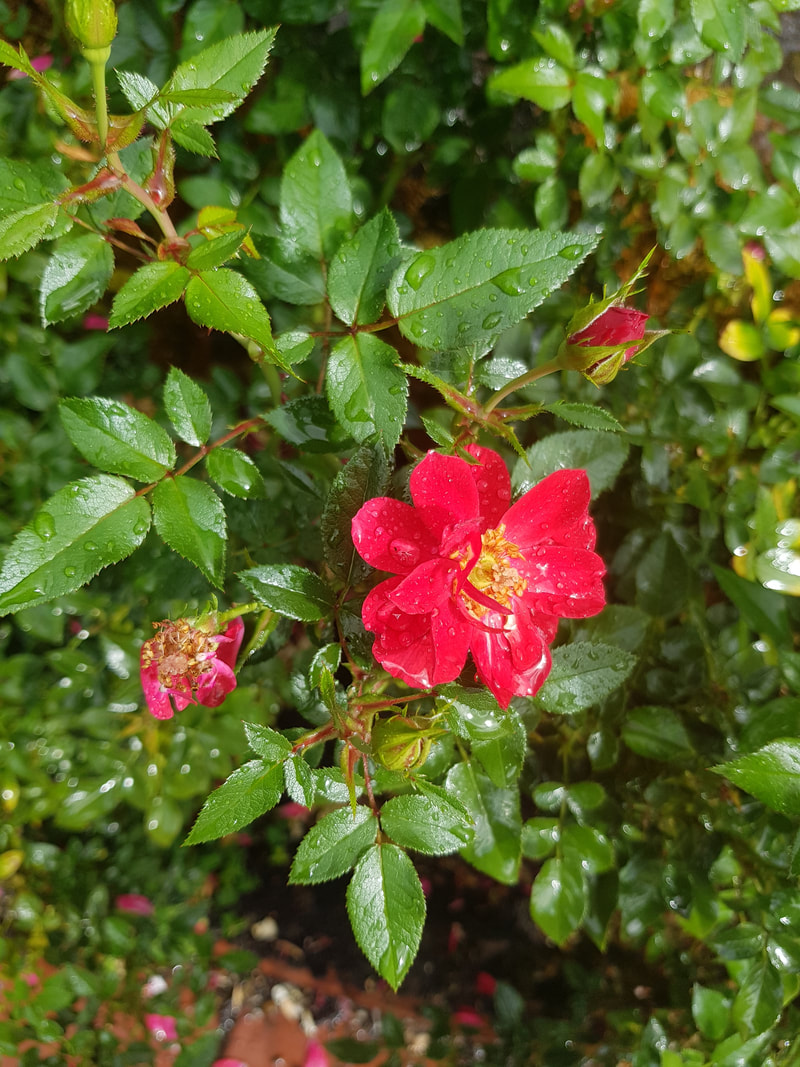
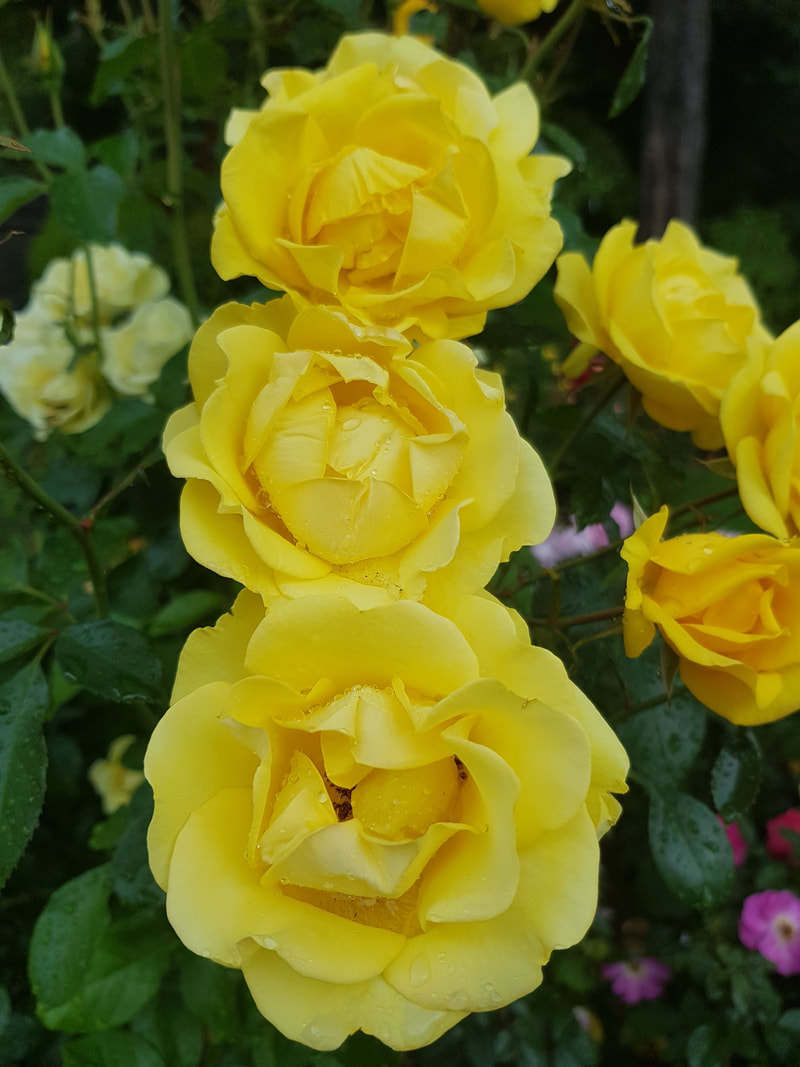
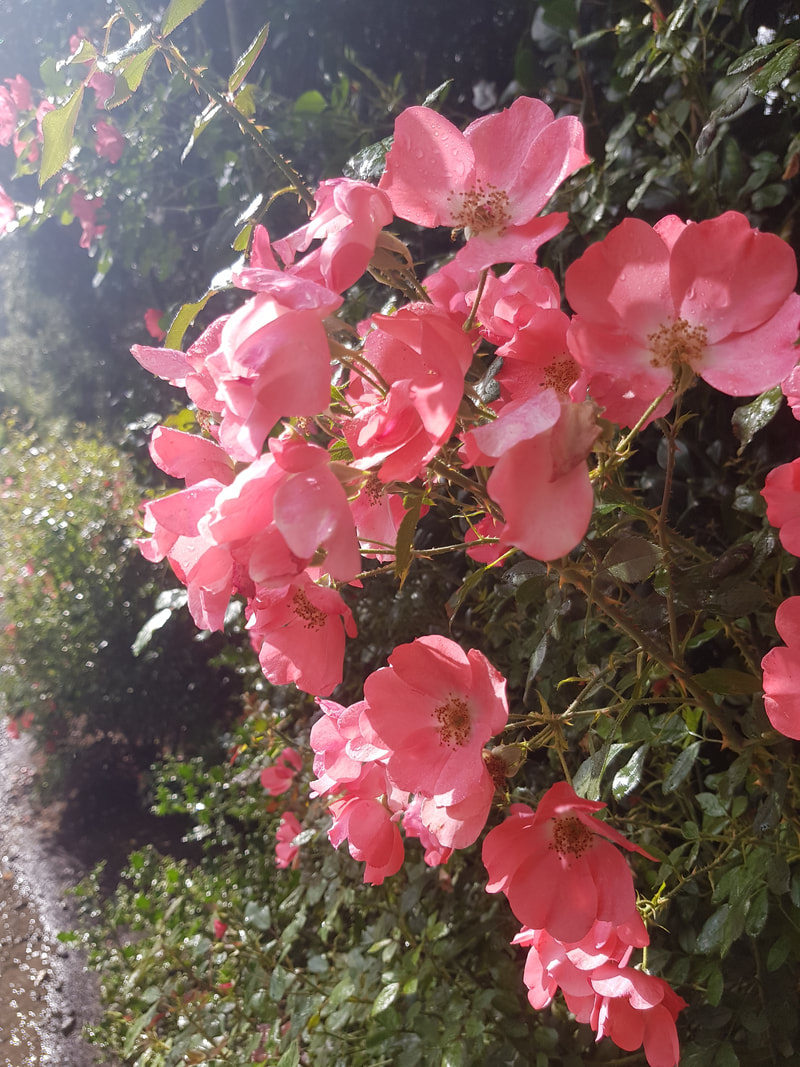
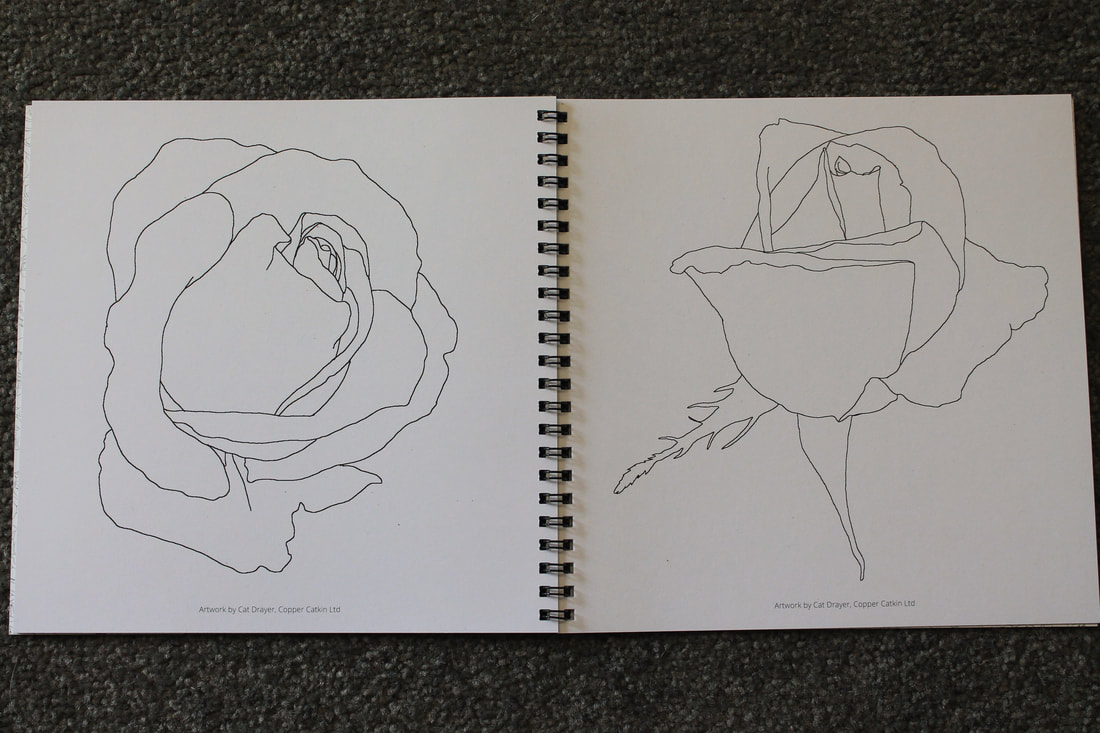
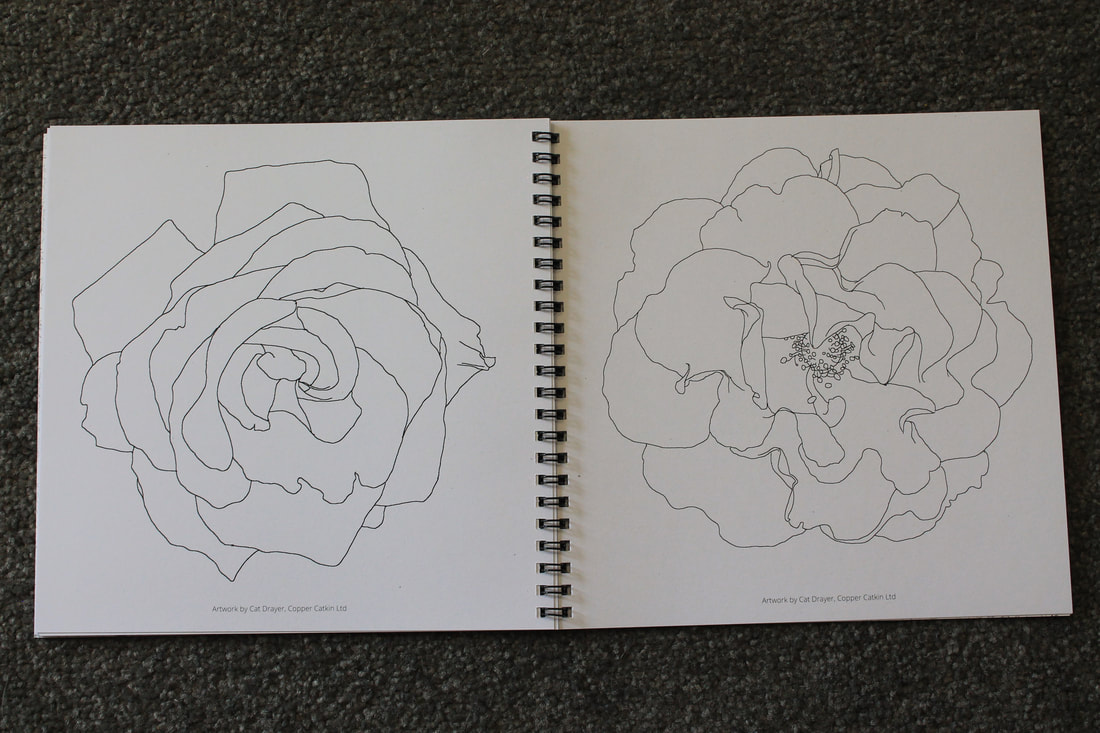
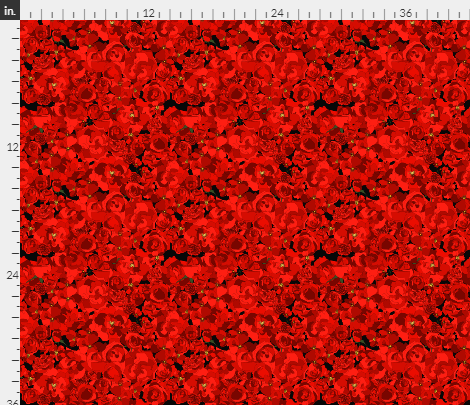
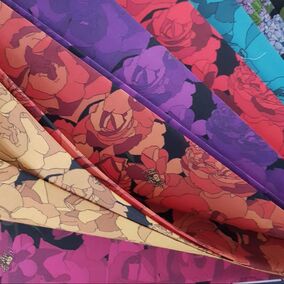
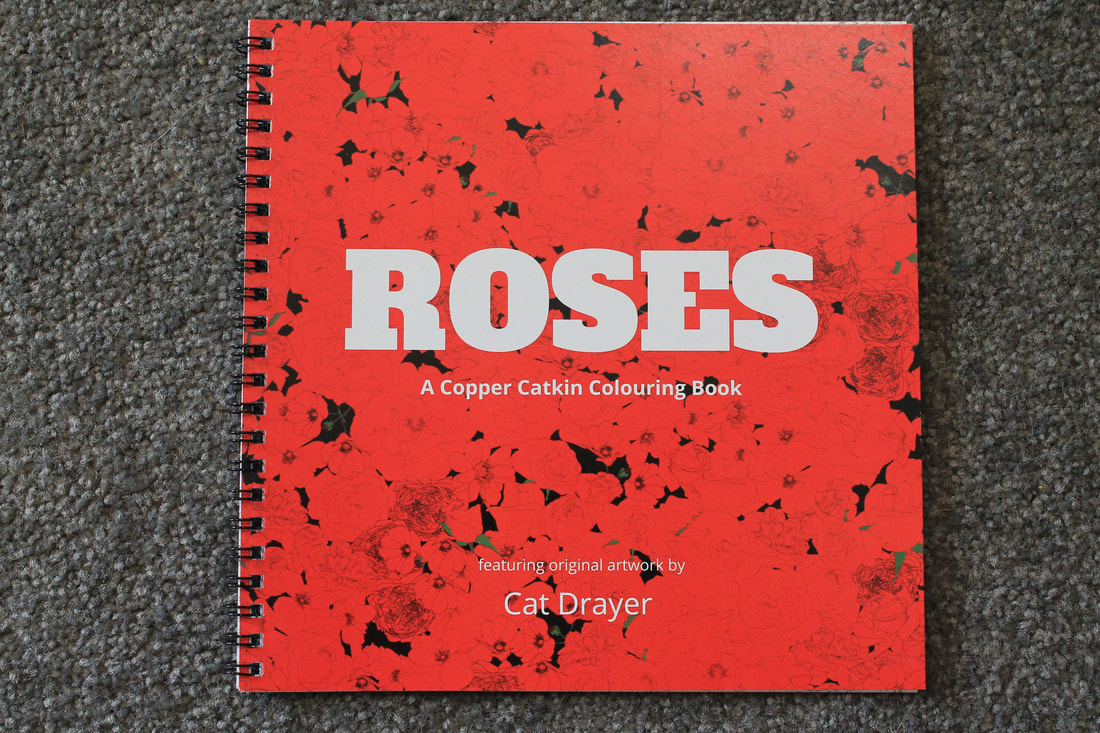
ROSES
My “ROSES” book was made at the request of several people who asked for roses, and using my photos from our trip to Portland, Oregon, the “City of Roses“.
This design is also available as fabric, earrings, and scarves, too.
Click on the image to shop on Spoonflower
Click on the image to shop on Etsy
Click on the image to shop for this colouring book on Etsy!
Greatest hits
The FLORA and NGA MANU collections pull together some of my most popular drawings ever – and there is some crossover, as many people only want to buy one colouring book. The good thing about a bit of crossover, too, is that families with several children can have some images in common, while still getting their own designs to colour in, too.
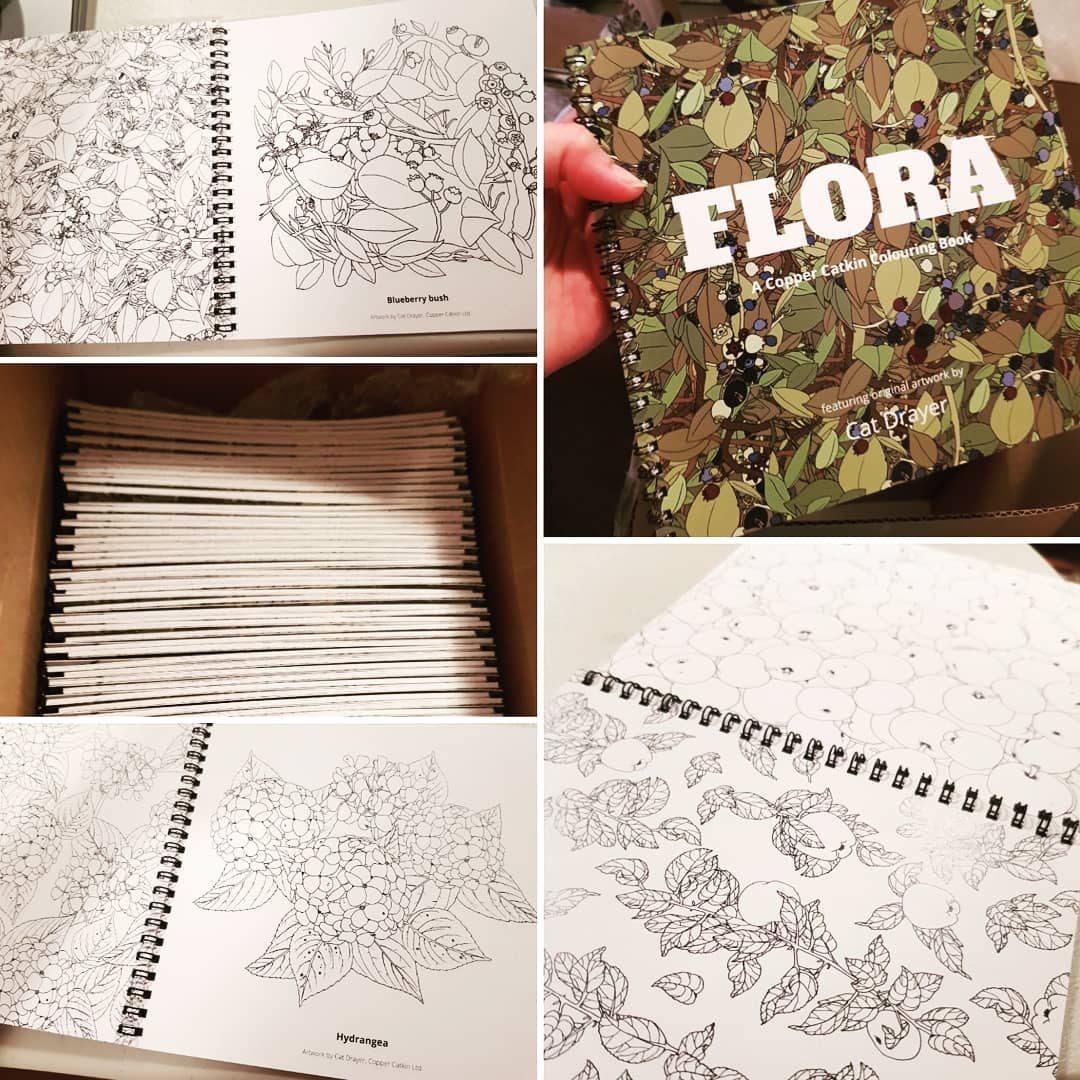
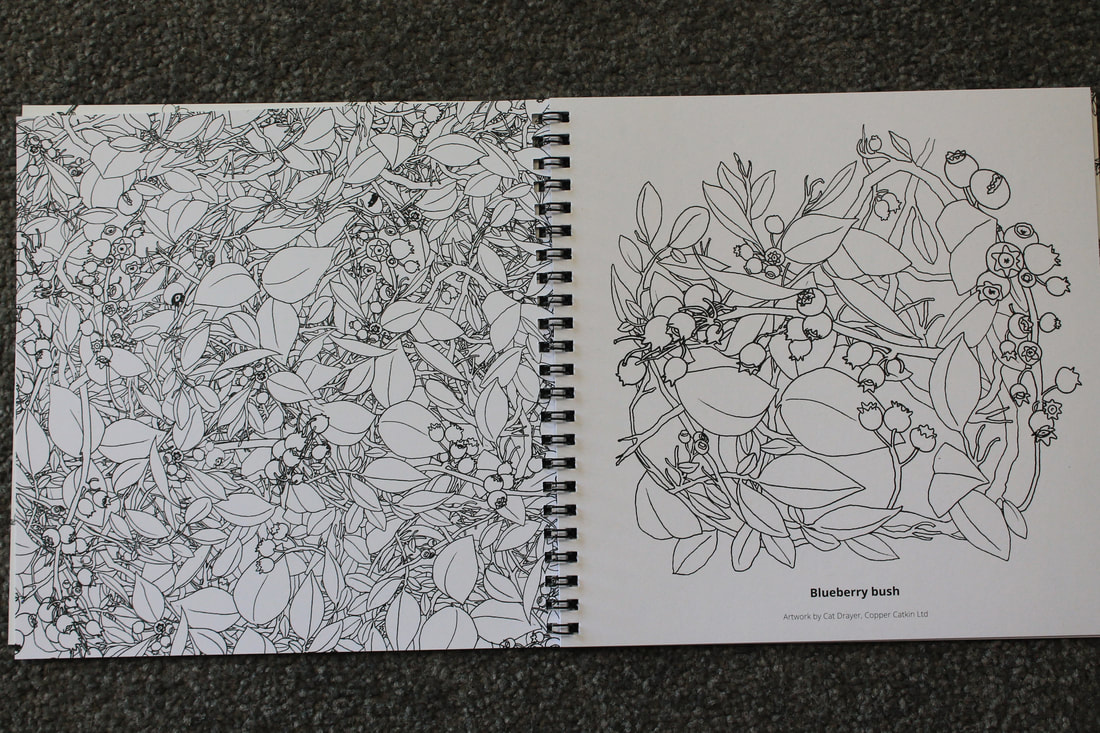
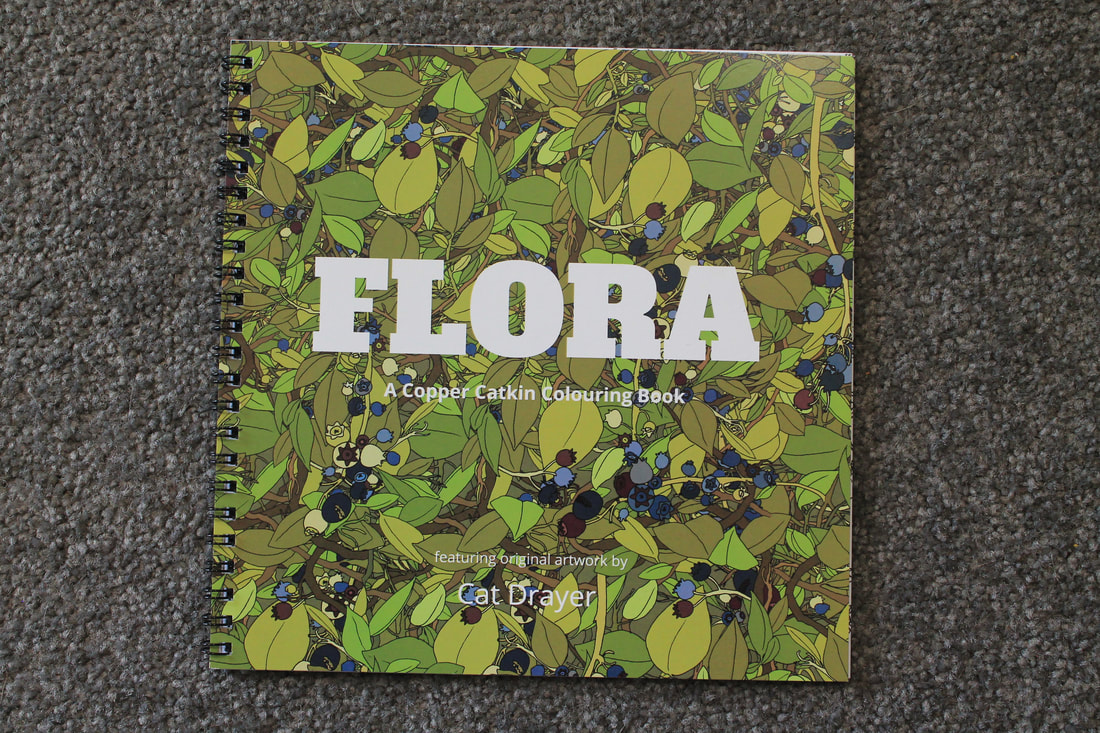
FLORA
Named for my maternal grandmother, and filled with the top choices from my back catalogue of plants and trees, this is a great collection for meditative colouring, with complicated repeats and simpler motifs to give a range of choices, depending on how much time and commitment you have.
Click on the image to shop for this colouring book on Etsy!
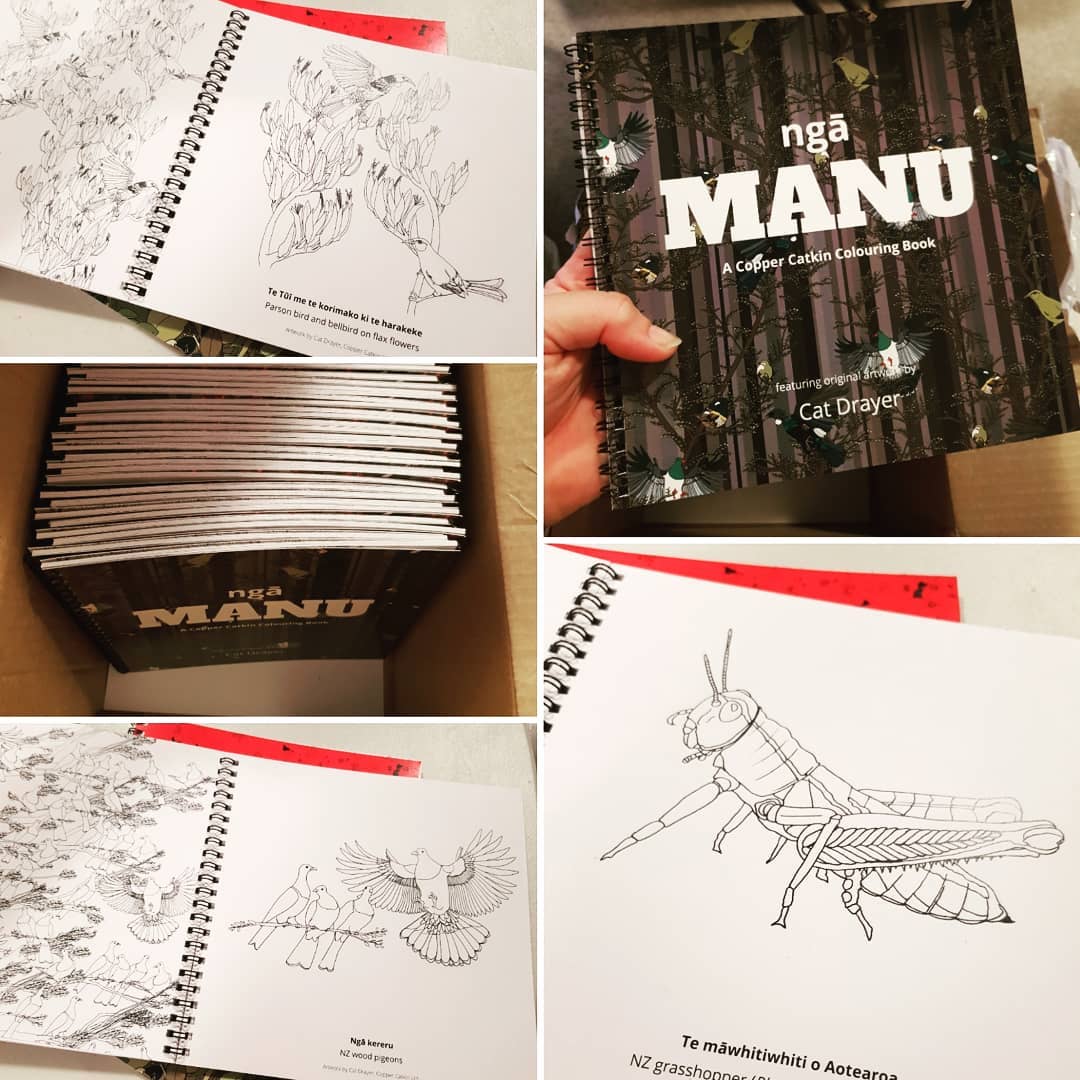
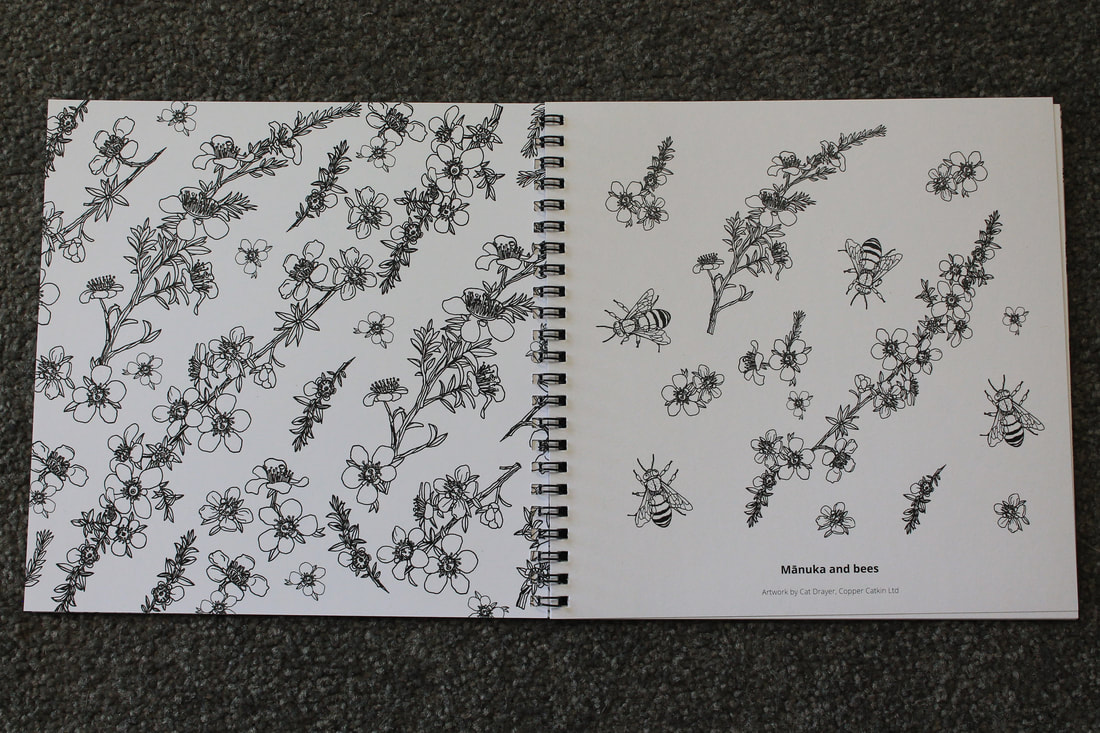
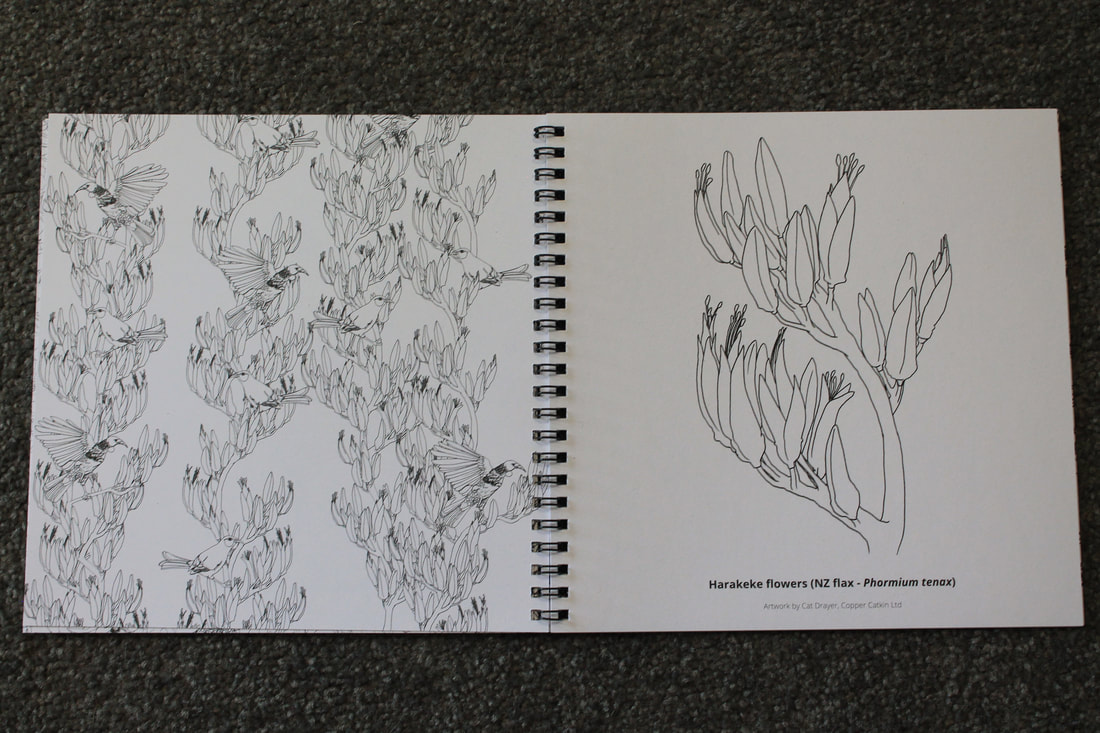
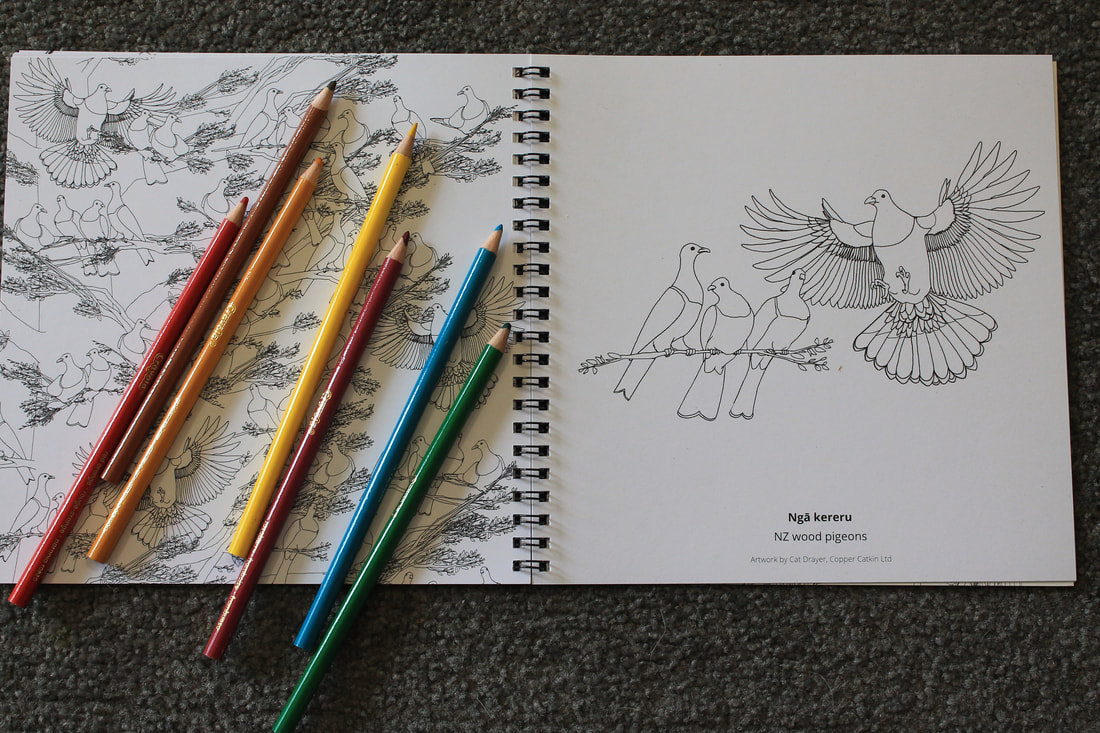
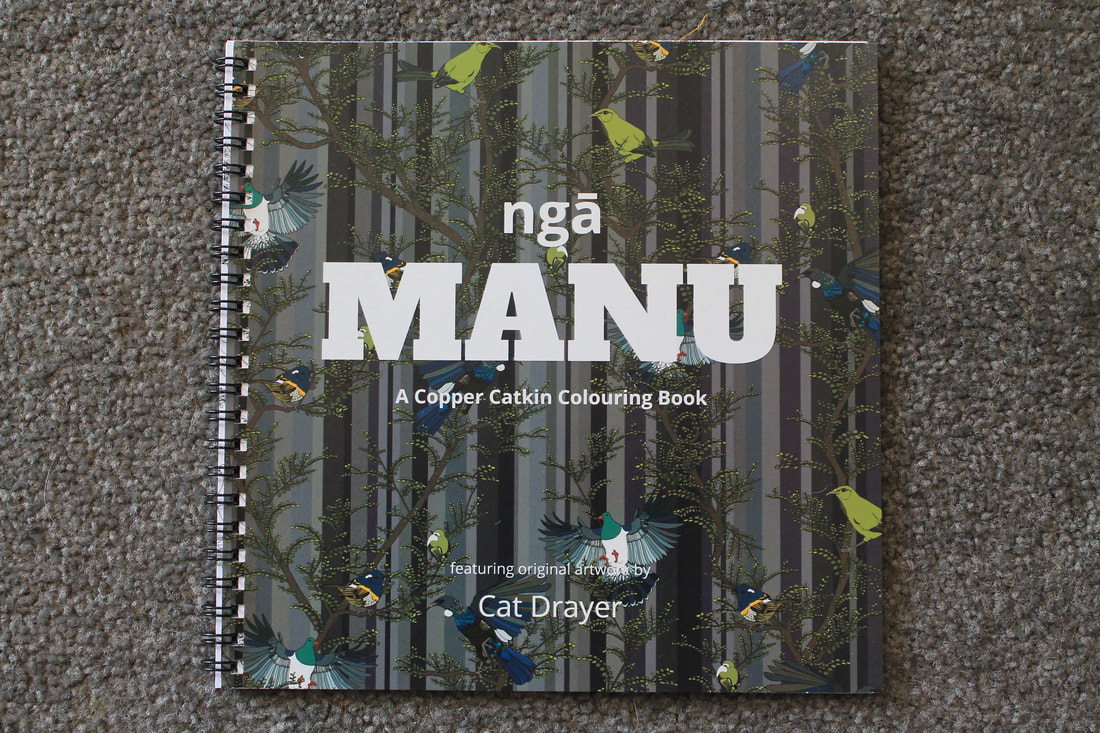
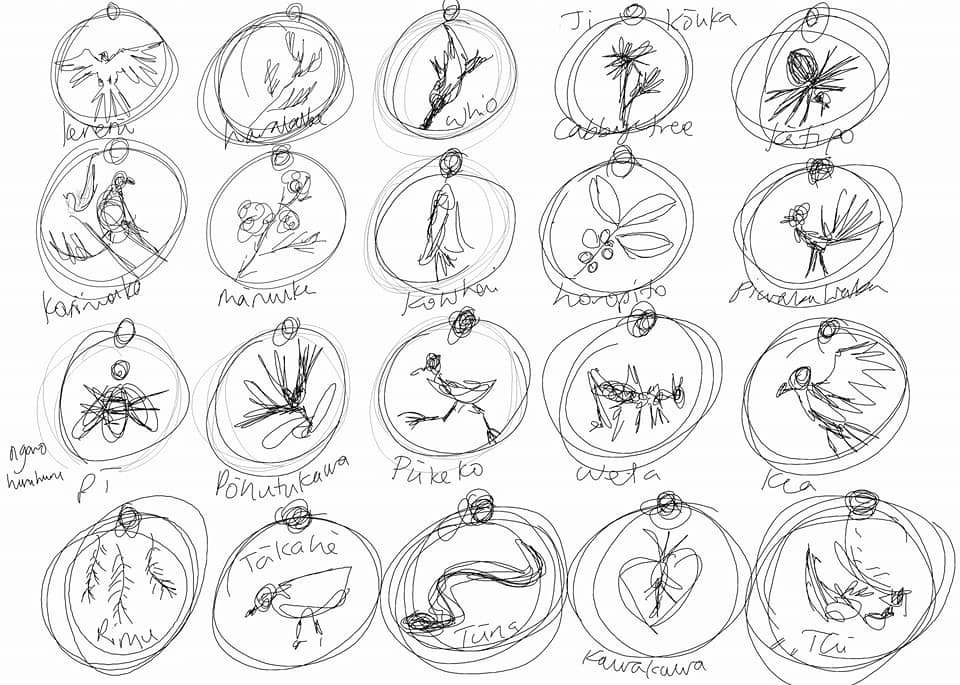
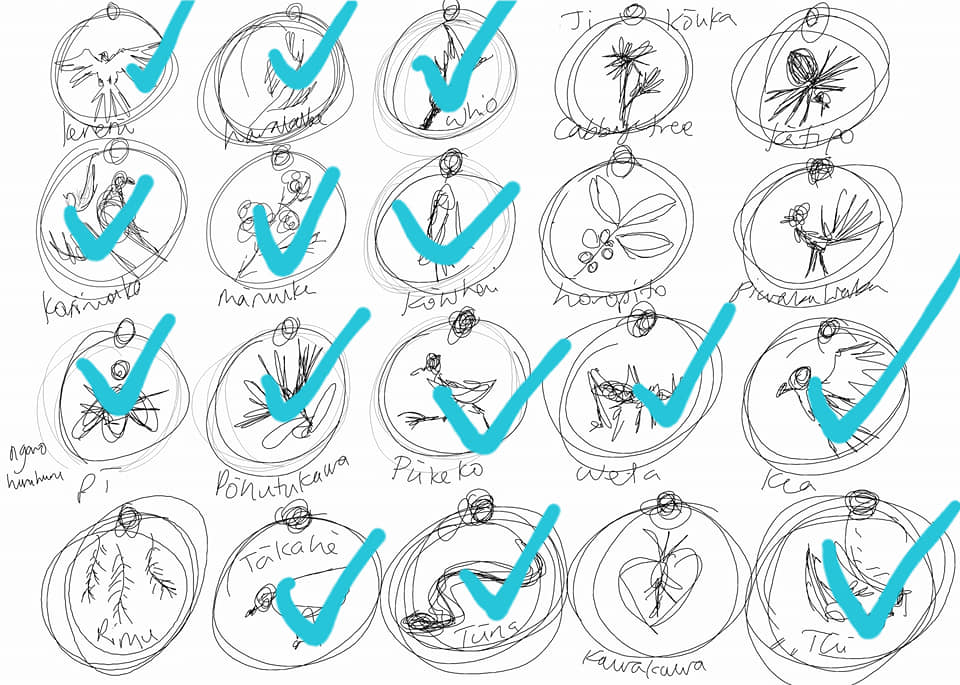
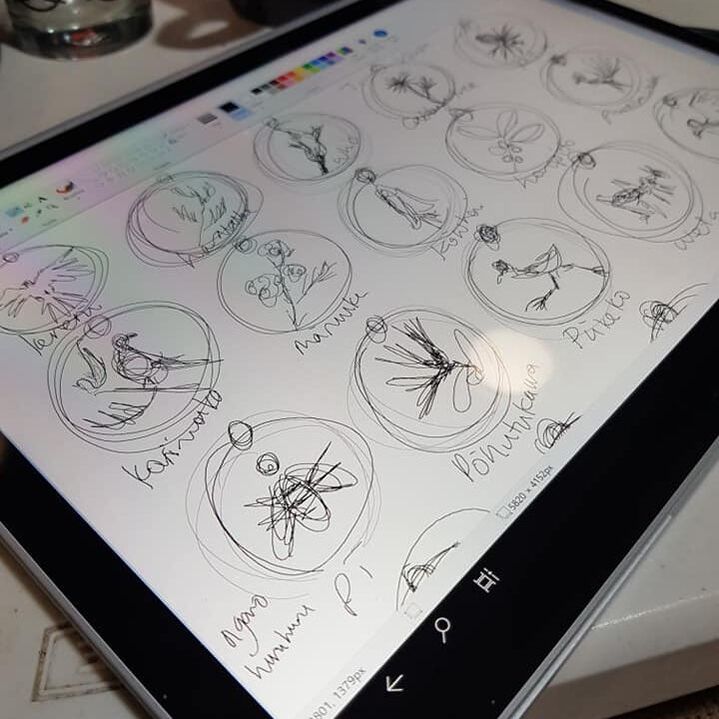
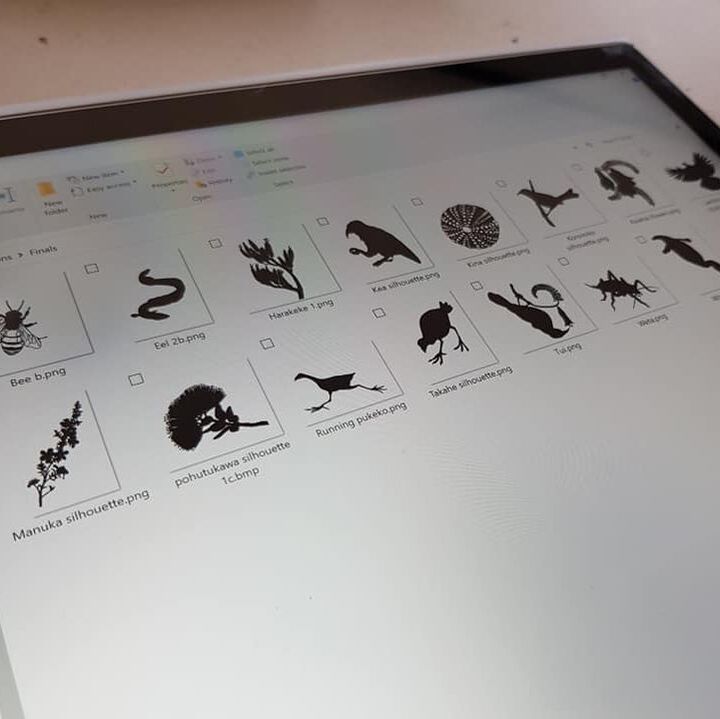
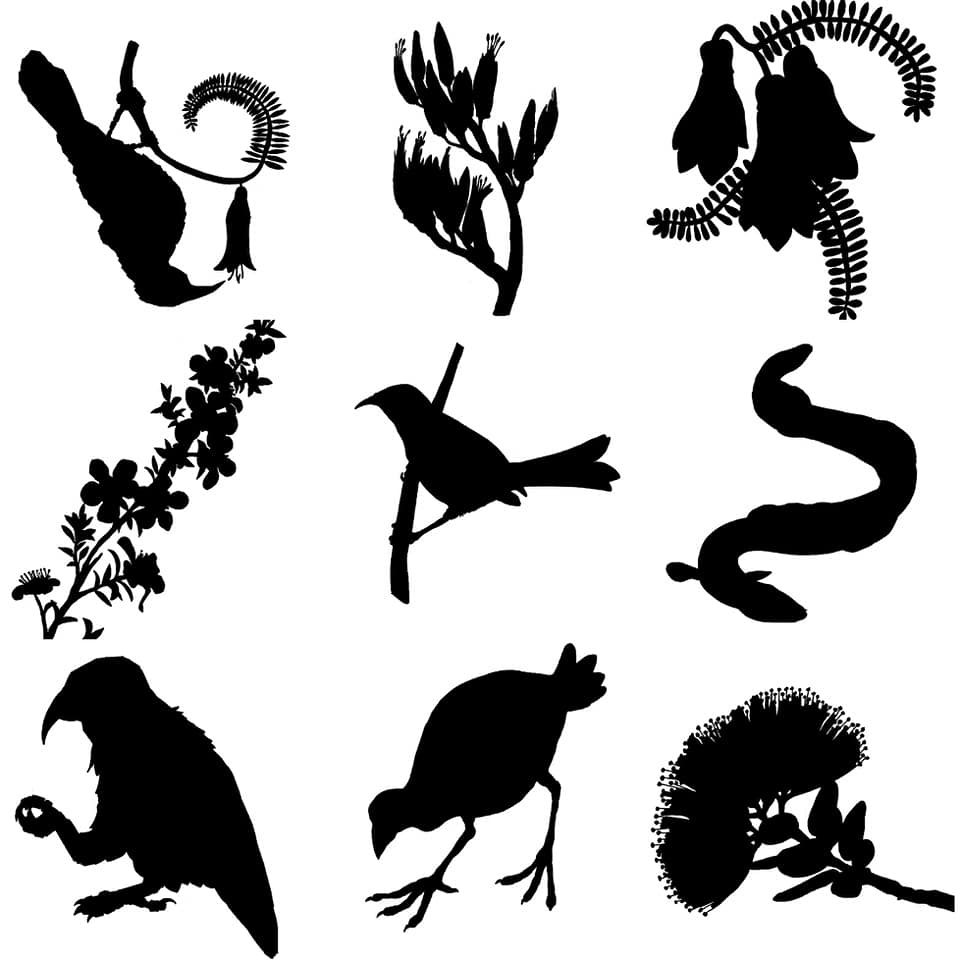
NGA MANU
âAt our place, we are surrounded by native bush and native birds, so it makes sense that they both show up a lot in my designs.
In the process of researching the possible names for the book, I also discovered that the meaning of “manu” is actually broader than I thought, too, so I added a few other things that fly.
Of course, as mentioned above, these designs combine both birds and plants, so versions of some of them can be found in both “FLORA” and “NGA MANU”.
Click on the image to shop for this colouring book on Etsy!
TL;DR
You can go and watch videos of my colouring books on YouTube, here:
You can buy my colouring books from my Etsy store, here:
Click on the image to visit my Etsy store
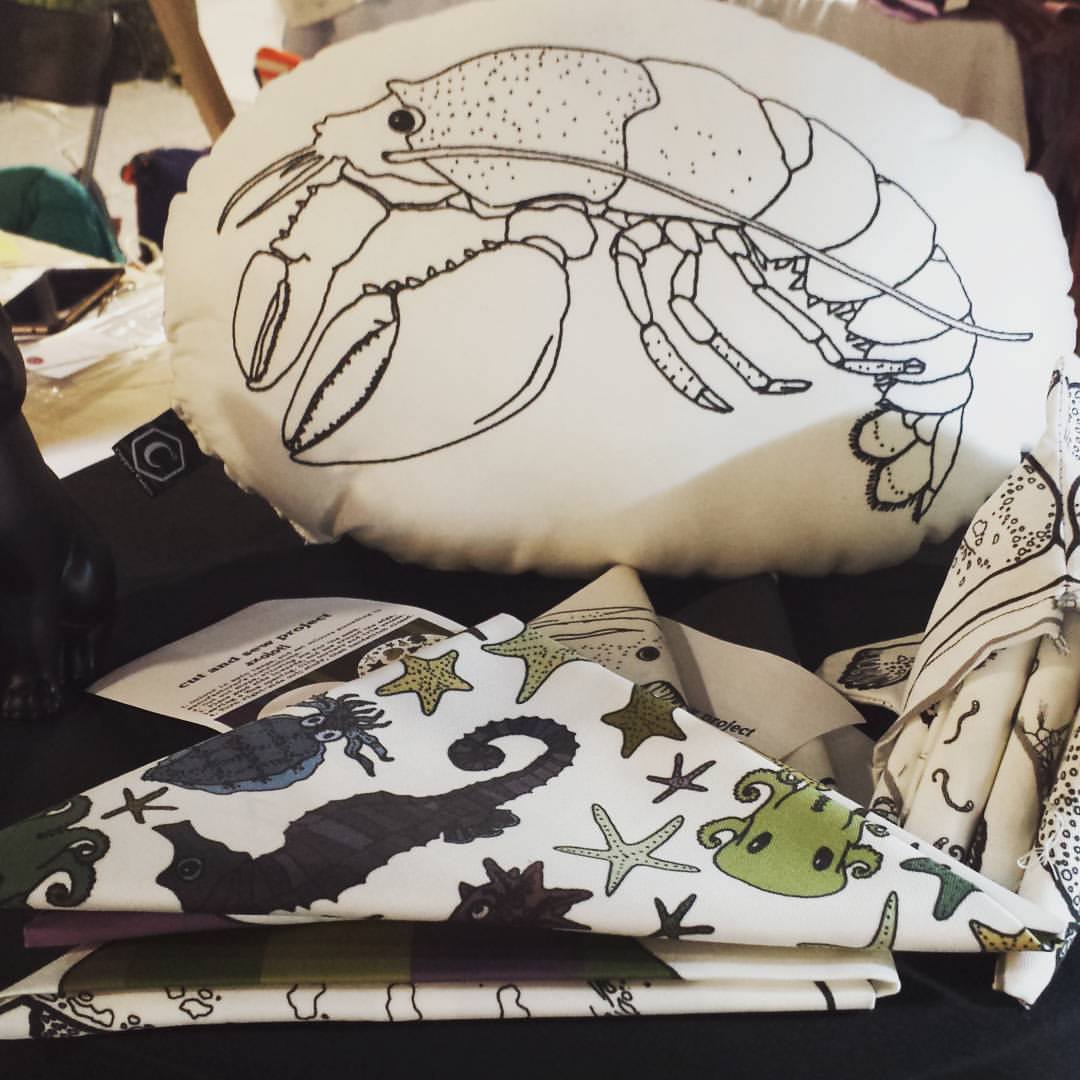
Read about our colour-cut-and-sew bags
Shop for colour-cut-and-sew projects on Spoonflower
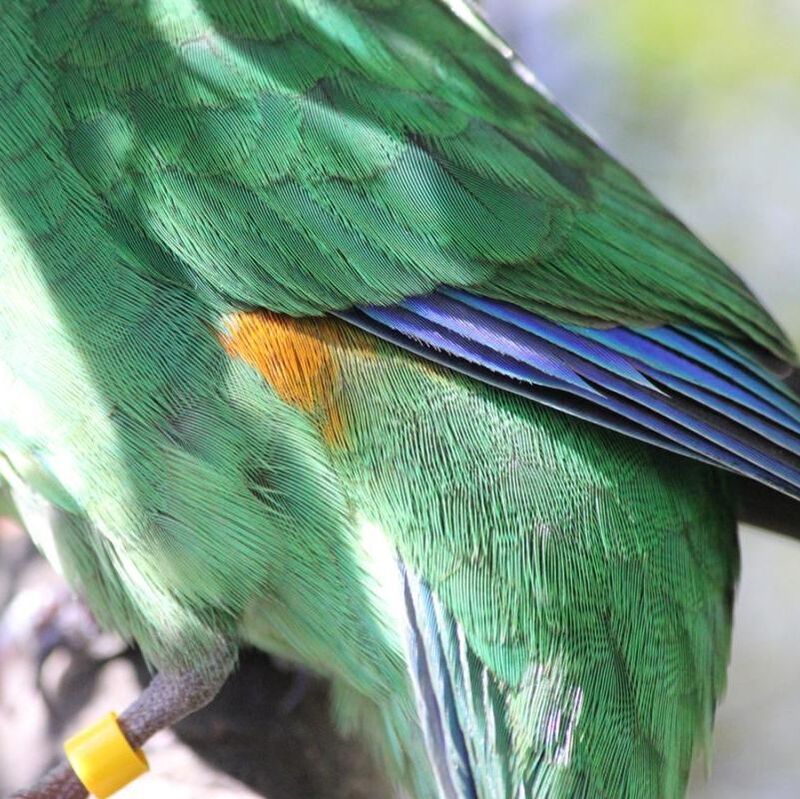
I have explored the different types of parrots in the kākāpō post, so I won’t go into that here. I grew up signing the rainbow in Te Reo at primary school, so for me, “kākāriki” means “green”, and “karaka” means orange, so this bird’s name is a bit confusing for my super-basic Māori language skills!
The etymology is: from kākā, parrot + riki, small. The word is also used to refer to the colour green because of the birds’ predominantly green plumage. Source: Wikipedia
The word “kākāriki” also has several other uses in Te Reo – click here to read about them.
Sources and resources
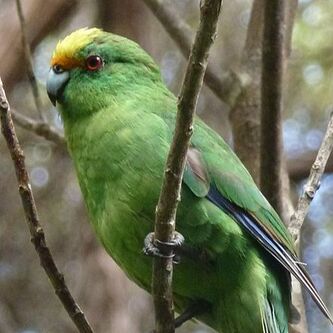
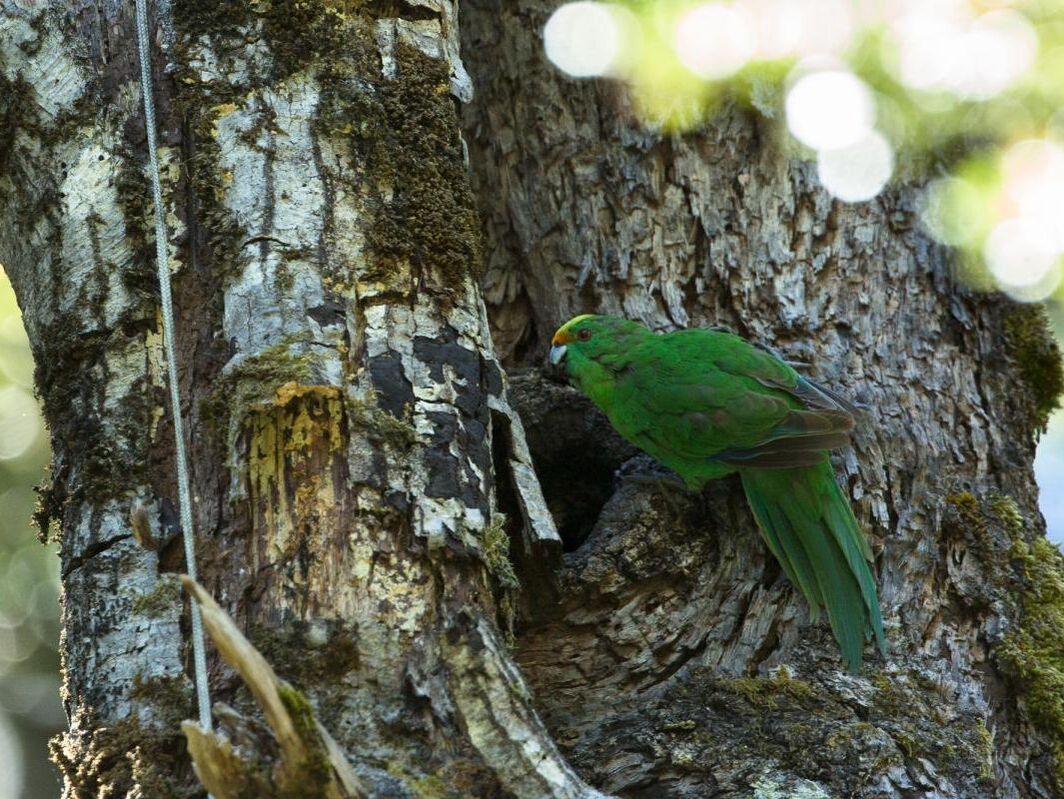
Malherbe’s parakeet (Cyanoramphus malherbi), usually known as the orange-fronted parakeet or in Māori, kākāriki karaka, is a small parrot endemic to New Zealand. In New Zealand it is always known as the orange-fronted parakeet, a name it shares with a species from Central America, while in the rest of the world it is known as Malherbe’s parakeet.[3] Restricted to a few valleys in the South Island and four offshore islands, its population declined to around 200 in the 1990s, and it is now considered critically endangered. Source: Wikipedia
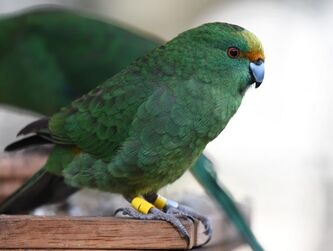
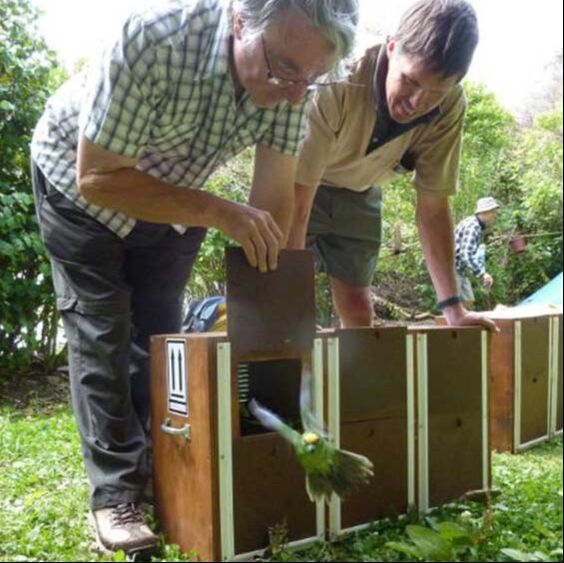
This budgerigar-sized parakeet is usually quiet and difficult to observe. A loud brief chatter or quieter contact call may give away its presence, but locating the bird can be extremely difficult. Orange-fronted parakeets are often confused with yellow-crowned parakeets. Formerly occurring throughout New Zealand, orange-fronted parakeets are now confined to four South Island beech forest valleys. Captive-reared birds have also been released on four offshore islands. Source: NZ birds online
Reports from the 1800s show that orange-fronted parakeets were once found throughout New Zealand. However, their distribution has reduced dramatically over the last century and the orange-fronted parakeet is now our rarest parakeet and forest bird in New Zealand.
The remaining populations are all within a 30 km radius in beech forests of upland valleys within Arthur’s Pass National Park and Lake Sumner Forest Park in Canterbury, South Island. The easiest place to see them, although still difficult, is in the Hawdon valley in Arthur’s Pass National Park.
Although kākāriki karaka are now confined to these few valleys, historic records suggest that in the later years of the 1800s, when beech seed was bountiful during mast years, the parakeets would have a breeding boom and disperse onto the Canterbury Plains.
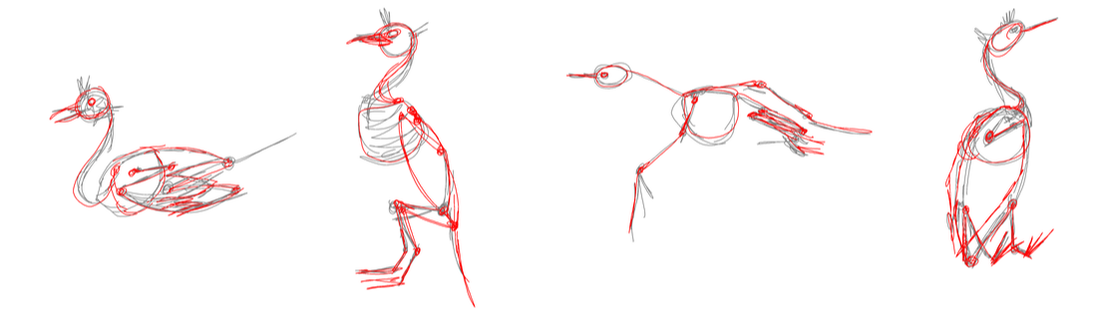
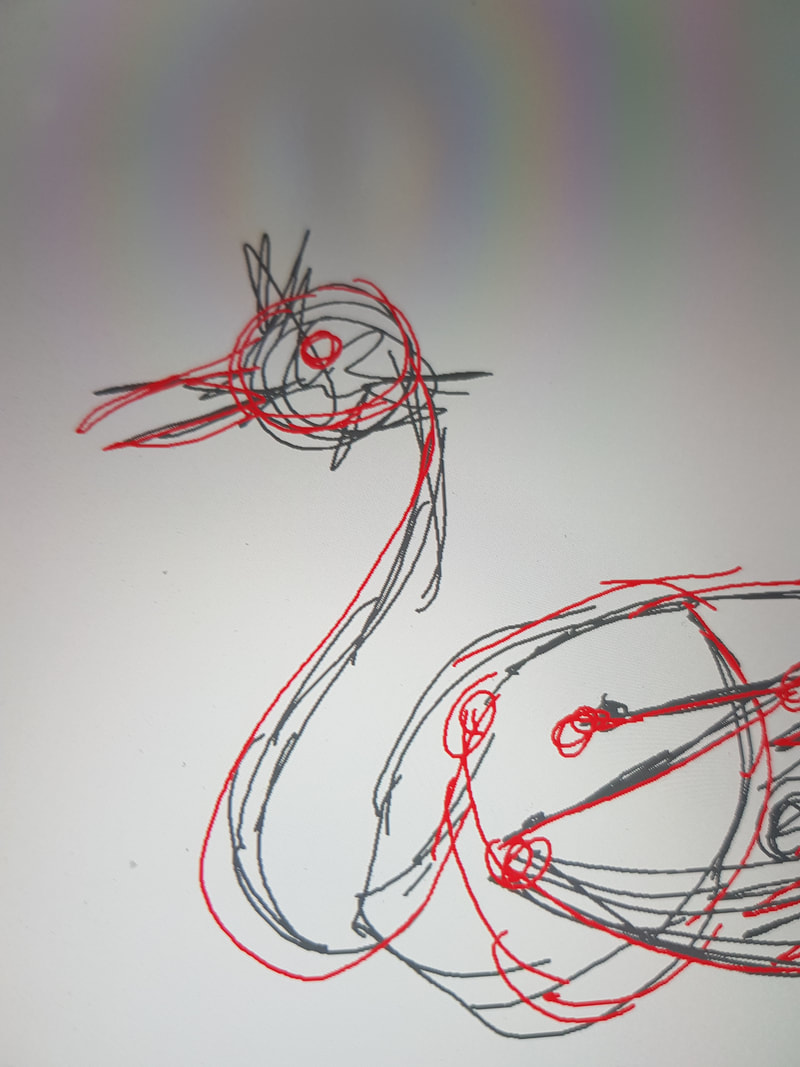
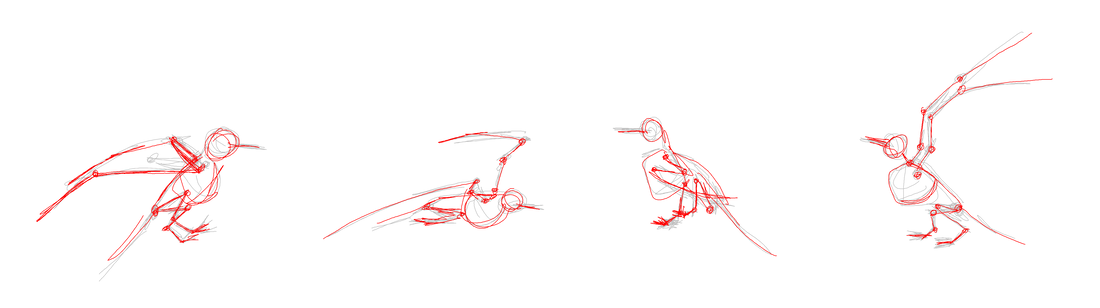
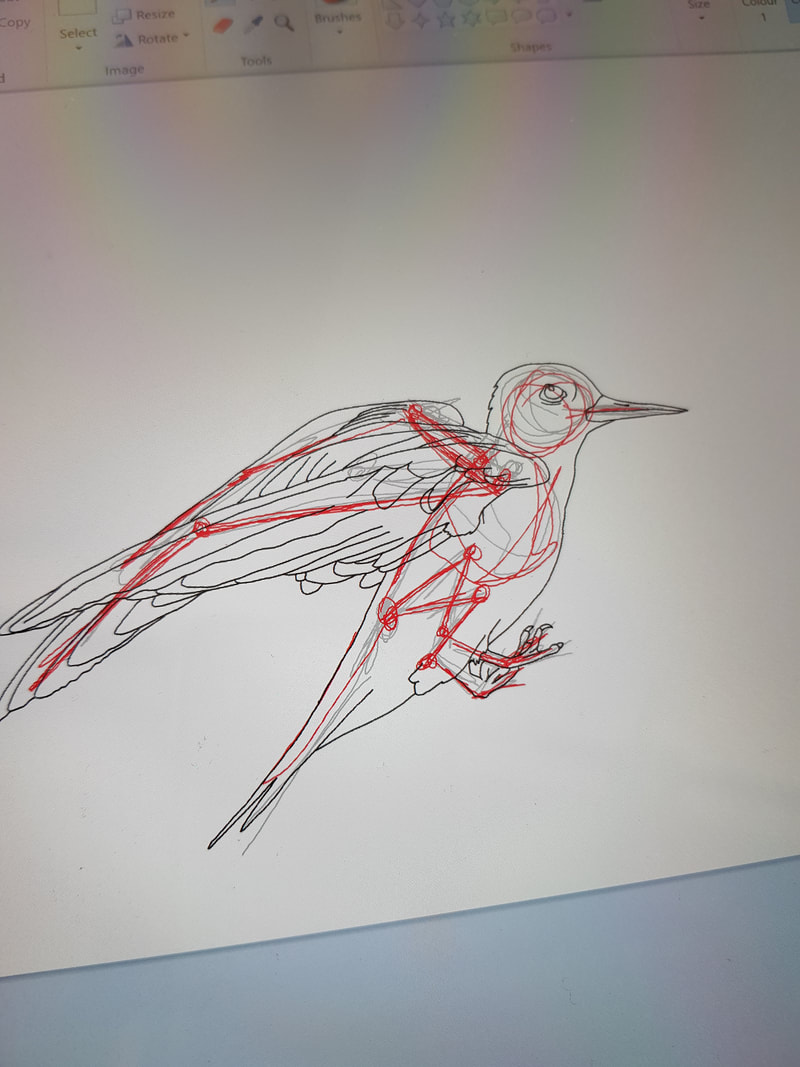
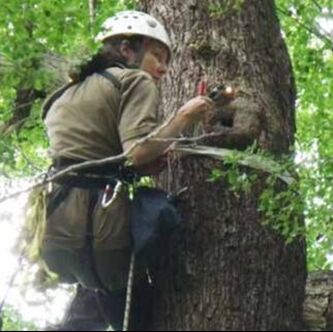
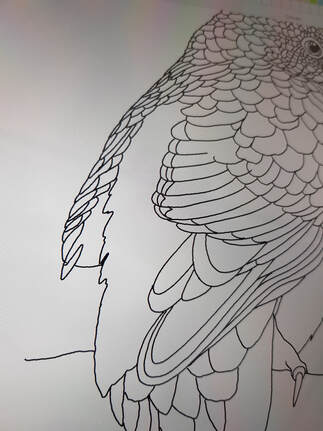
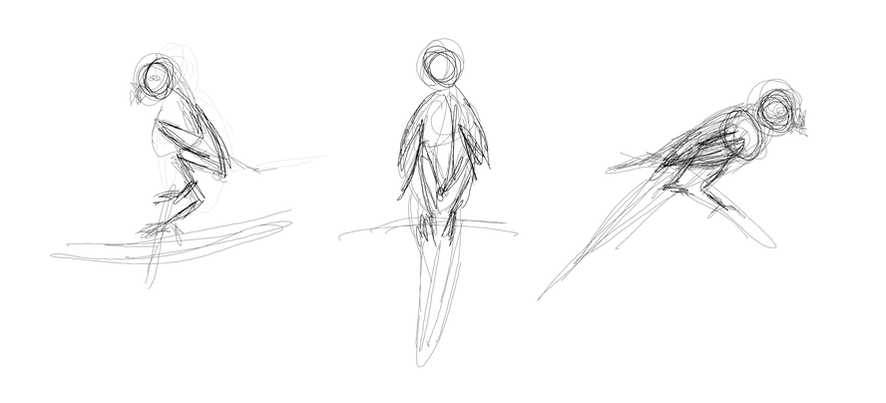
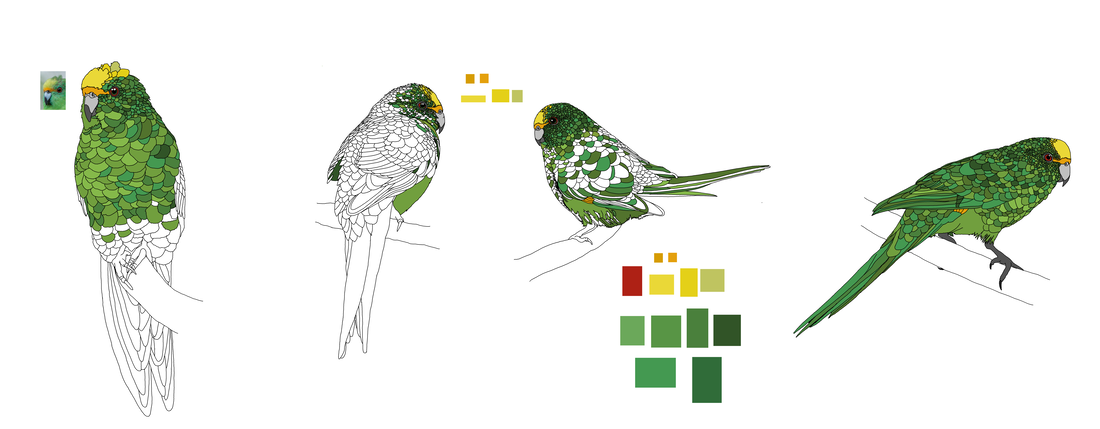
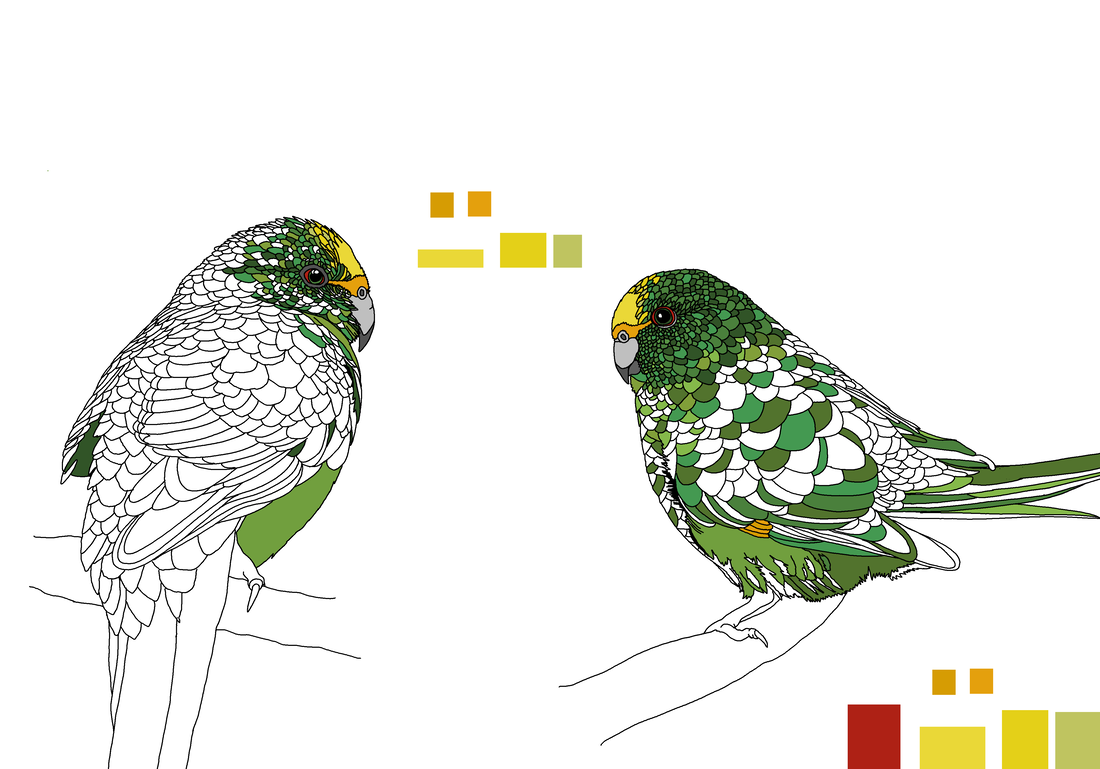
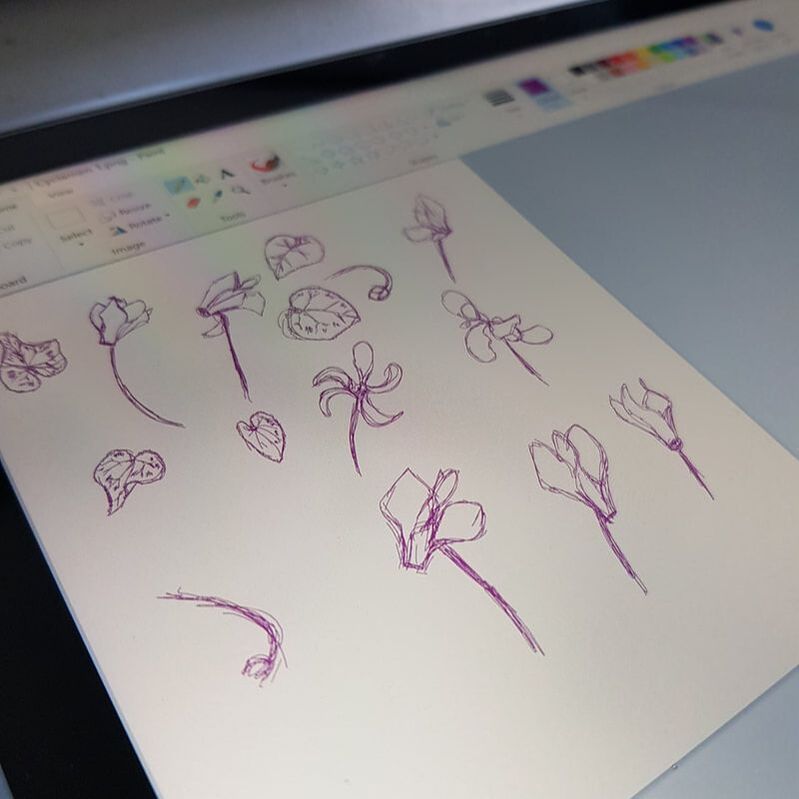
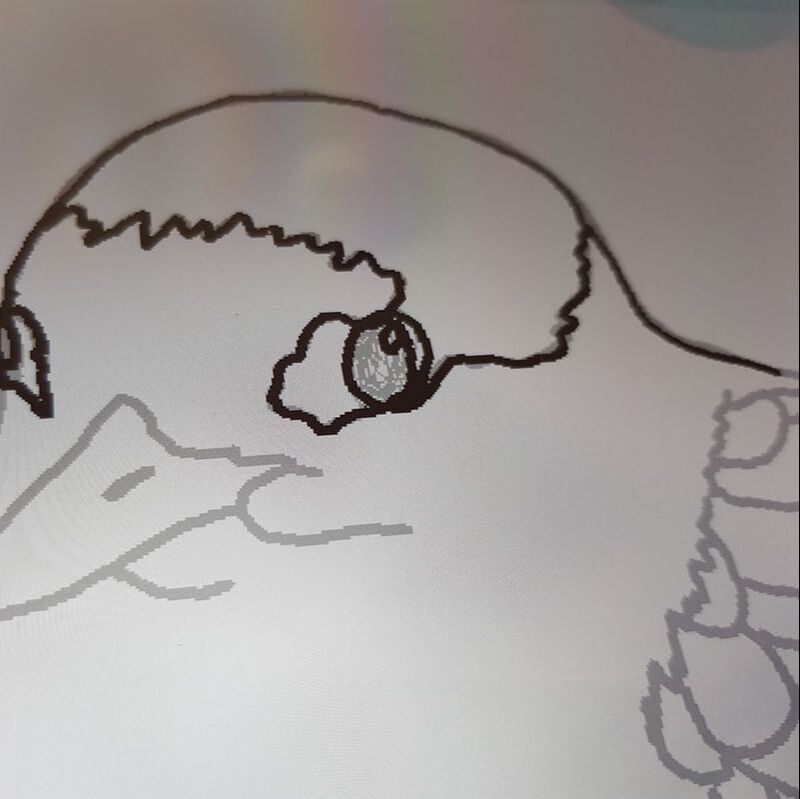
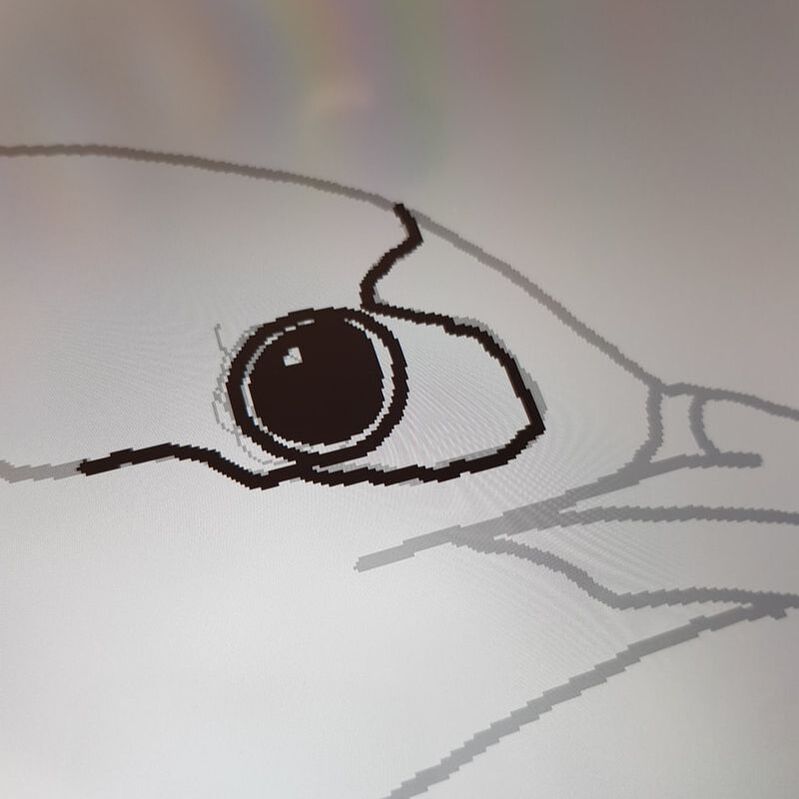
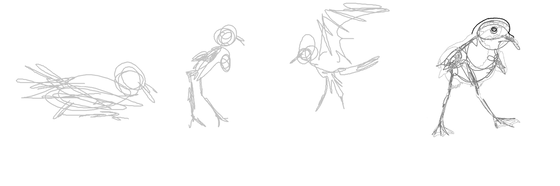
Reading the descriptions of the birds is a really important way of identifying the details that must be captured in my sketches.
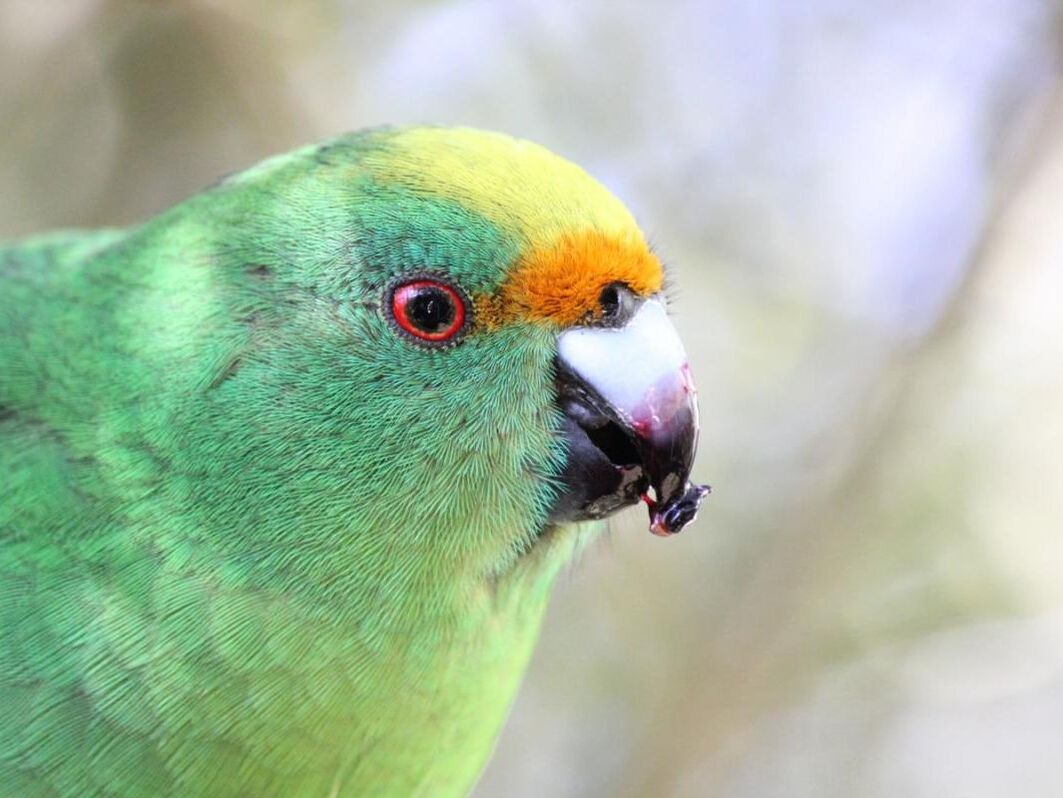
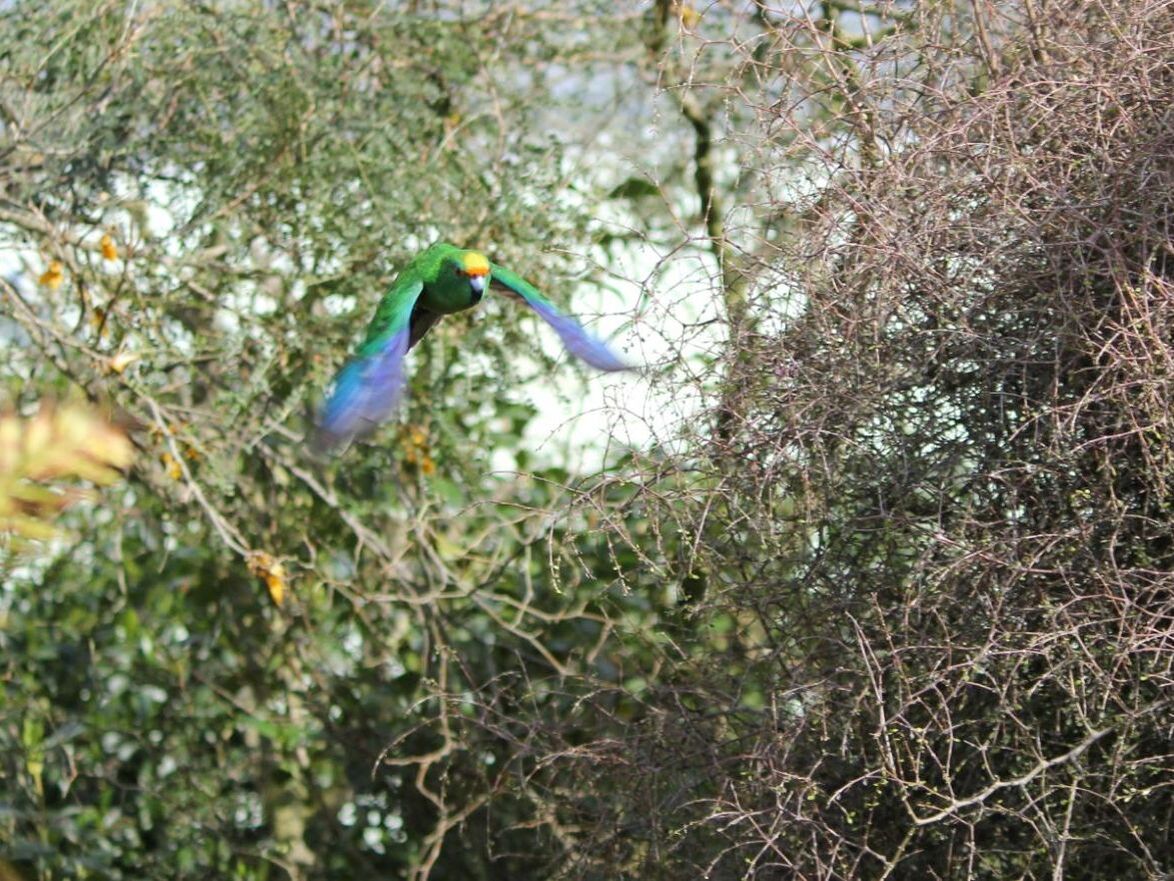
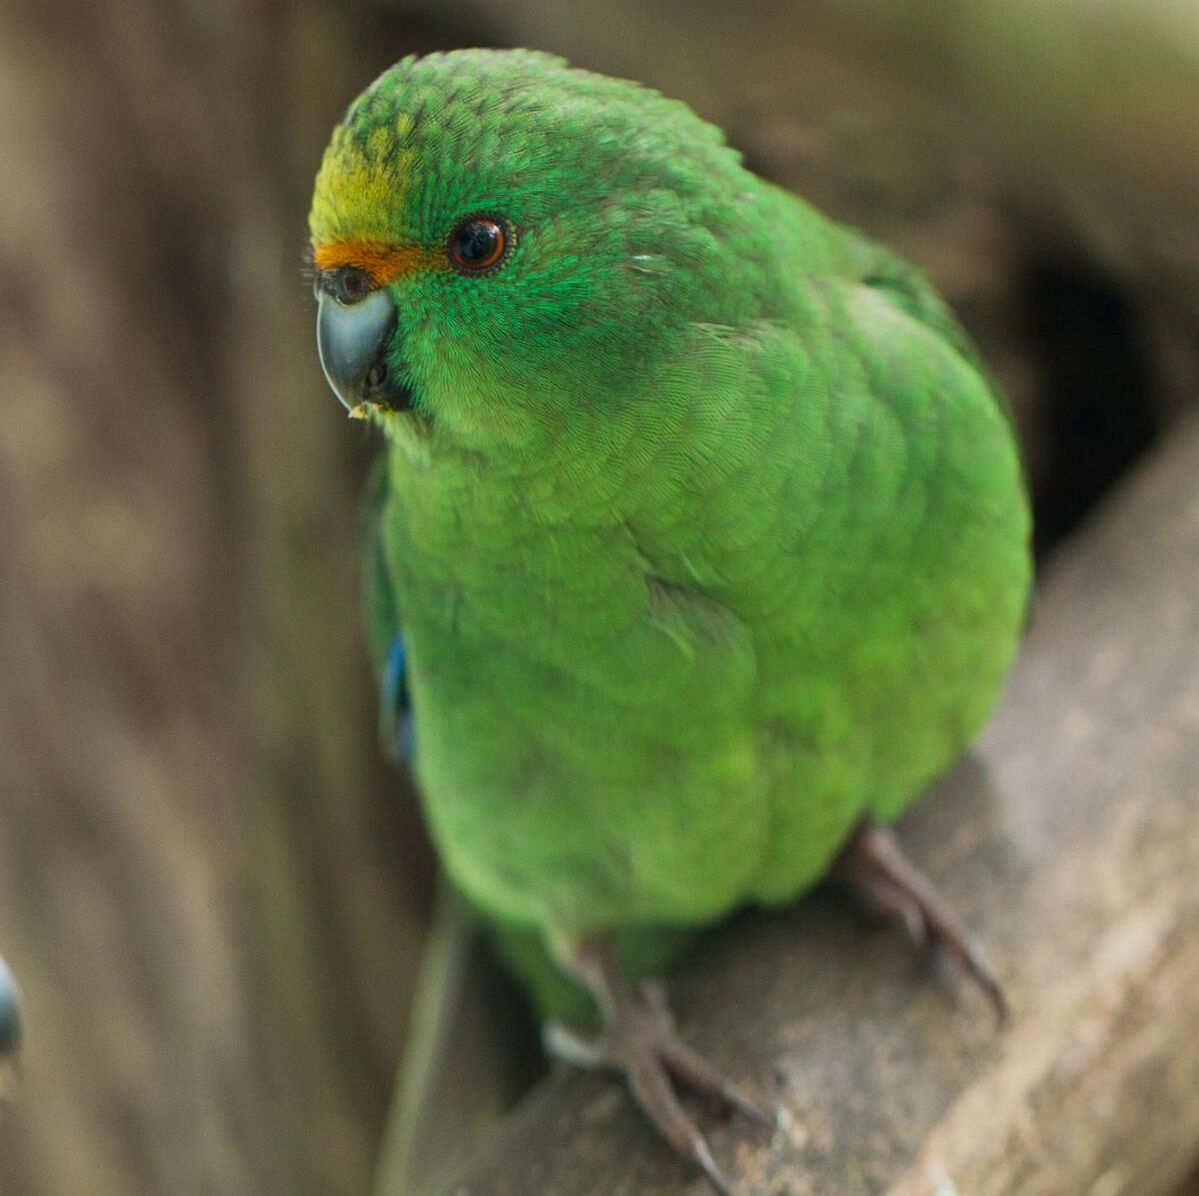
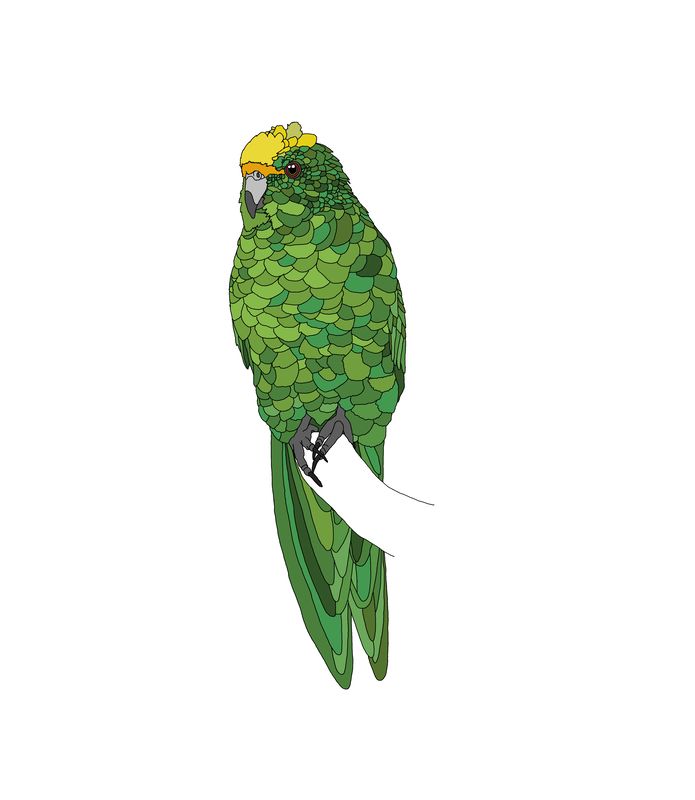
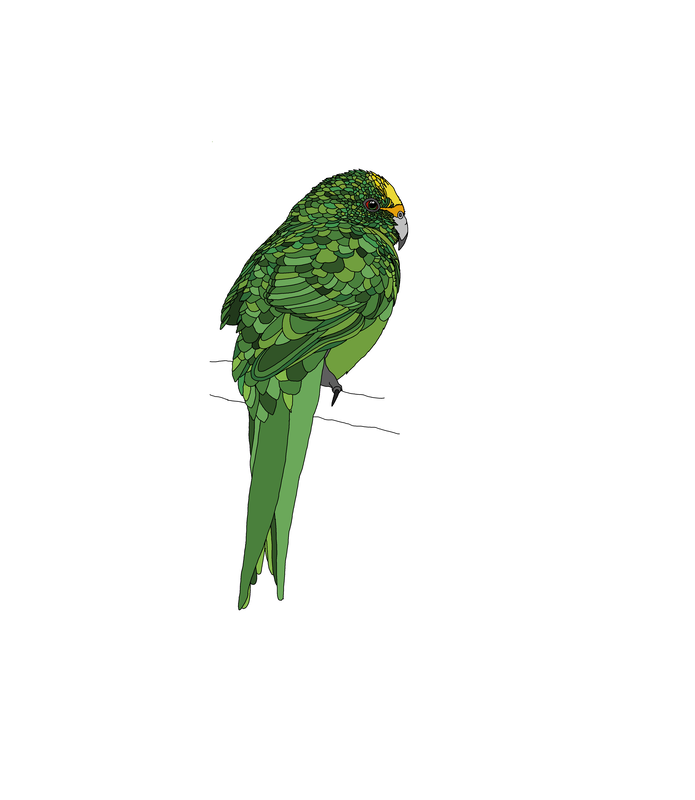
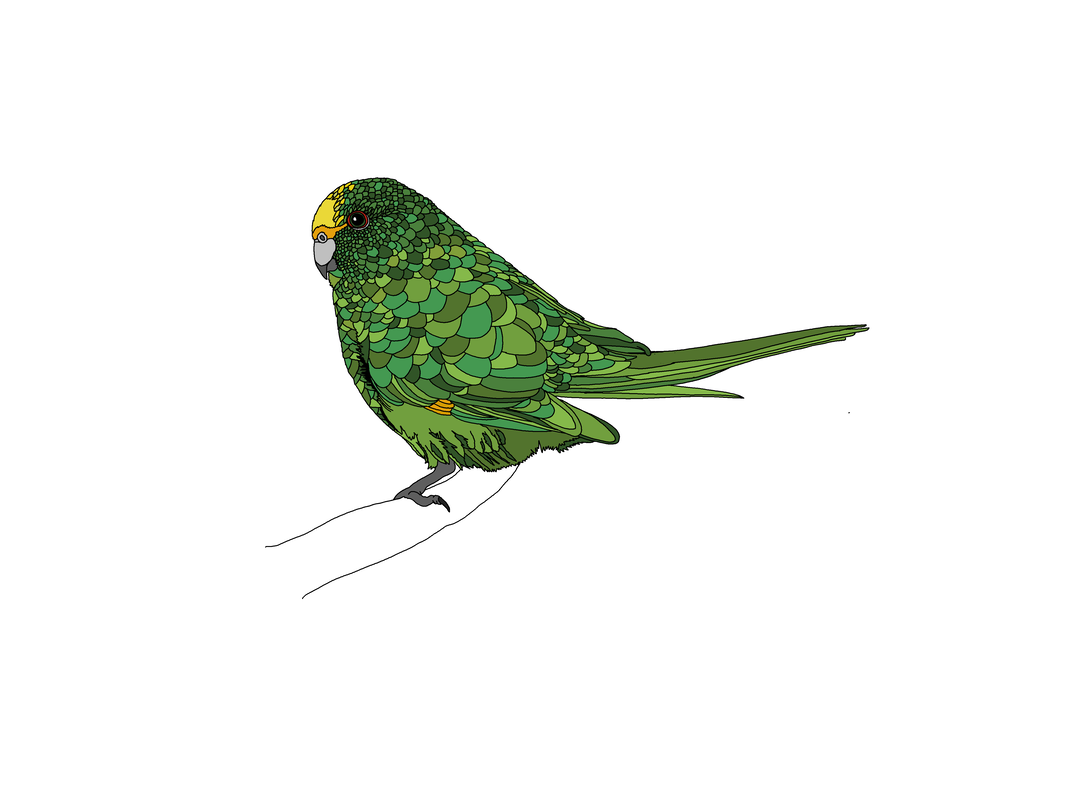
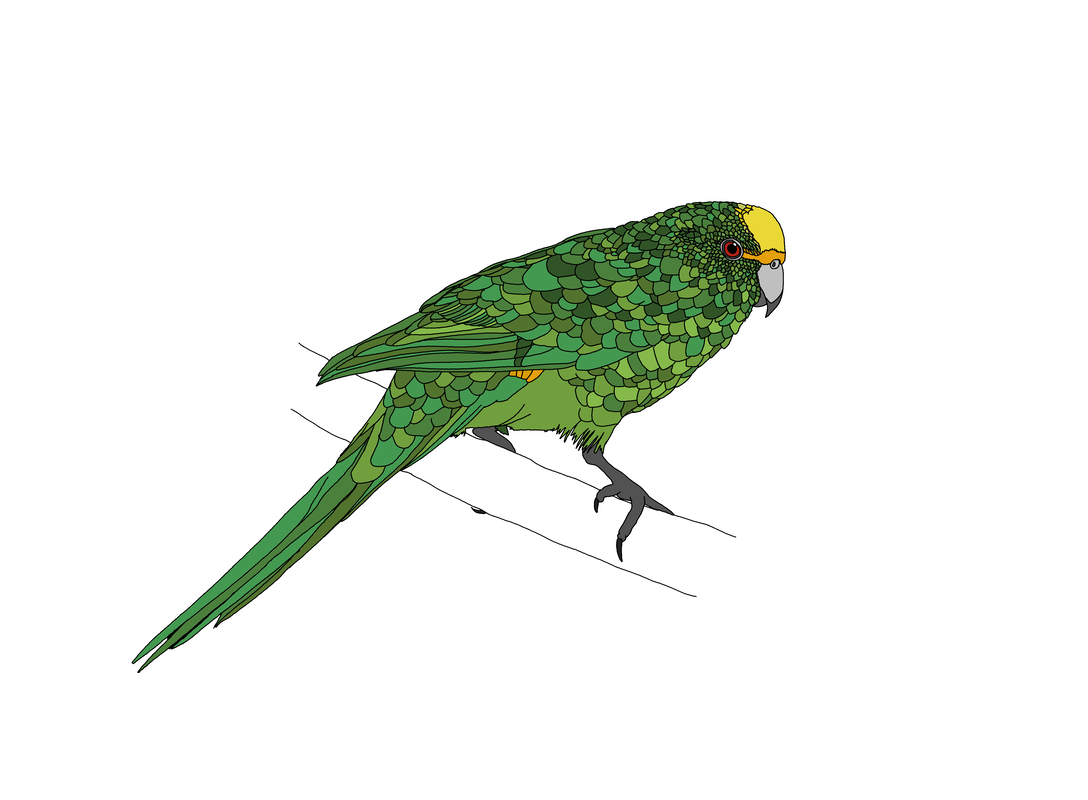
Cyanoramphus malherbi is a medium size parrot, approximately 20 centimetres long. Its body is primarily a bright blue-green, with azure blue primary covert and leading edge feathers on its wings.
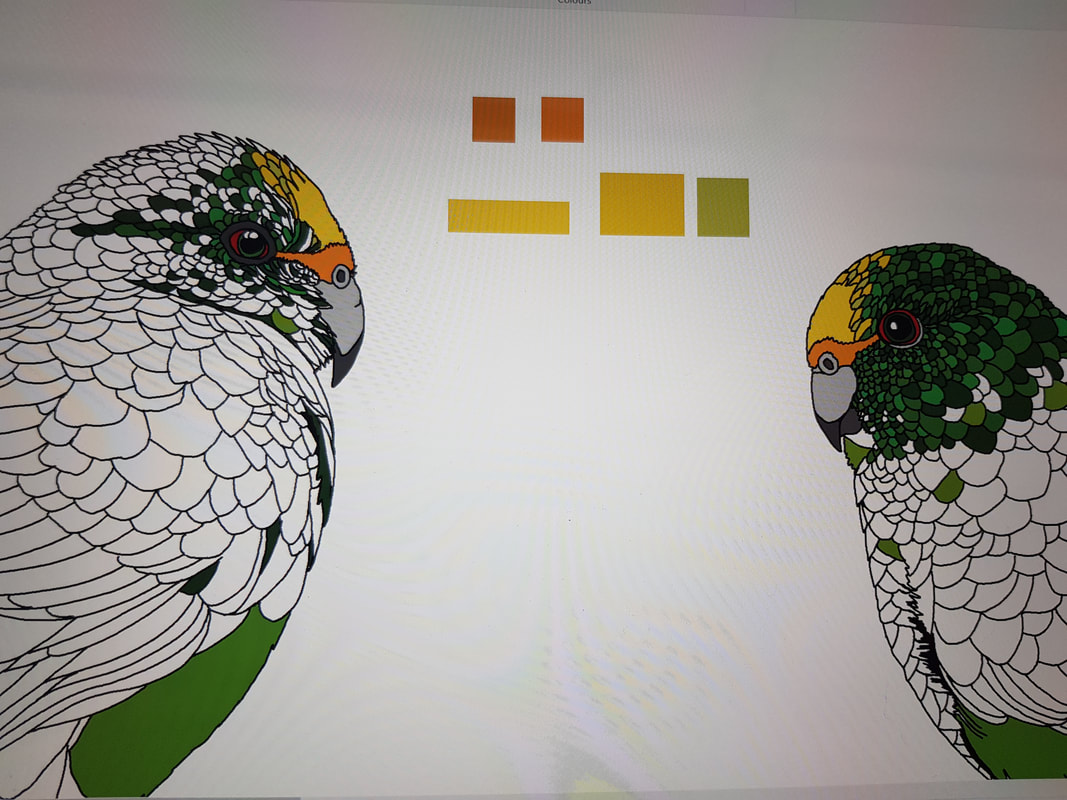
It has a distinctive (and diagnostic) orange frontal band on its yellow crown, but this is absent in juvenile birds, which have fully green heads. The orange frontal band begins to develop when the bird is 2–5 weeks old. Its rump has orange patches on the sides. Colouration in males tends to be brighter, and juveniles are distinctly duller.
The only reliable features that separate mature orange-fronted parakeets from the similar yellow-crowned parakeet (C. auriceps) are the colour of the frontal band and rump. Source: Wikipedia
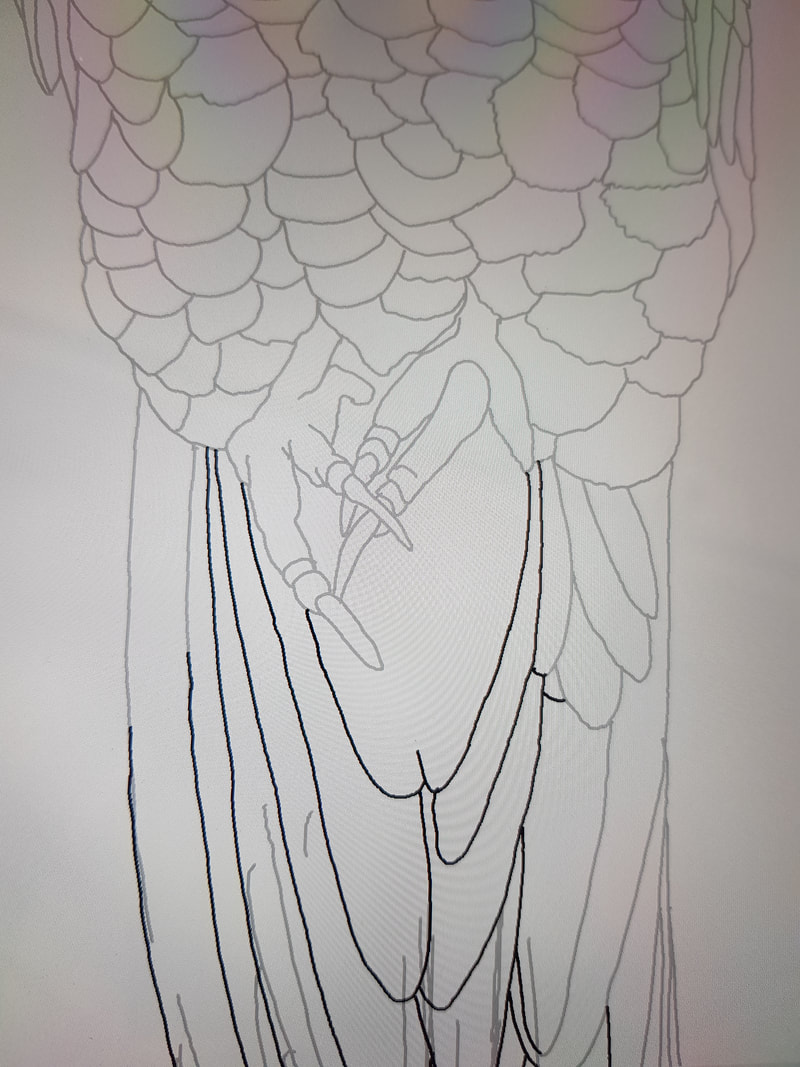
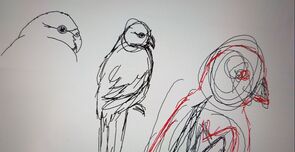
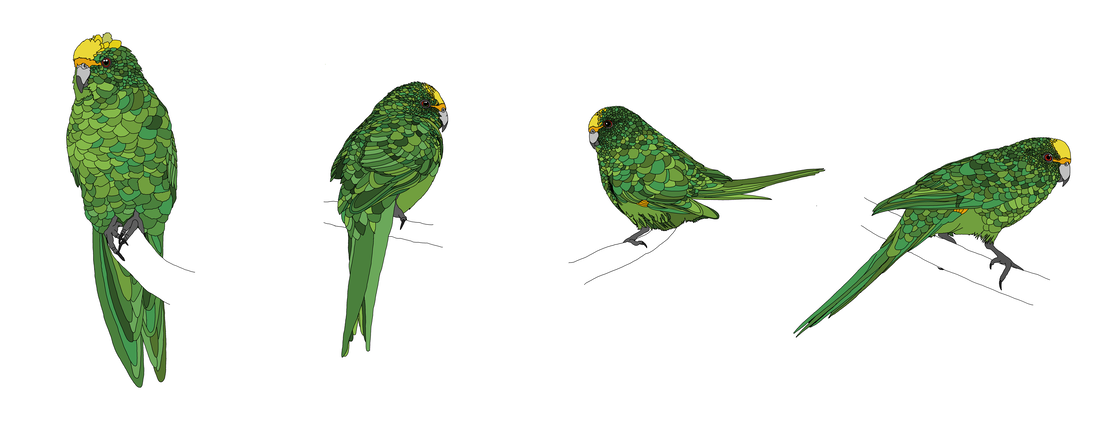
A first quick sketch to decide on what I was going to draw:
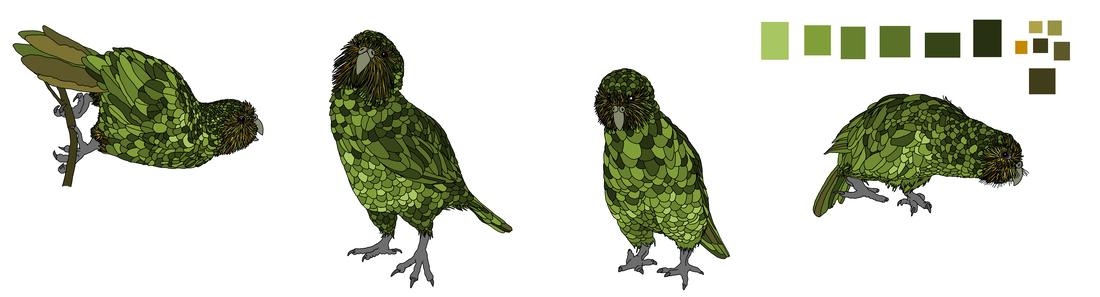
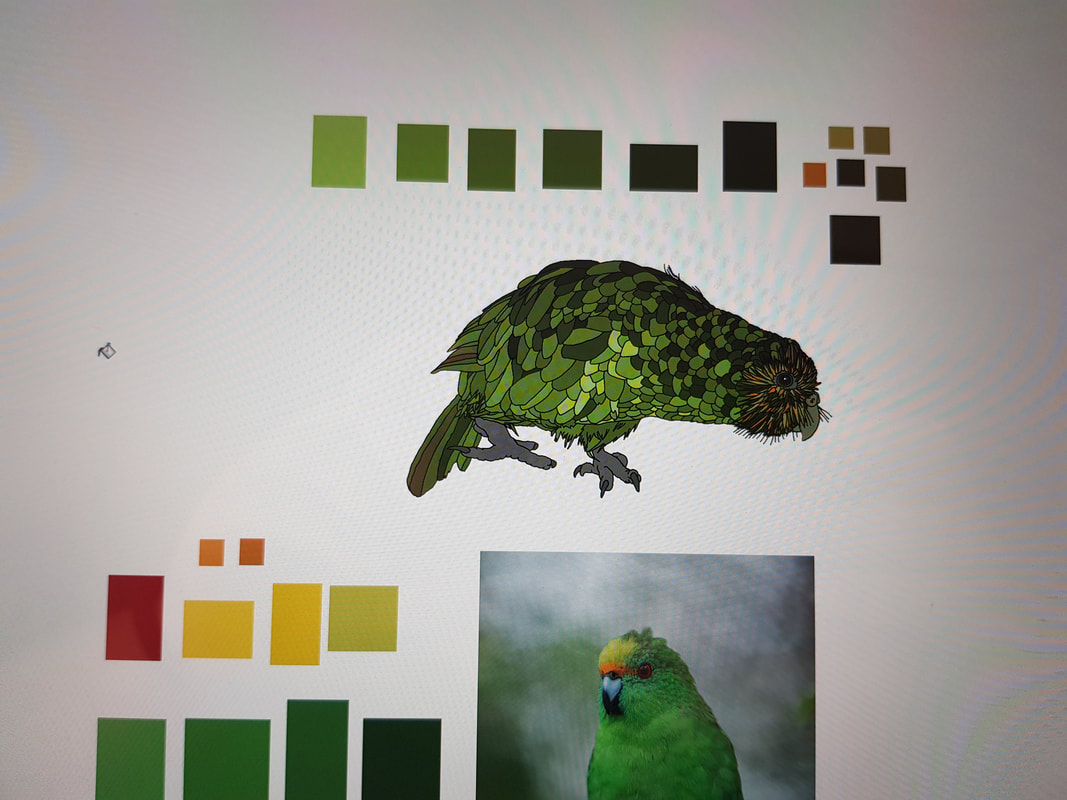
I started out by checking if the colours worked with the kakapo design – and no, they are quite different colours, although there were a couple of shades in common.
I was cranking to get this all coloured and finished in time for the market this afternoon, and I juuuust made it!
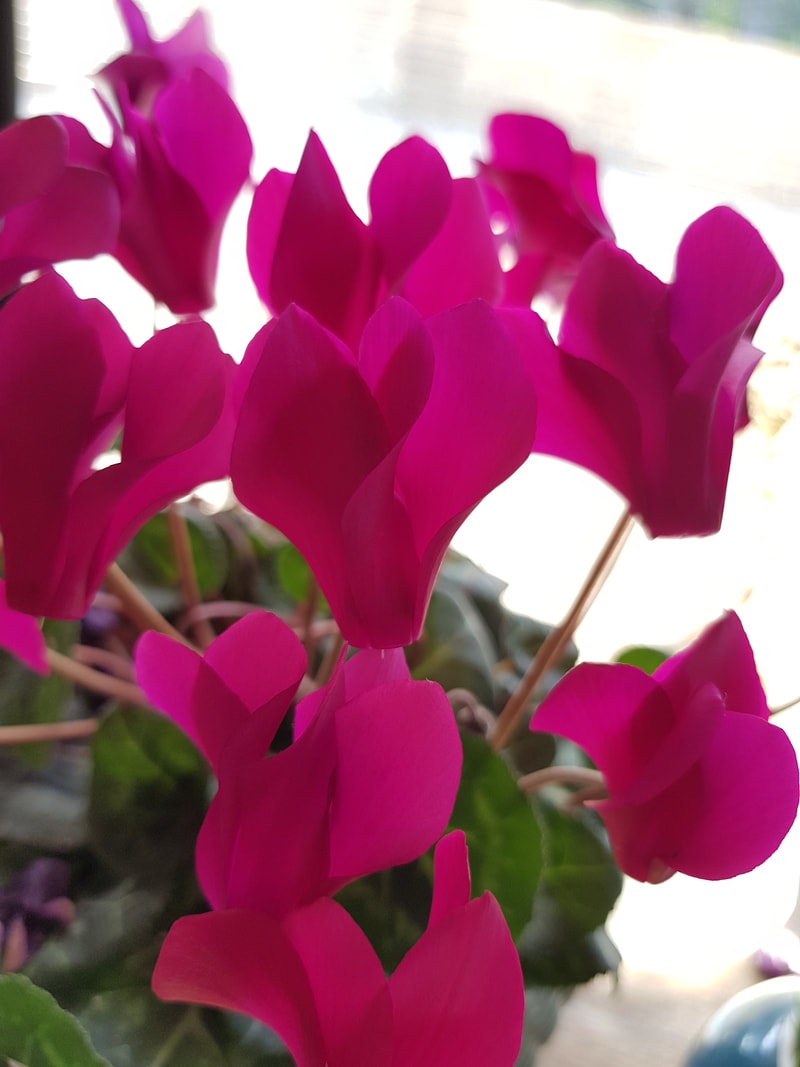
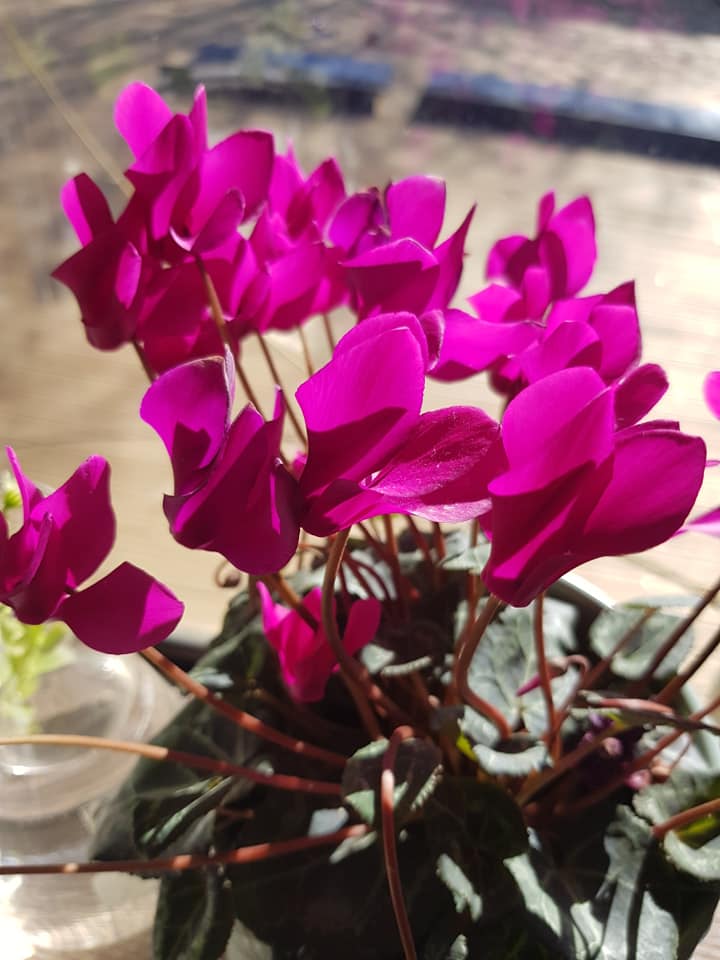
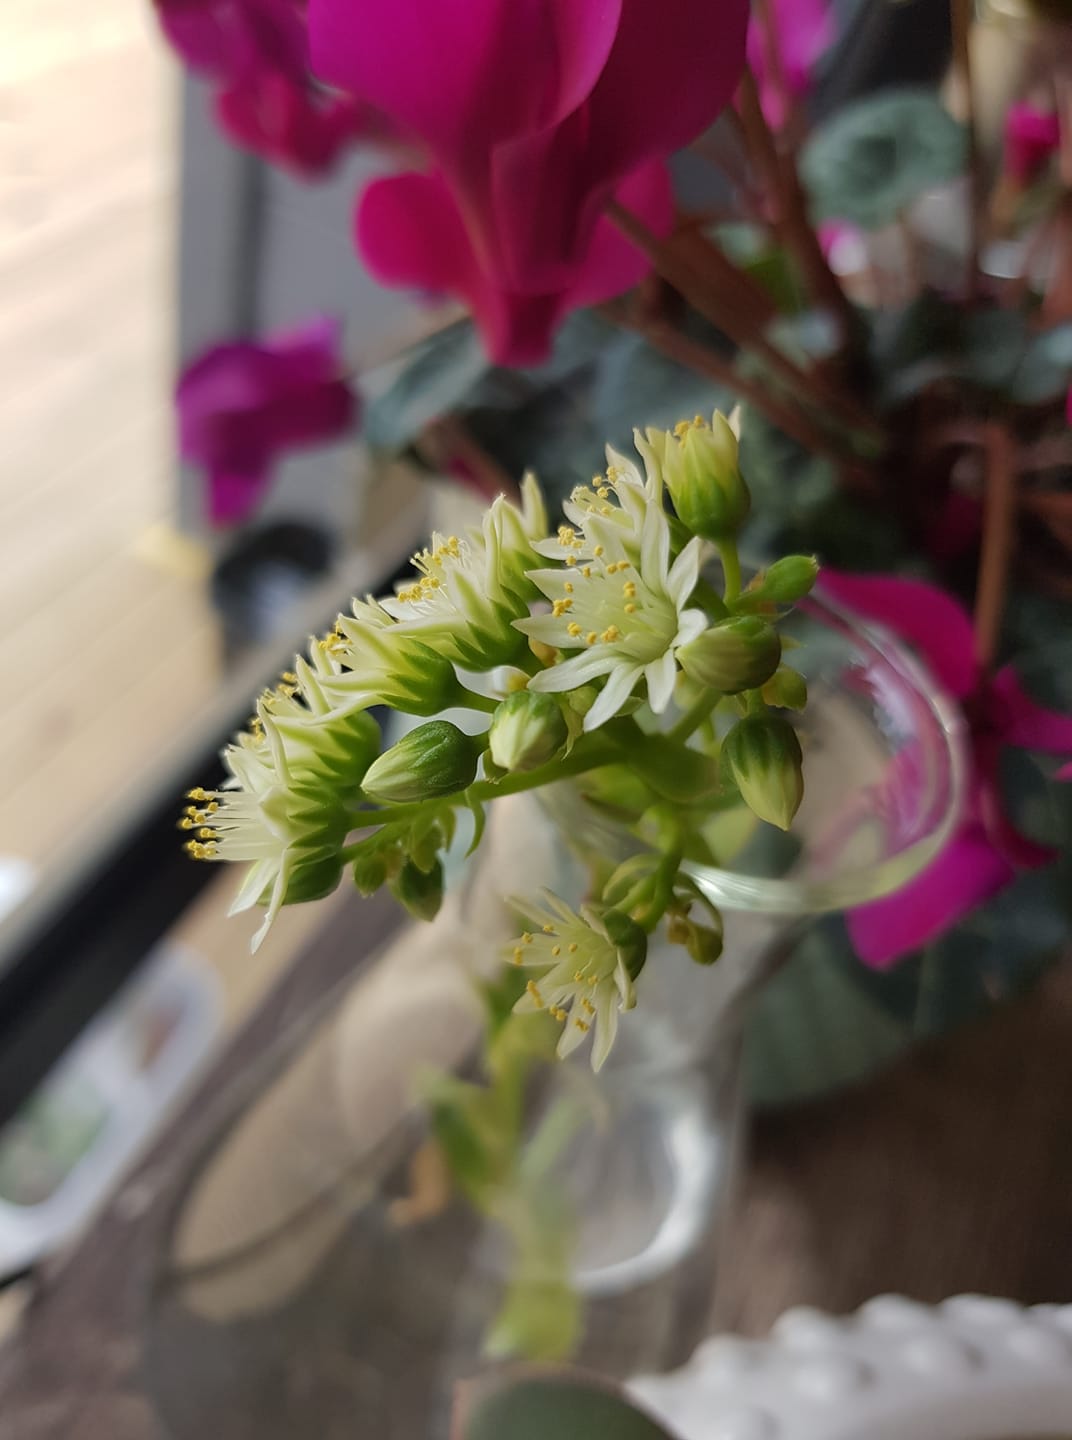
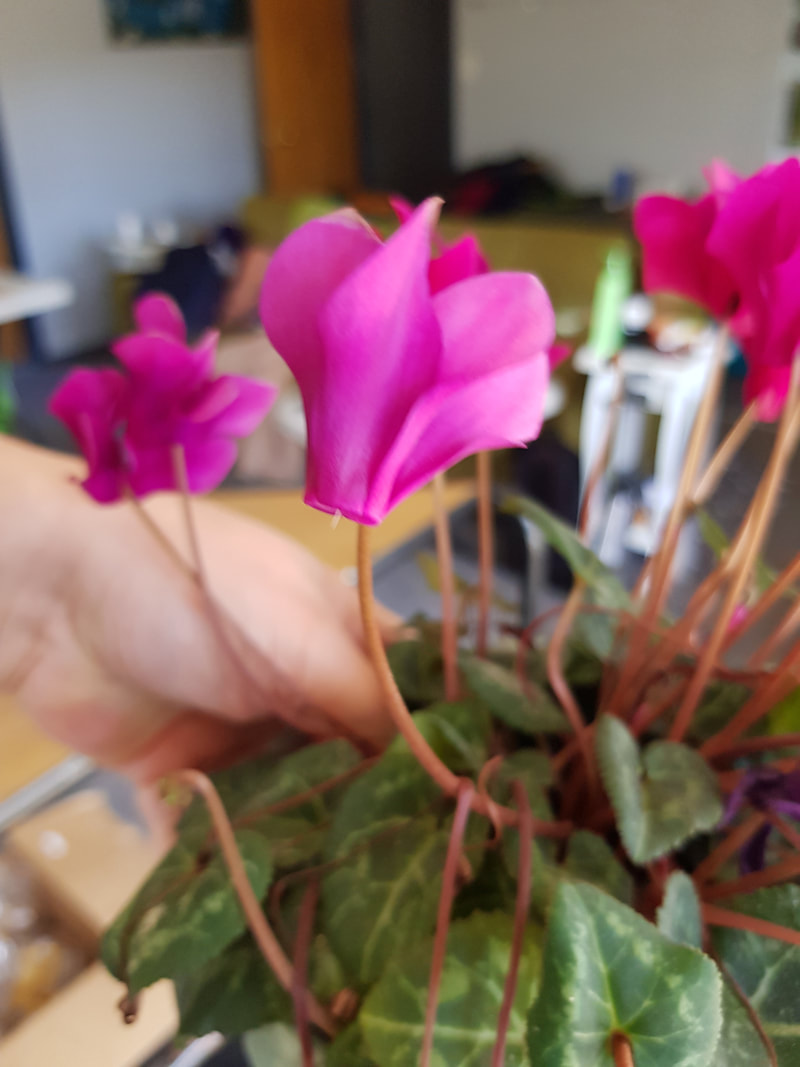
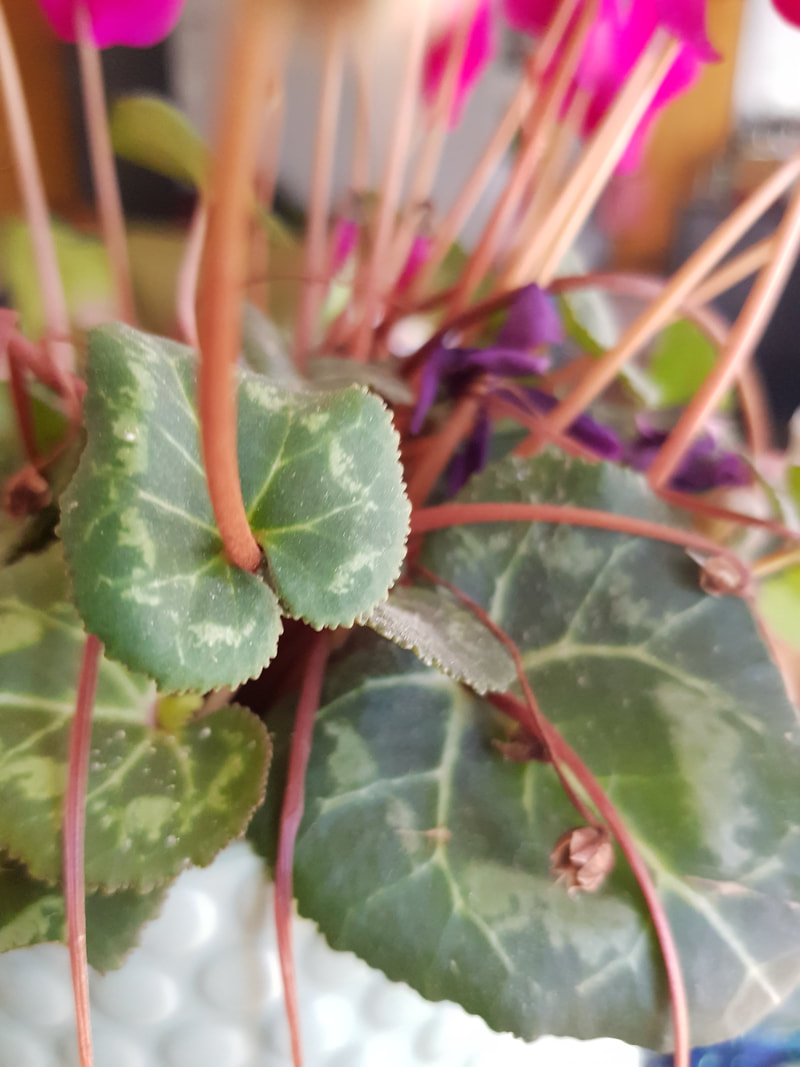
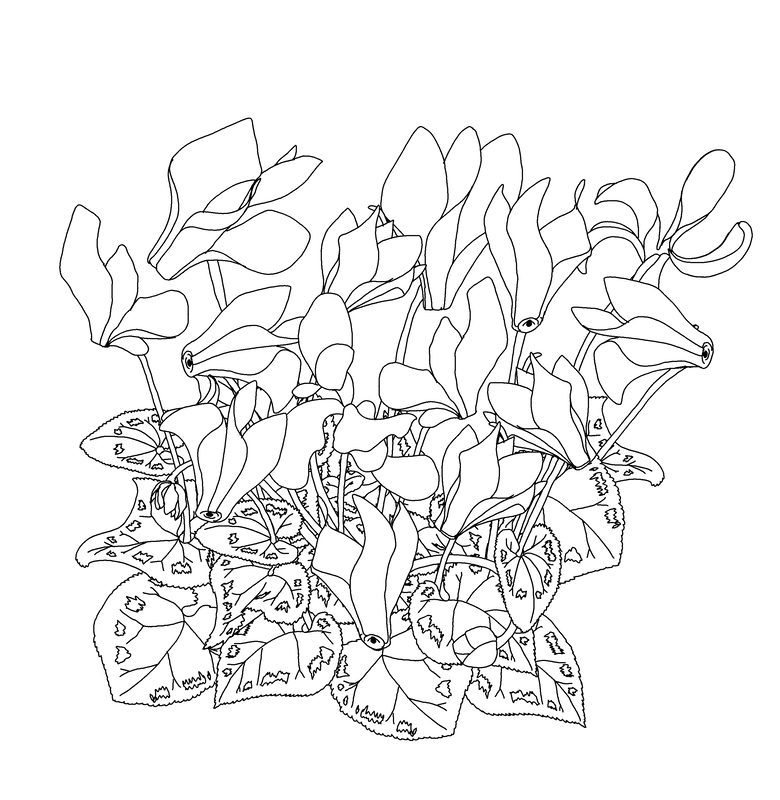
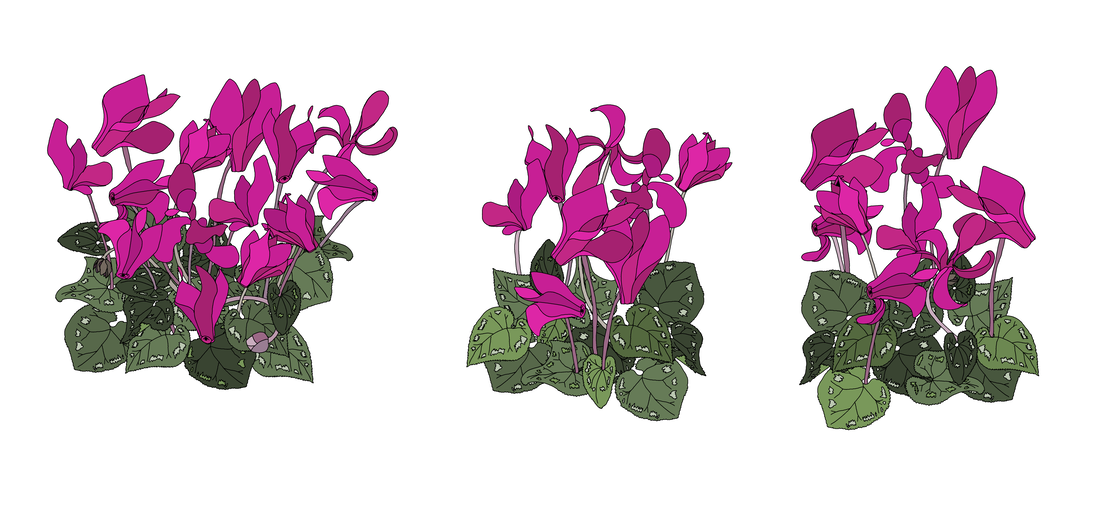
I got this little cyclamen on a whim – I hadn’t even seen one with such tiny flowers, or such a vibrant colour. It cheered me up through the whole of the winter, and is finally going dormant now in late spring. It also made a glorious background to my photos of my succulents, which I have drawn and talked about in this post.
One of the things I find most fascinating is the upside-down, inside-out flowers.
Another interesting thing that I learnt in passing was that the variegation on the leaves is actually not just a variation in the colour of the leaf itself – there are several types of variegation. This one is called “chimeral”, specifically, reflective.
Some variegation is due to visual effects caused by reflection of light from the leaf surface. This can happen when an air layer is located just under the epidermis resulting in a white or silvery reflection. […] Leaves of most Cyclamen species show such patterned variegation, varying between plants, but consistent within each plant.
We are choosing not to print our instructions, to reduce waste and our impact on the environment.
With that in mind, we are going to put instructions for our various Colour-Cut-And-Sew projects on the blog instead.
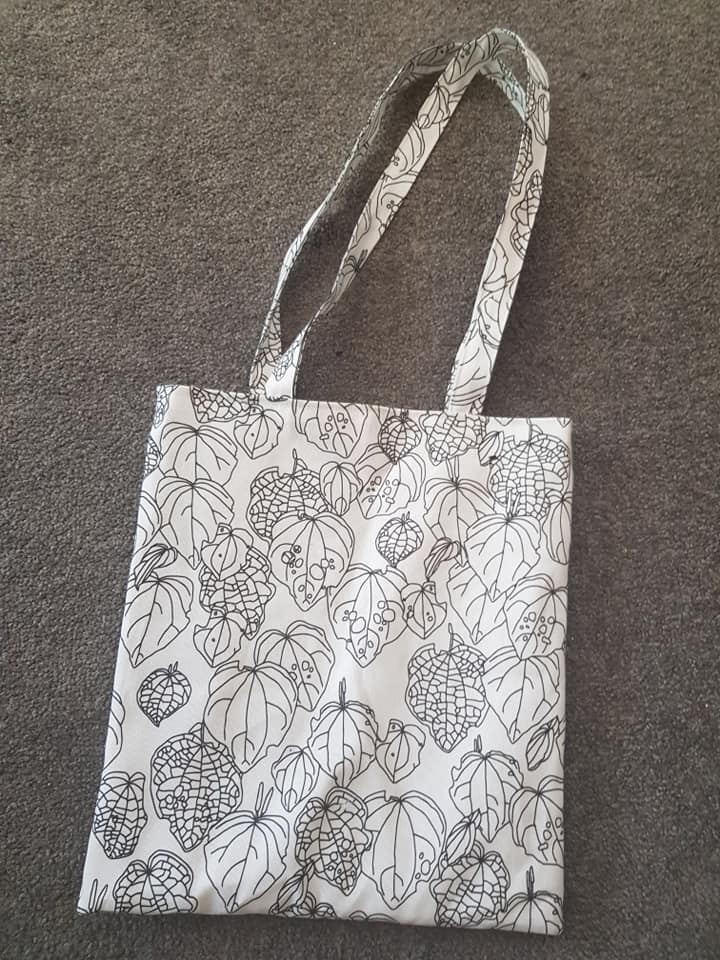
Here’s how to make this bag – lined, and unlined.
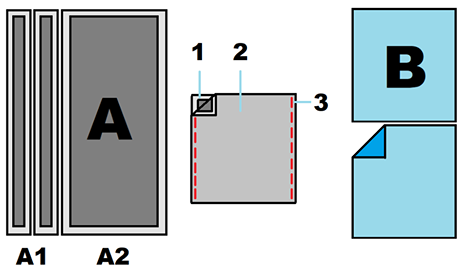
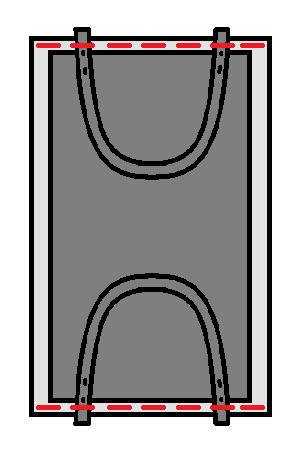
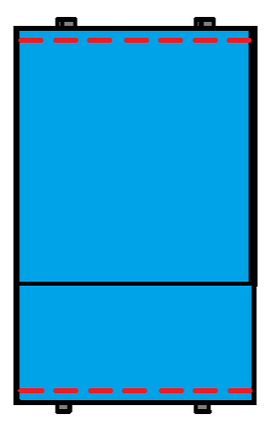
A – your CCS fabric – includes the body of the bag, and two straps. You can colour this in first, or afterwards. Choose whatever colouring media you like, and be sure to follow the manufacturer’s instructions to set the colour. 1 – the ‘good’ side, or printed side, also showing the seam allowance 2 – the ‘bad’ or unprinted side 3 – new stitches to sew for this step
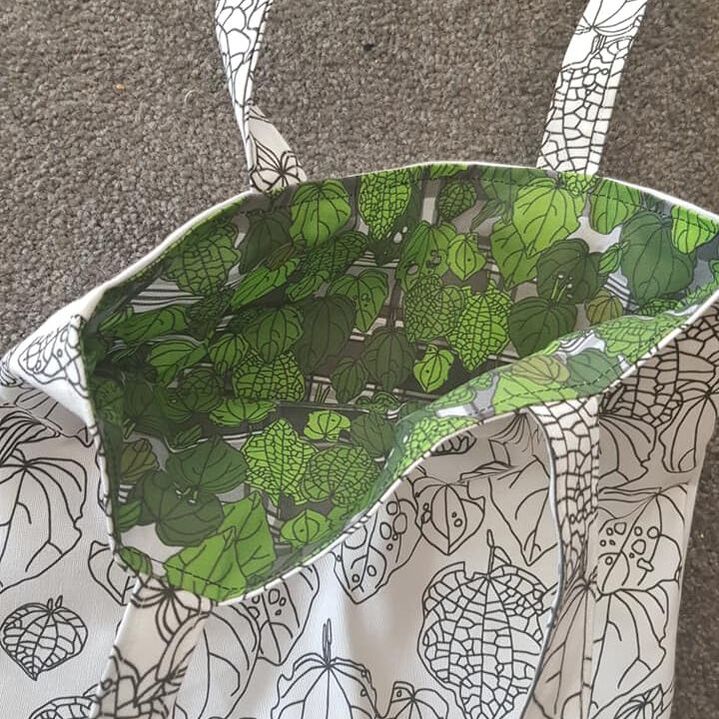
B – when lining the bag, these two pieces can be cut from your own stash, or from Copper Catkin fat quarters. You will need two fat quarters, cut to x by y, where x = the width of A. and y = half the length of A plus a 2cm seam allowance
An example of how “A” looks
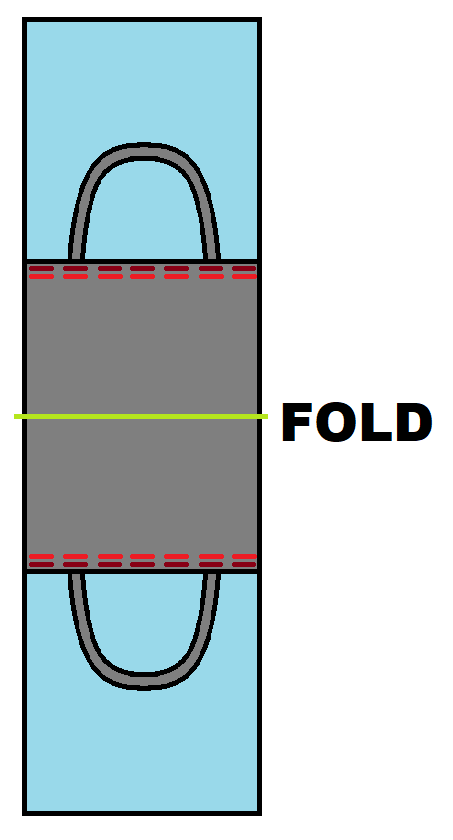
Step 1 – make the straps
Folding the fabric so that the good side is on the inside, form a tube. Sew all down the open side, then turn inside-out. Press neatly with the seam down the middle of one side.
Step 2 – attach the straps
Pin the pressed straps to the good side of the bag, and stitch in place along the top.
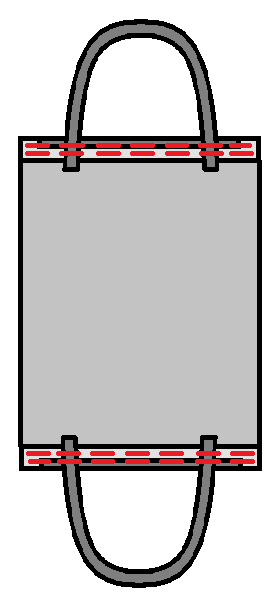
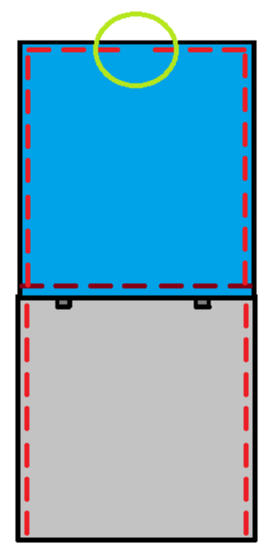
Unlined bag – step U1
Fold towards the “bad” side and press along the top edges, then stitch two more rows to secure the straps.
Unlined bag – step U2
Folding the bag in half with the good side facing inwards, sew the two side seams.
Unlined bag – step U3
Turn right-side-out, and press. Your unlined bag is finished!
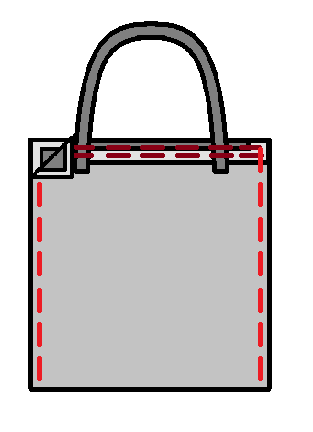
Lined bag – step L1
Complete steps 1 and 2 as above. Attach your lining along the top edges of the bag. The two lining pieces should overlap a little – this will form the seam allowance for the bottom of the lining.
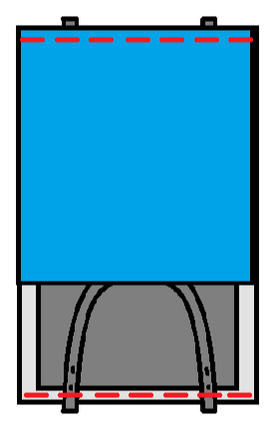
Lined bag – step L2
Flatten out the bag and sew along the top edges, below your previous stitches, to reinforce the handles. Ensure you are not sewing the lining as well at this stage.
Lined bag – step L3
Fold the whole length of the bag in half, good side inwards, and sew up the sides and along the bottom of the lining, leaving a gap at the bottom of the lining.
Lined bag – finishing
Turn the bag right-side-out by pulling it through this gap, then stitch gap closed, and press if desired.
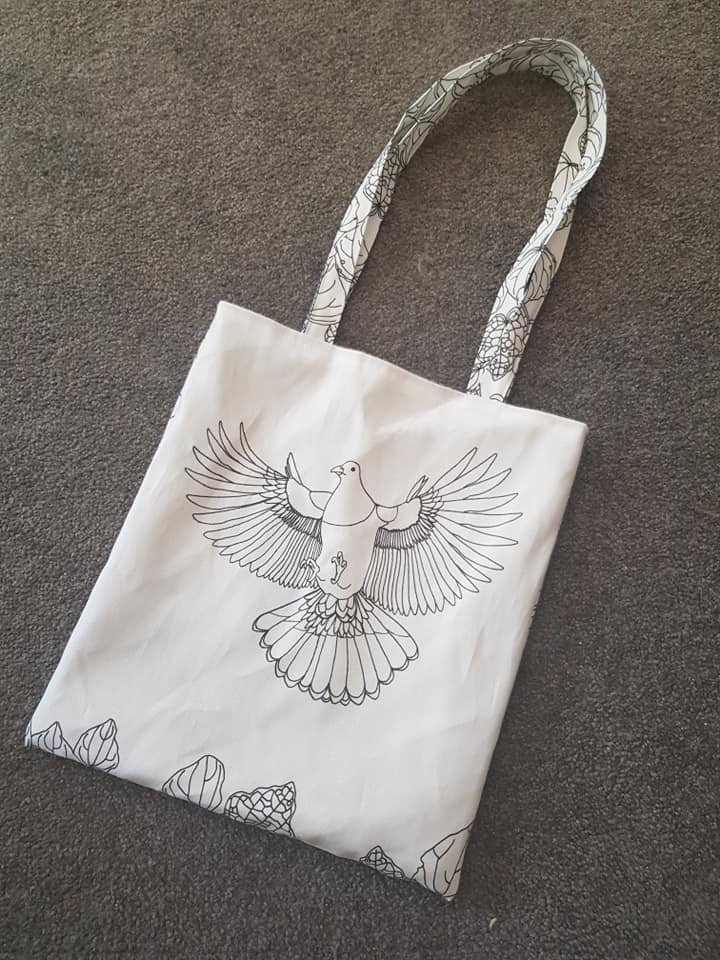
And here’s an example of a finished bag for reference:
How did you get on with yours? Pop over to our Facebook page and send us a message with photos, if you like!
Click on this photo to read more about the design process for this bag
Click on this photo to shop for CCS projects on Spoonflower
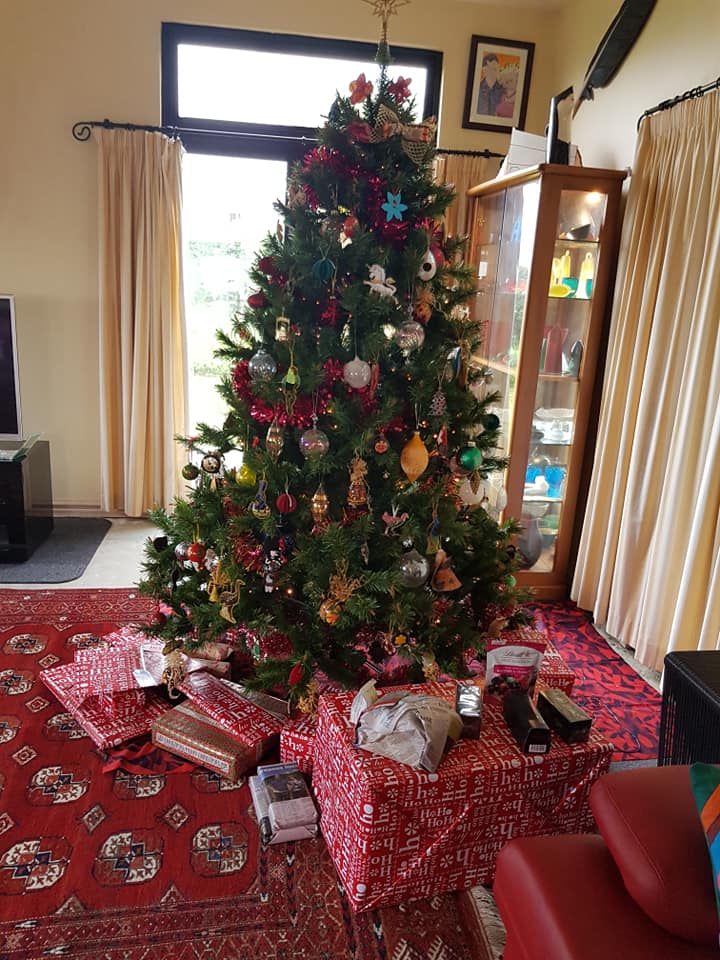
In New Zealand, we really only have one major “holiday” a year – Christmas. Even though a great many New Zealanders do not identify as Christians, it’s still a holiday that many of us celebrate. At Copper Catkin HQ, we are a secular household who love to decorate the tree and exchange gifts – particularly when they give us an opportunity to purchase from other small businesses – and we begin planning and shopping for our gifts towards the middle of the year.
2018 was supposed to be our last Xmas in NZ, so we went all out – here’s a small selection of gifts we gave, because I really enjoy looking at them again.
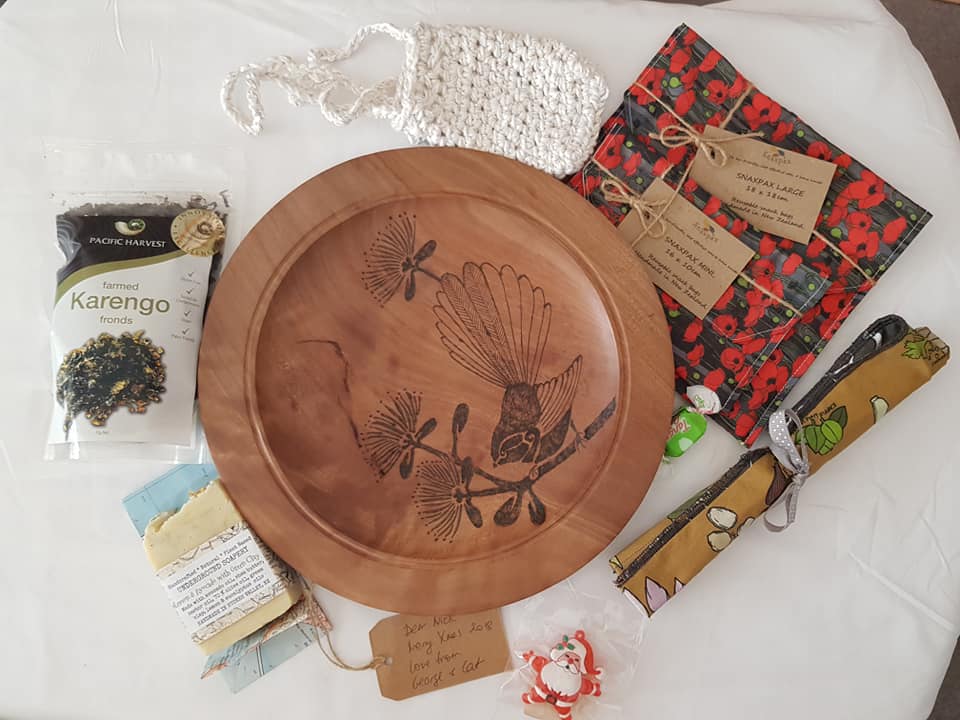
Nick got some interesting seaweed from Moore Wilson’s, a soap saver by Shop Nikkis and soap from Underground Soapery, custom Snaxpax, a Copper Catkin cutlery wrap, a traditional tacky Santa badge, and, of course, a beautiful bowl by Burnt Offerings.
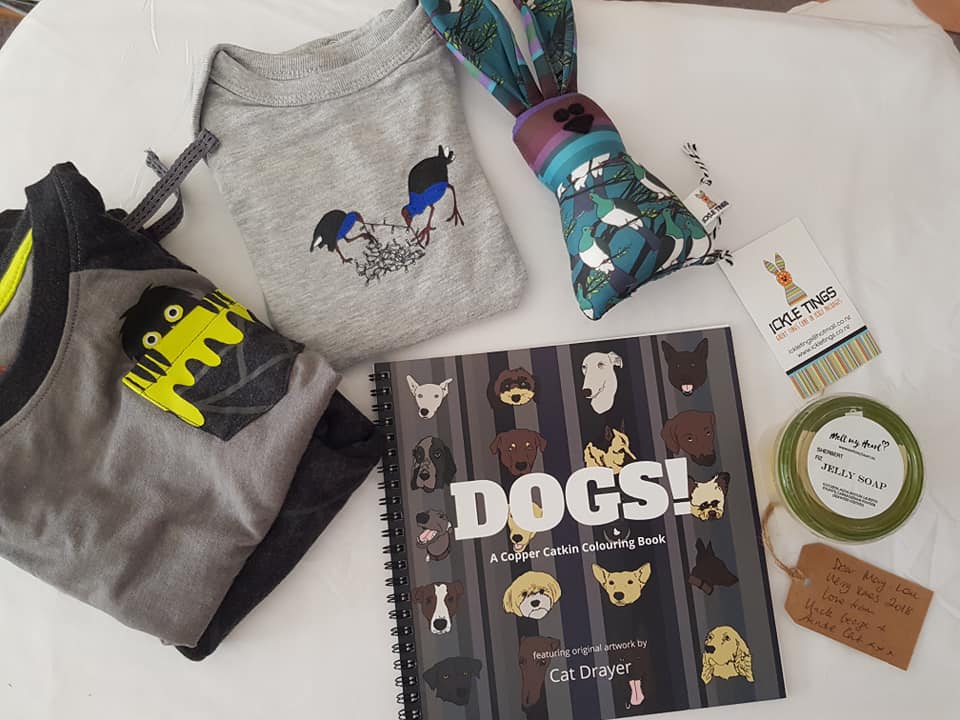
Mary-Lou got a top and trouser set from Portland, a Copper Catkin bodysuit and colouring book, an Ickle Wabbit by Tings, and a jelly soap from Melt my Heart.
Maura got a Pretty Fkn Expletives tea towel, custom Snaxpax, Korowai Oils zest, kawakawa tea by The Very Green Gardener, wet bag by Tings, soap by Underground Soapery and soap saver by Shop Nikkis, face scrubbie by Calluminati Crochet, and a Copper Catkin cutlery wrap.
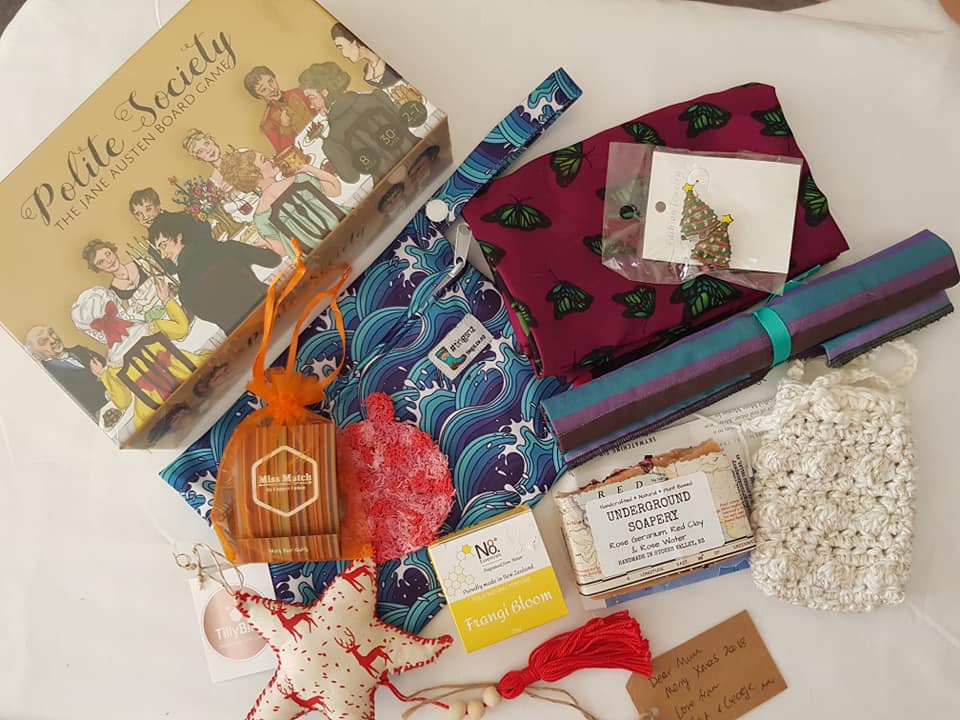
Christine got polite society, a Copper Catkin cutlery wrap, scarf, and earrings, a Tings wet bag, a Shop Nikkis soap saver to go with her Underground Soapery soap, a face scrubbie by Calluminati Crochet, a decoration by Tilly Bird, and a perfume by No8Essentials, plus the traditional tacky Xmas earrings.
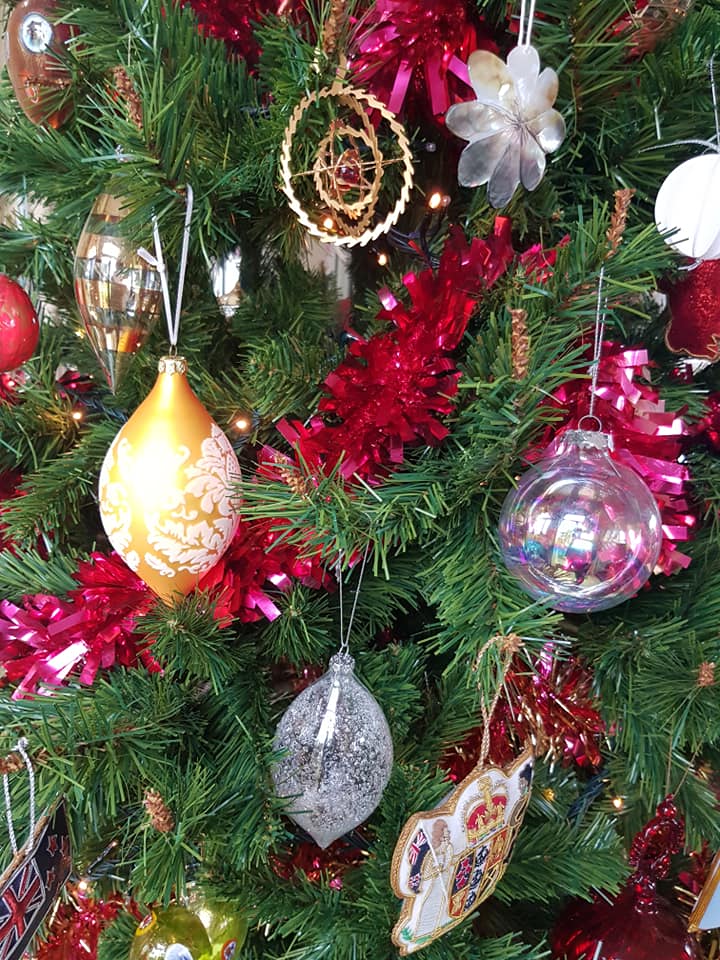
My mum collects ornaments for their tree, so it’s the souvenir of choice when we travel, or when we visit Xmas markets.
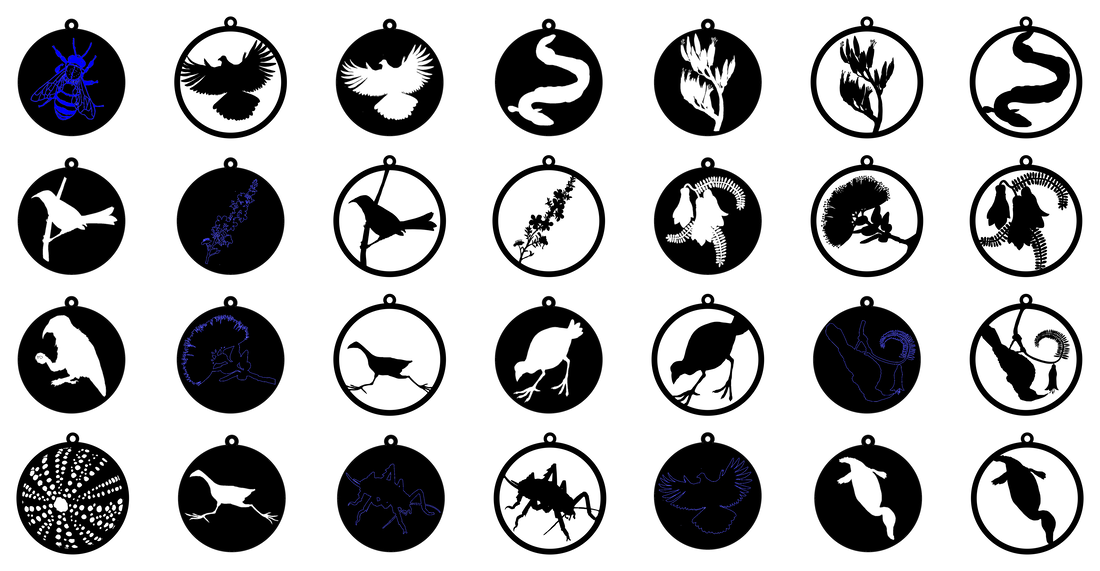
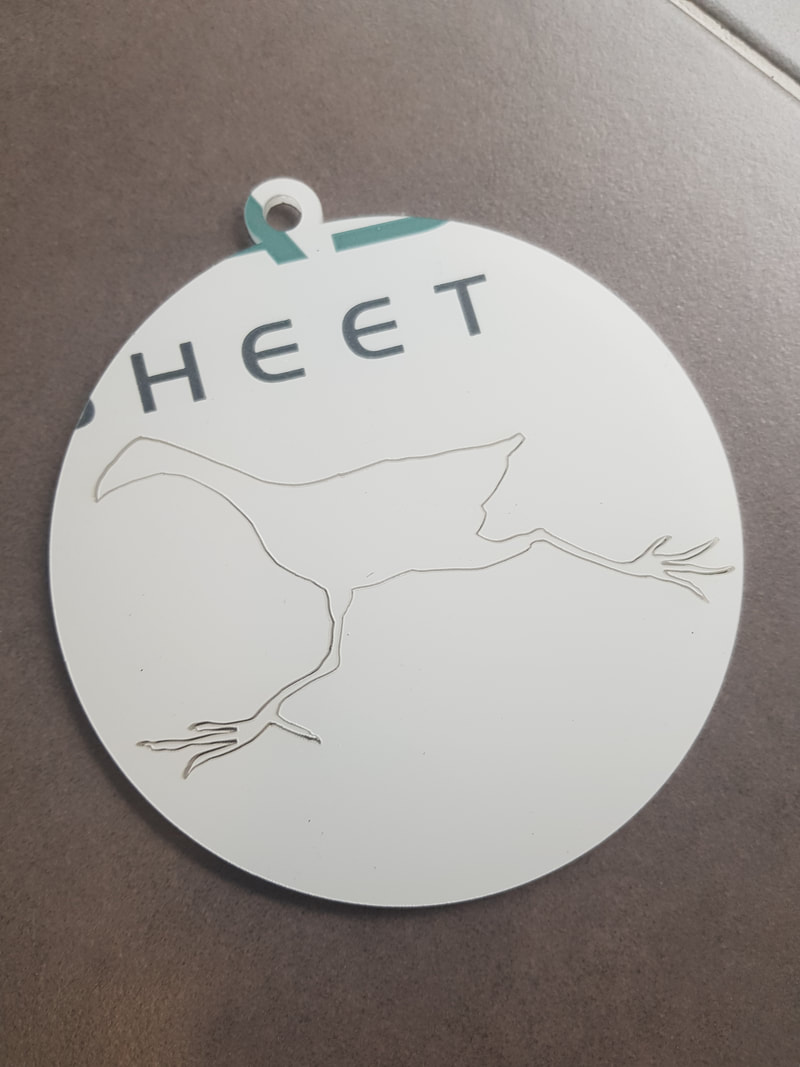
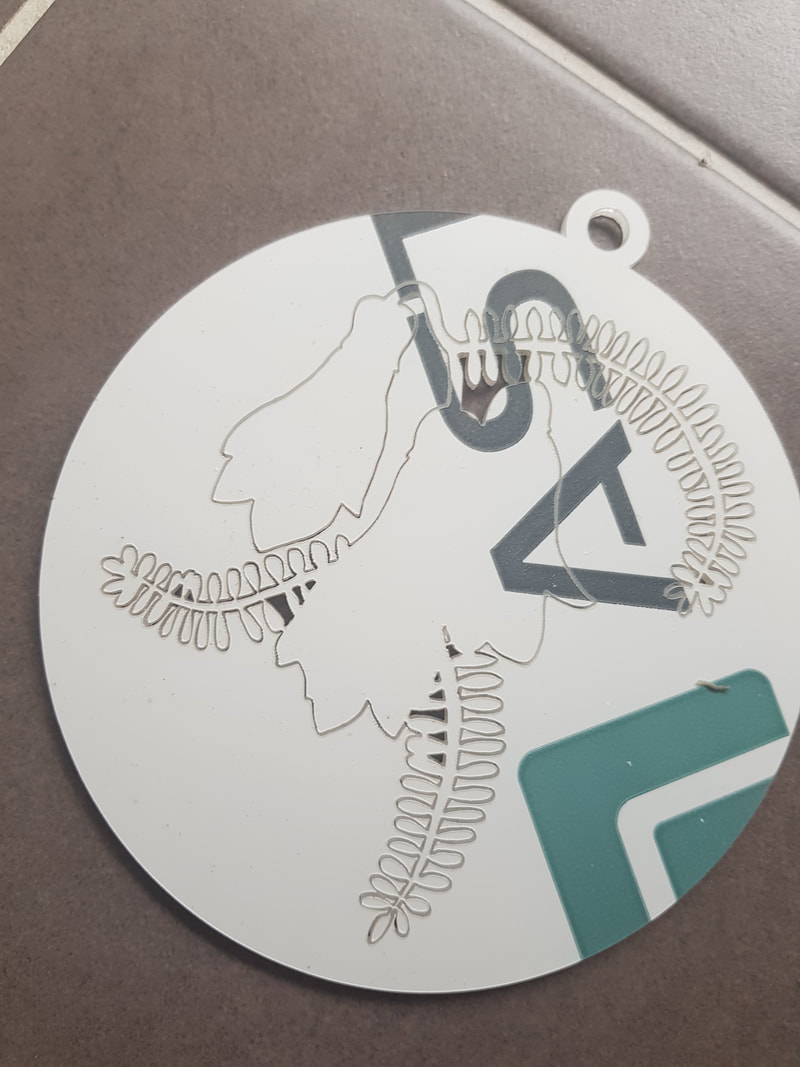
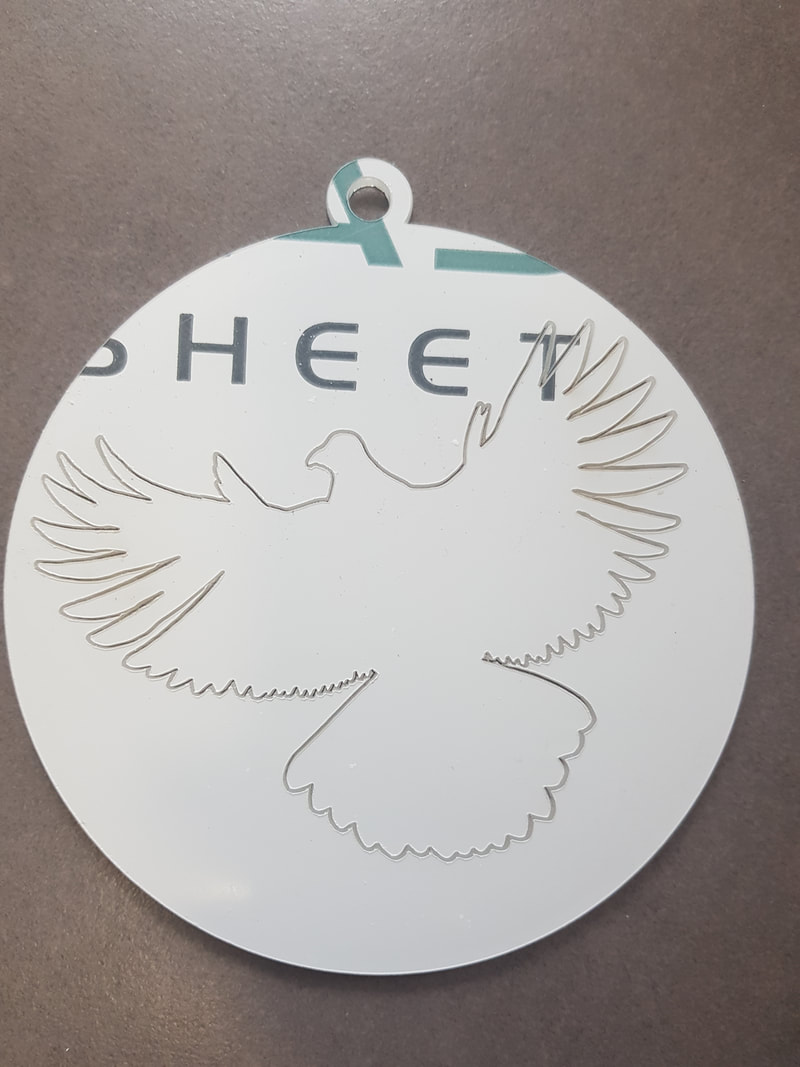
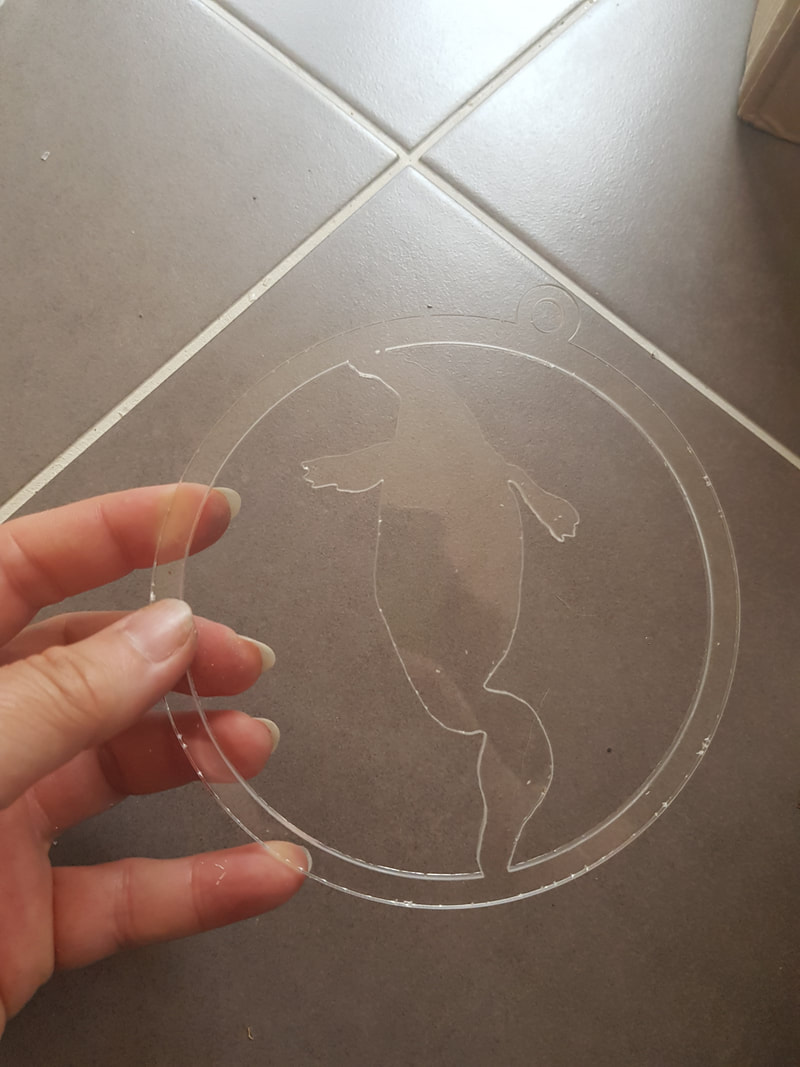
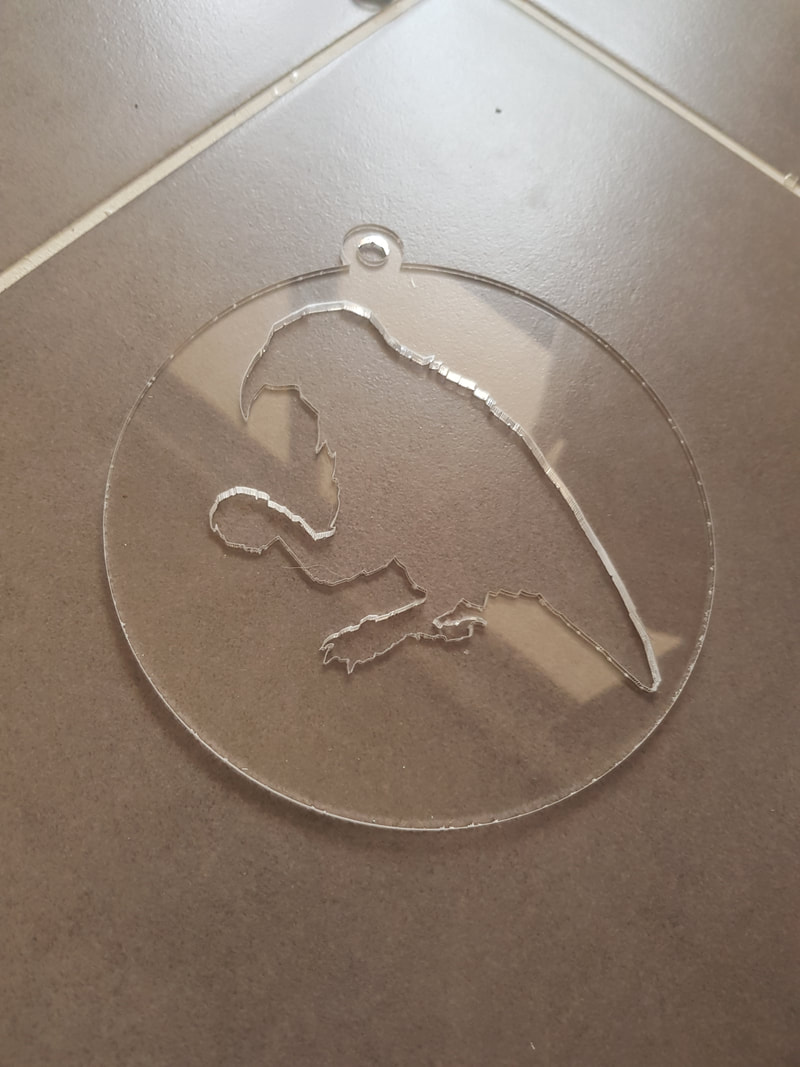
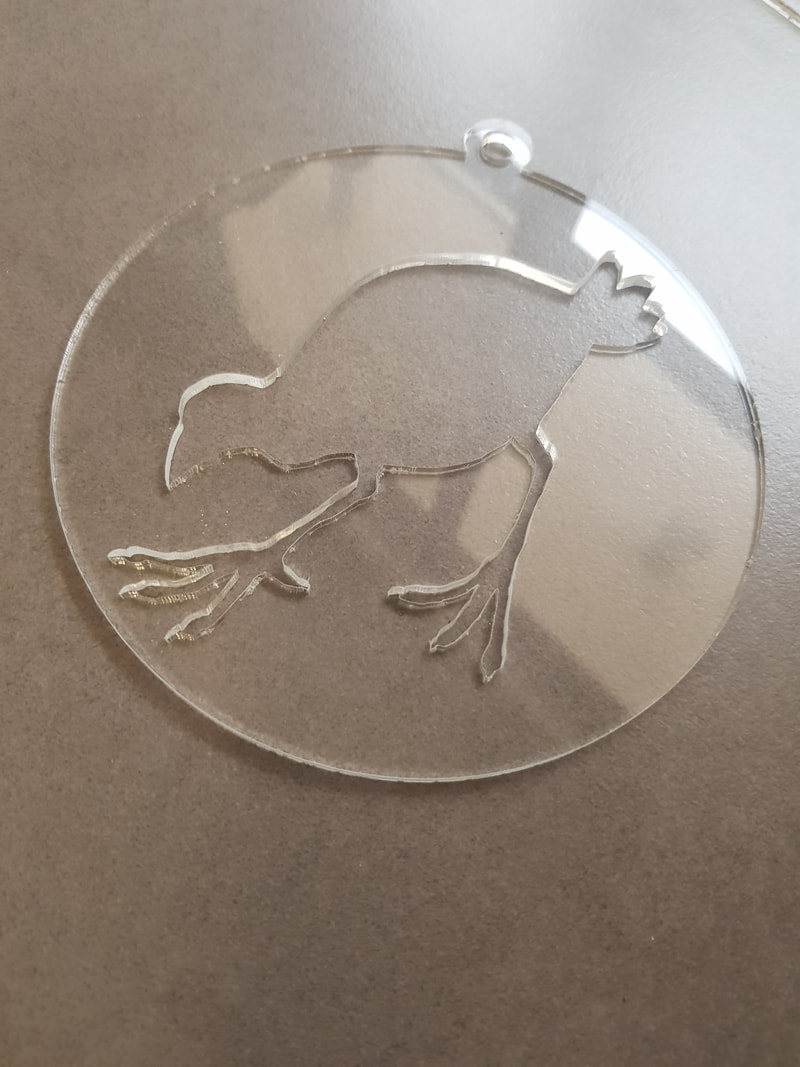
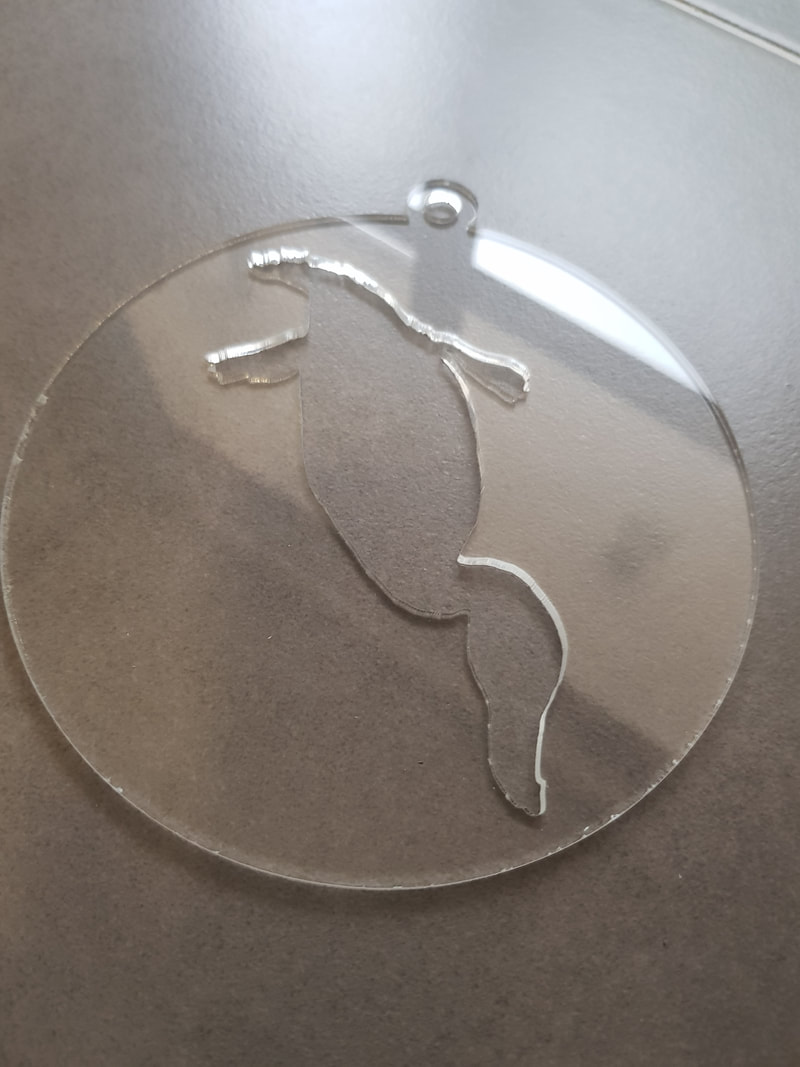
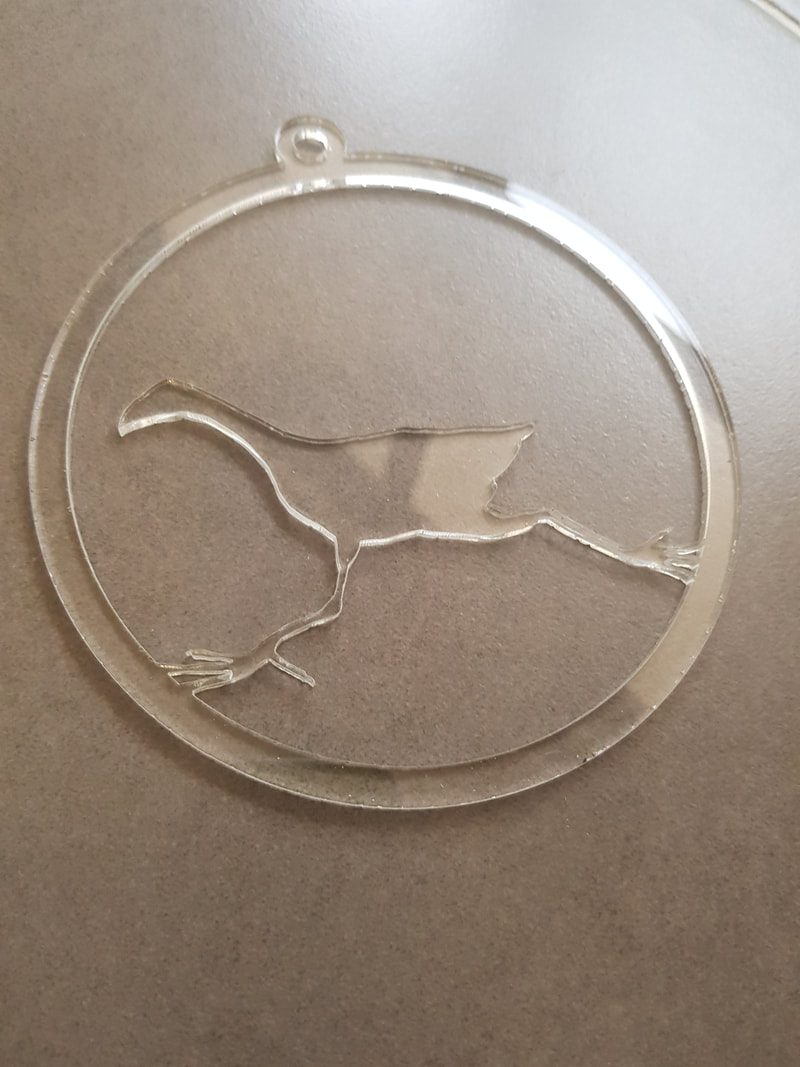
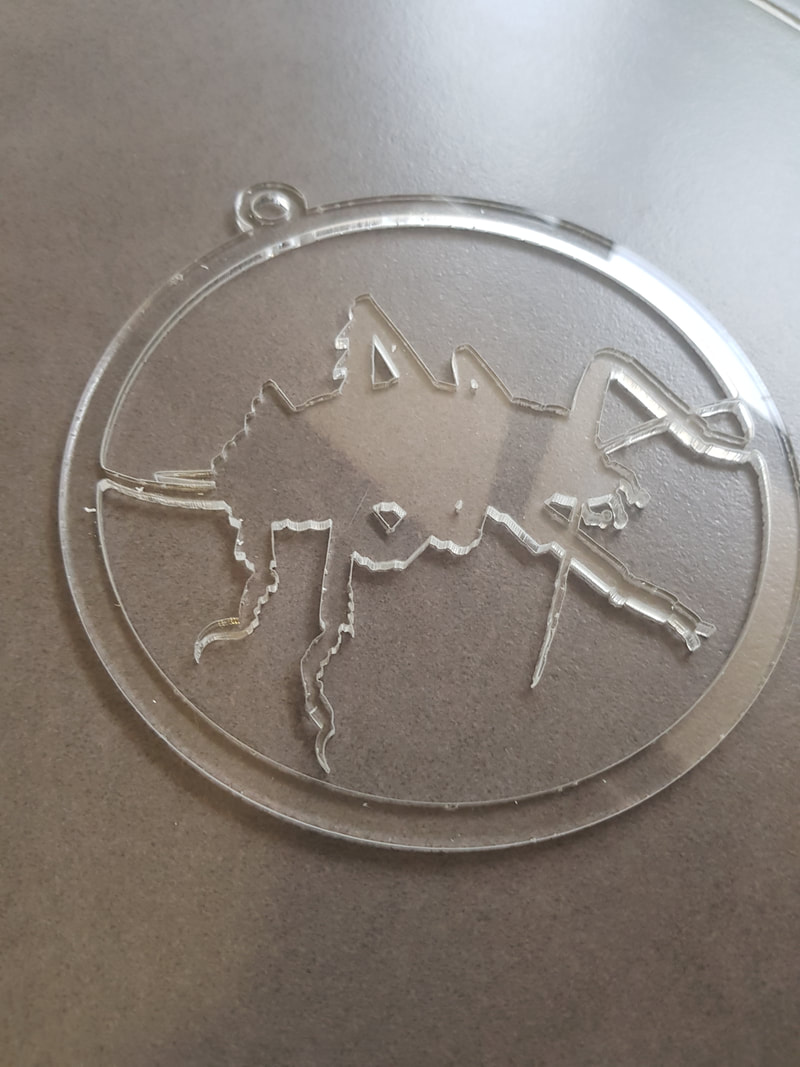
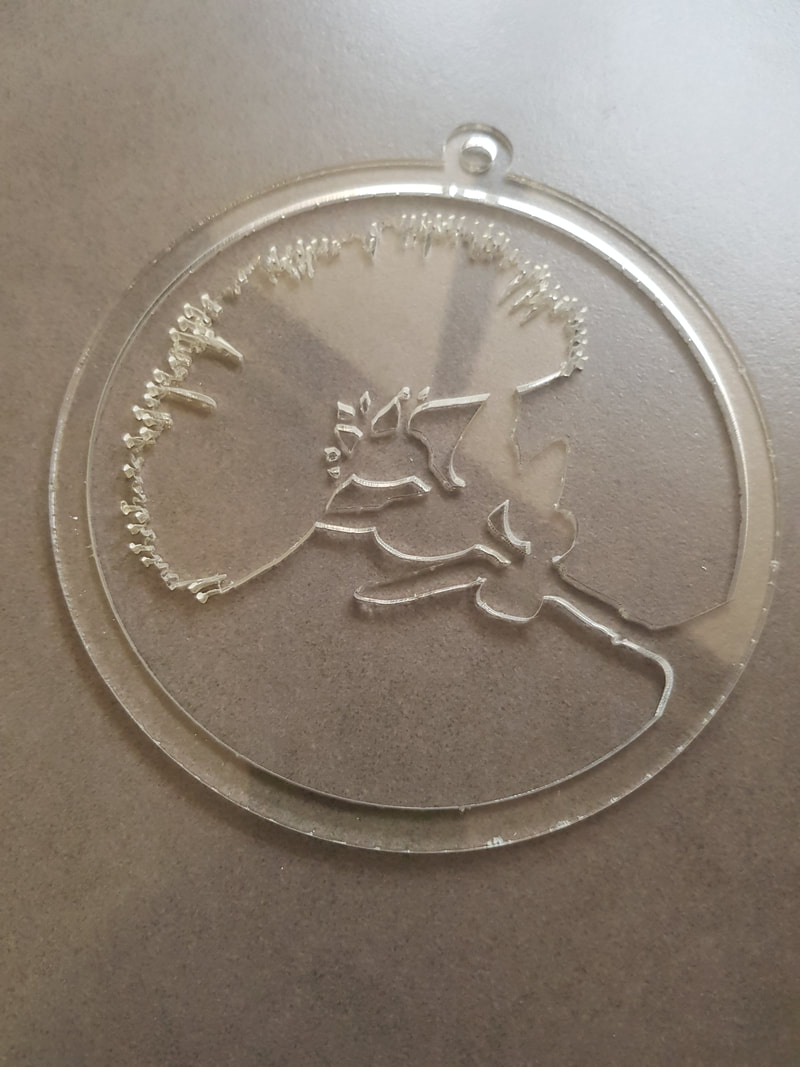
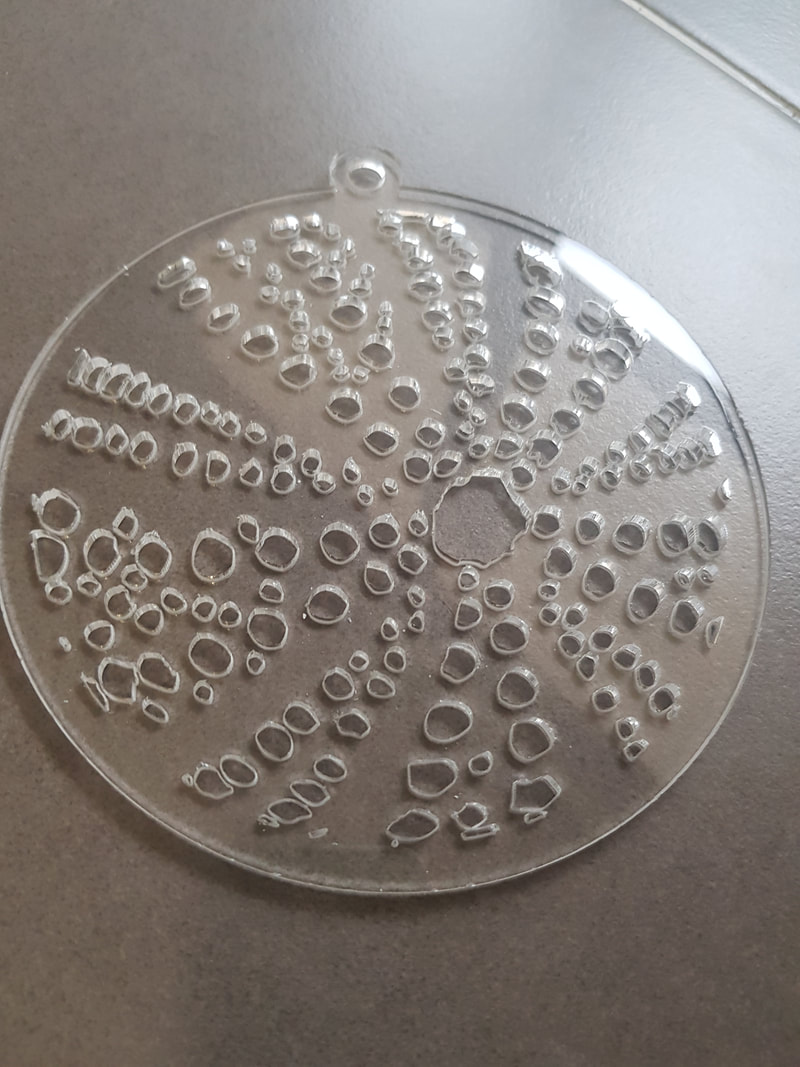
One thing that we (well, I) really hate is when it’s time to put the tree away – so this range of decorations is designed to be suitable all year round. There’s nothing religious, and nothing seasonal – you can use them anywhere, any time. Here’s how we designed them.
The concept
I started with the idea of my popular designs as a starting point, but simplified to suit the laser-cutting requirements.
Initial ideas
Ideas that made it to the next stage of development
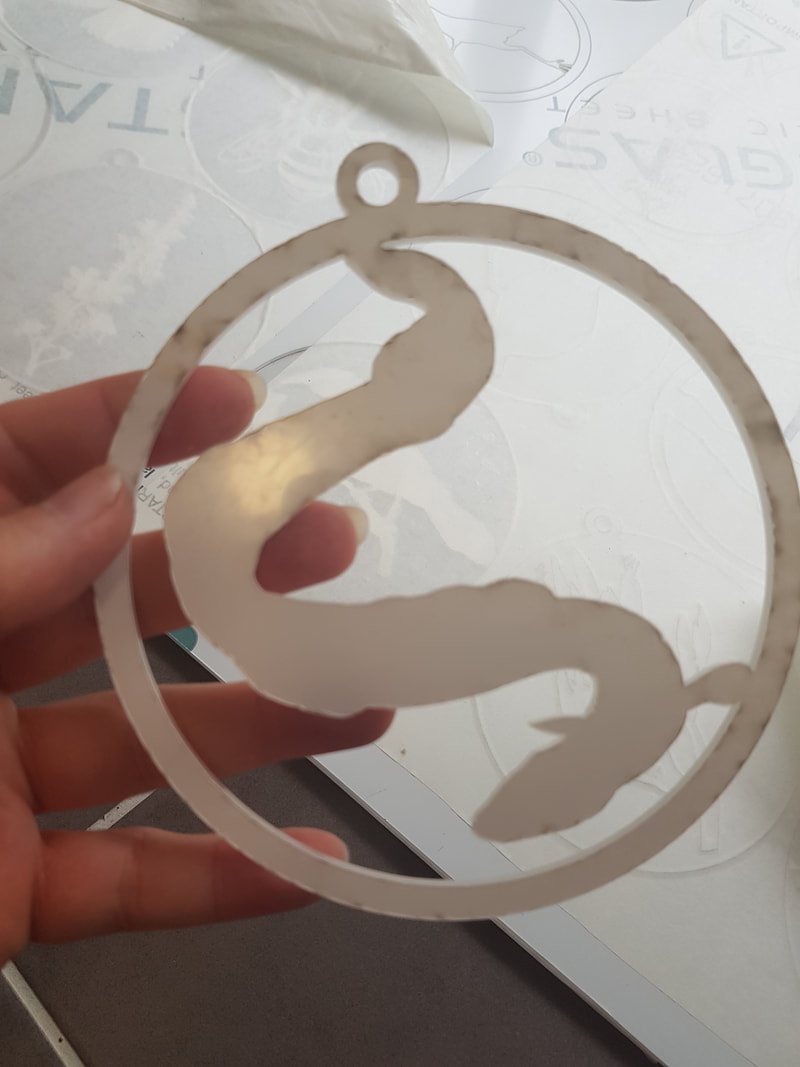
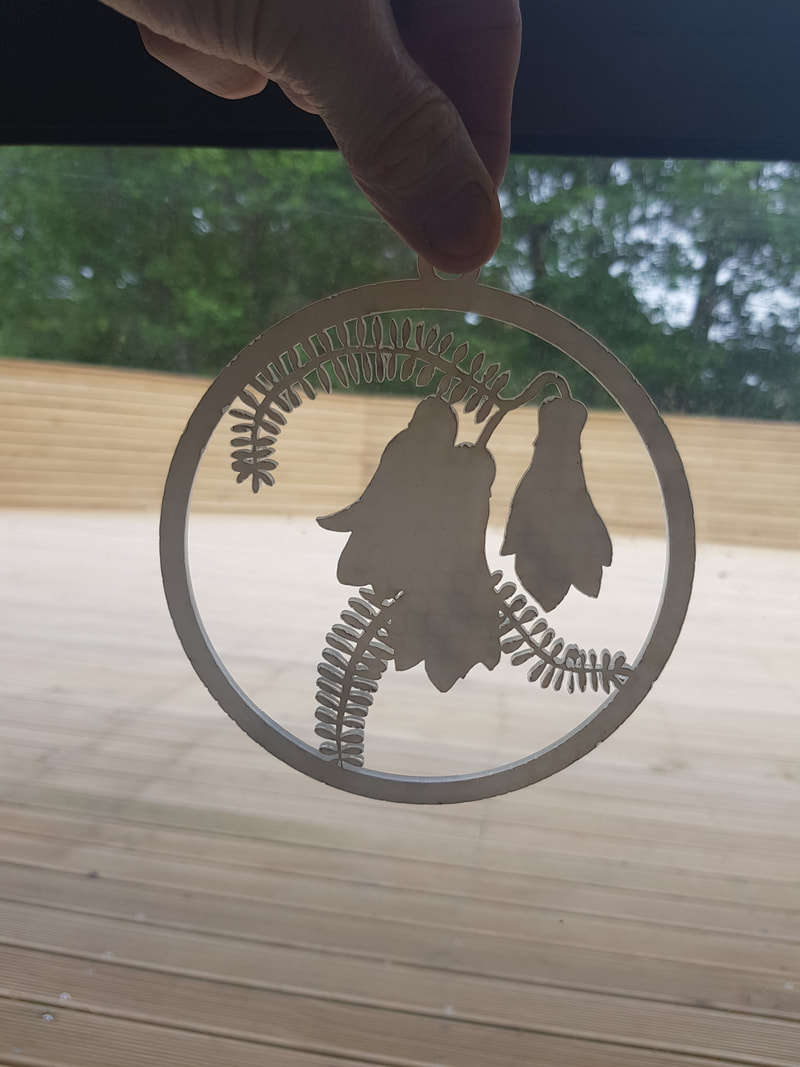
At this point, I handed the concept over to El Huz, who developed the images into vectors, then into between one and three of the following options:
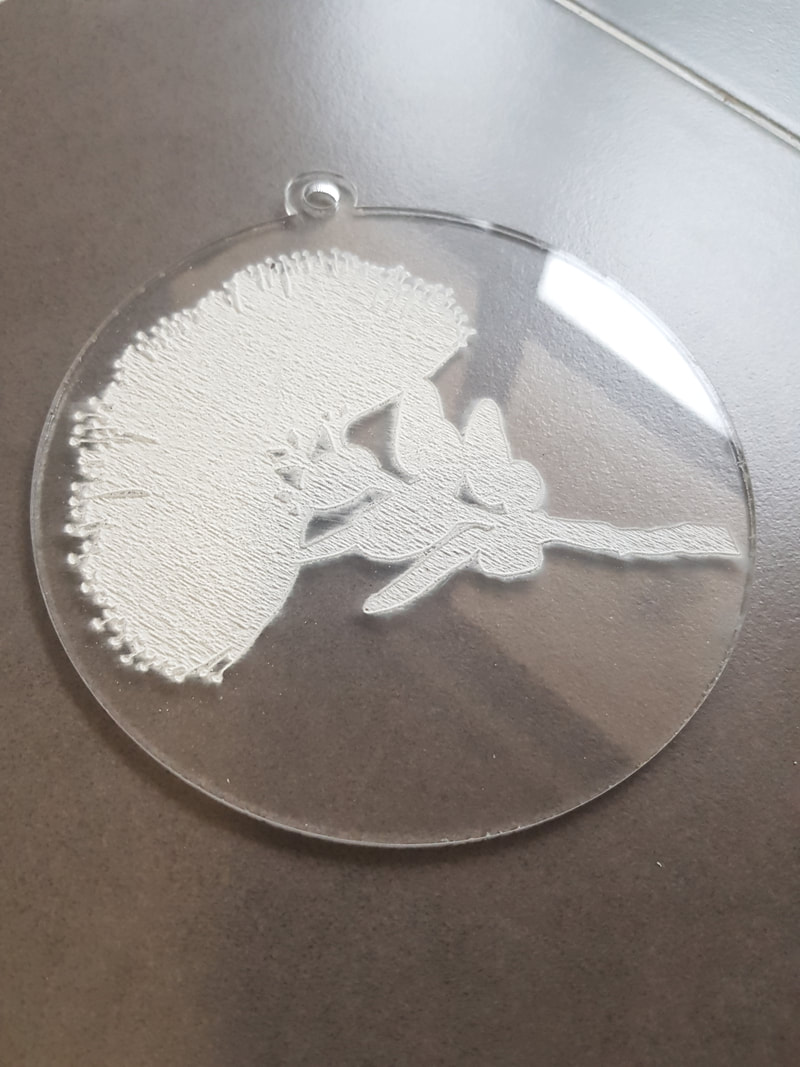
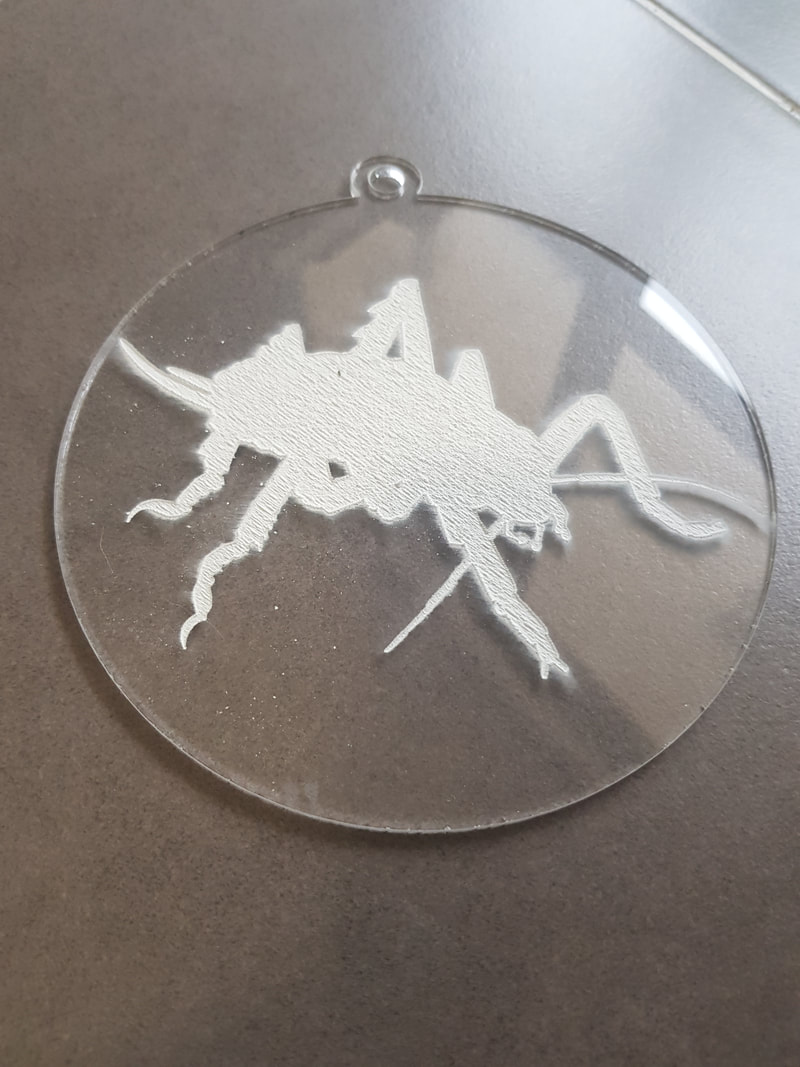
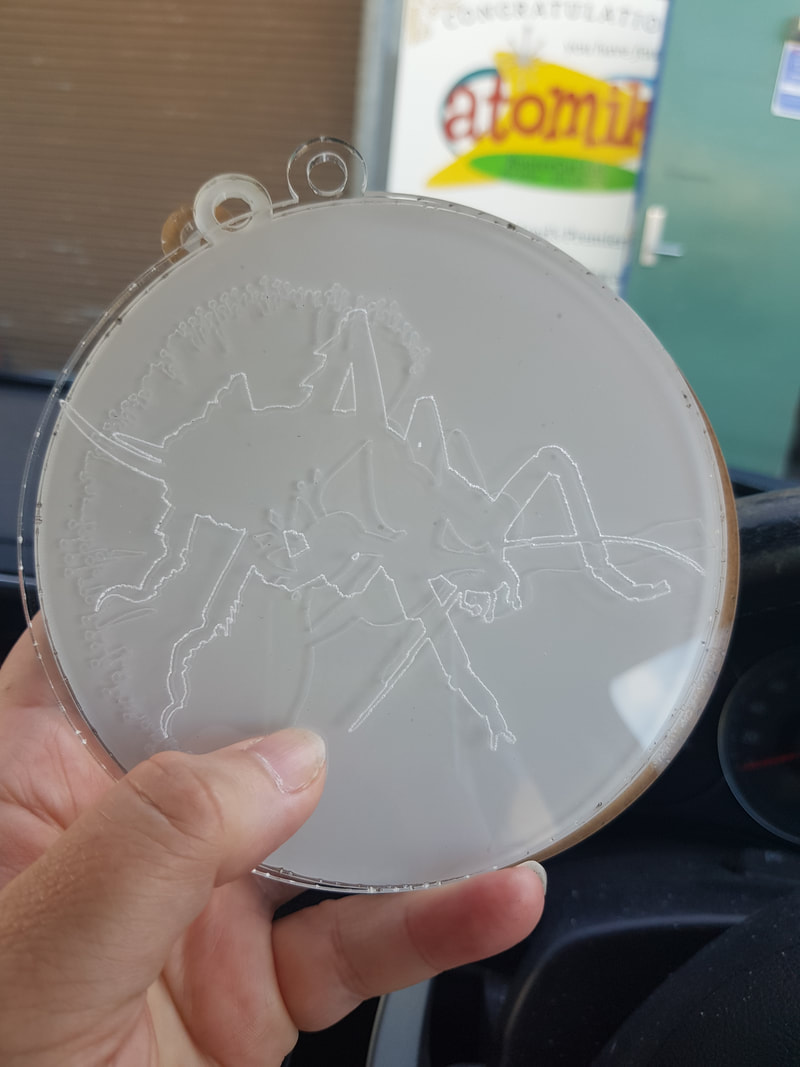
a solid piece, with an engraved motif
a solid piece, with a motif carved out of the centre
a solid central motif, joined to a circular frame
1 – engraving indicated by blue lines
2 – motif removed from the centre
3 – motif suspended in circular frame
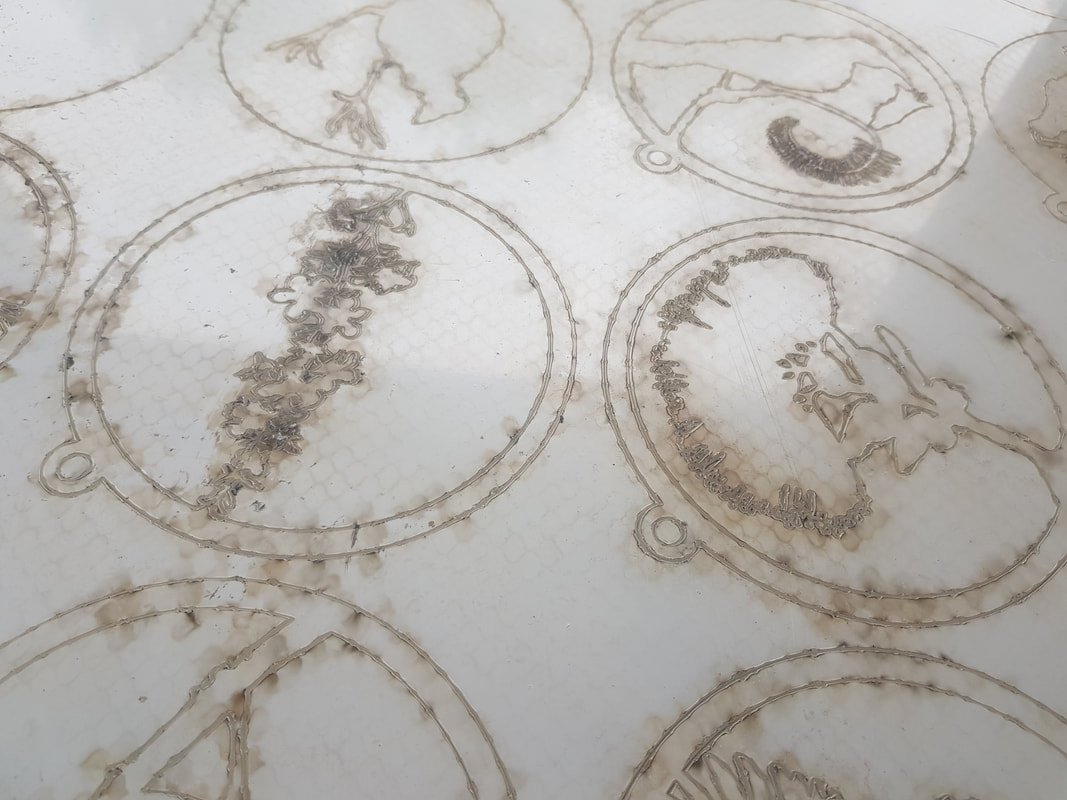
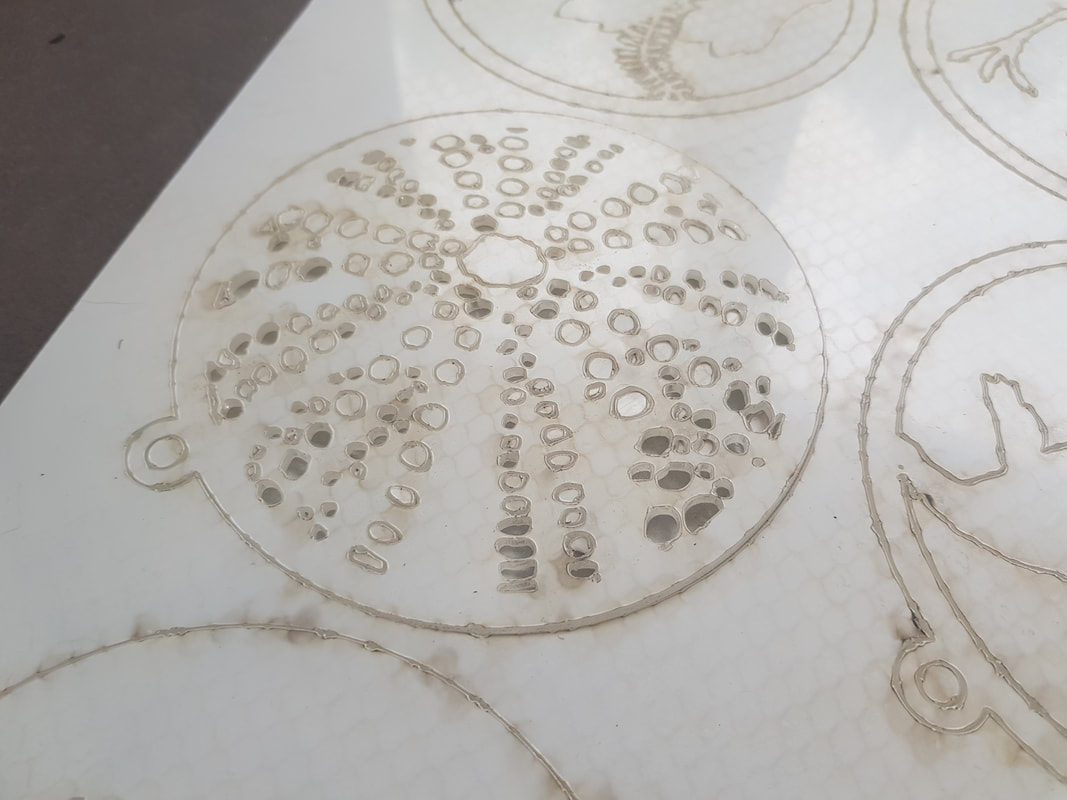
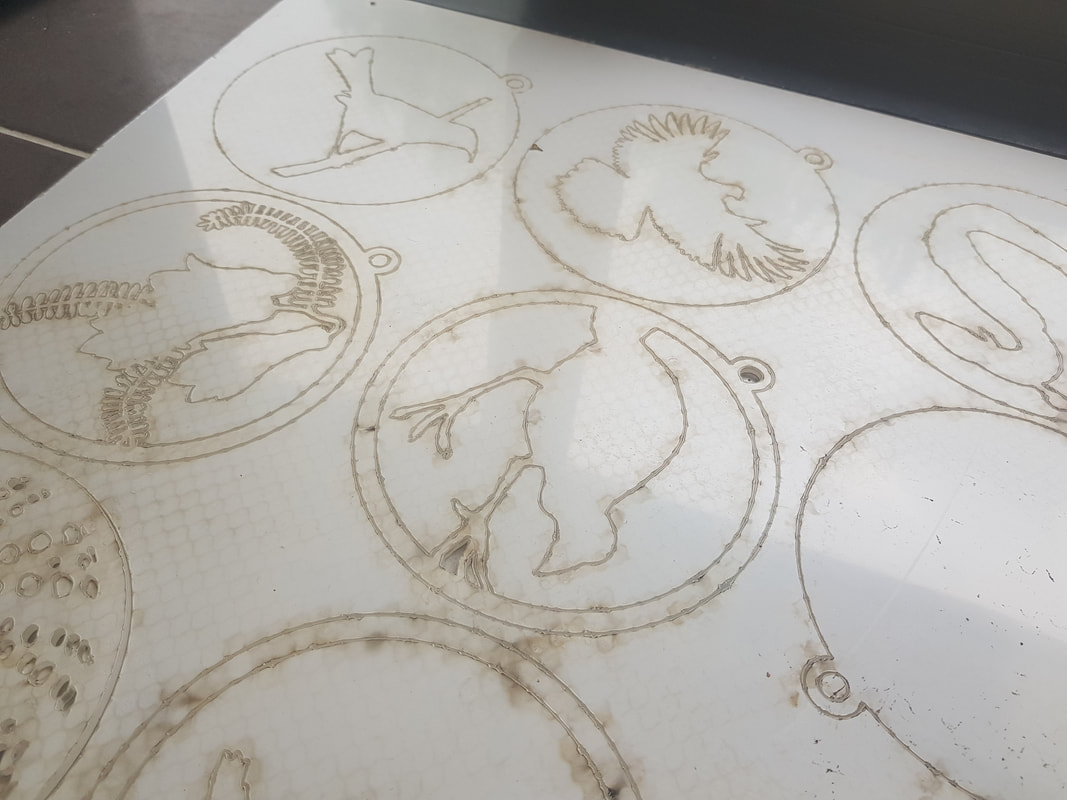
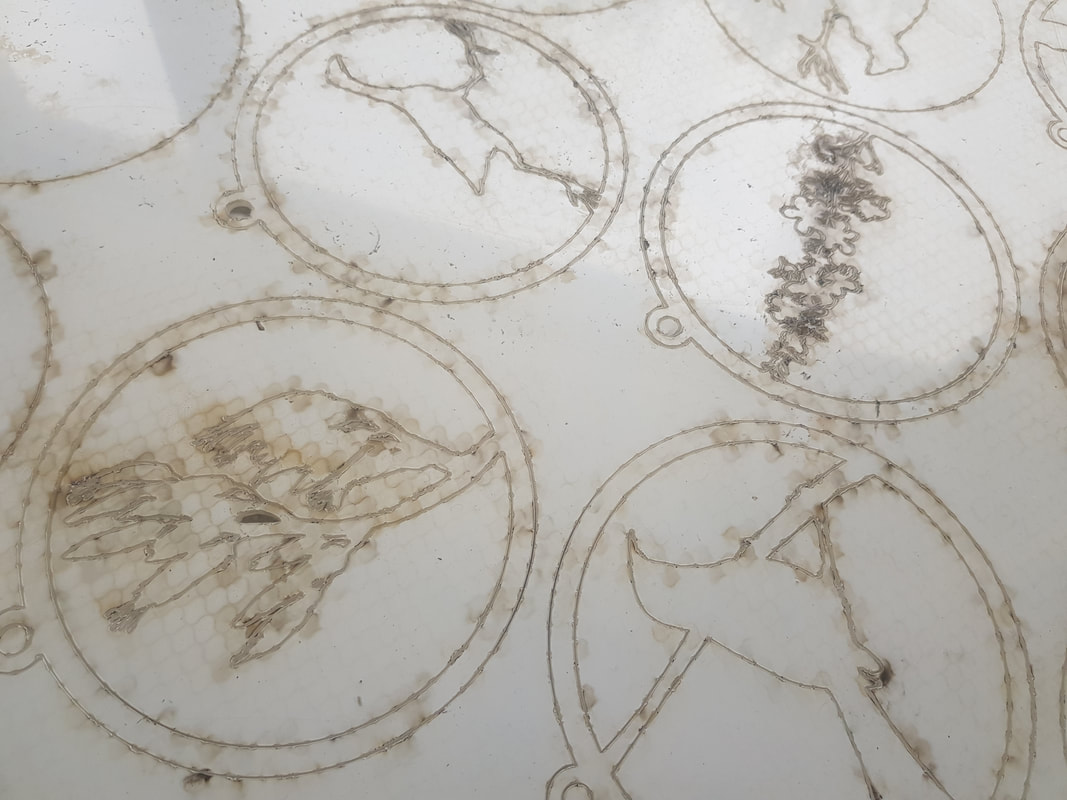
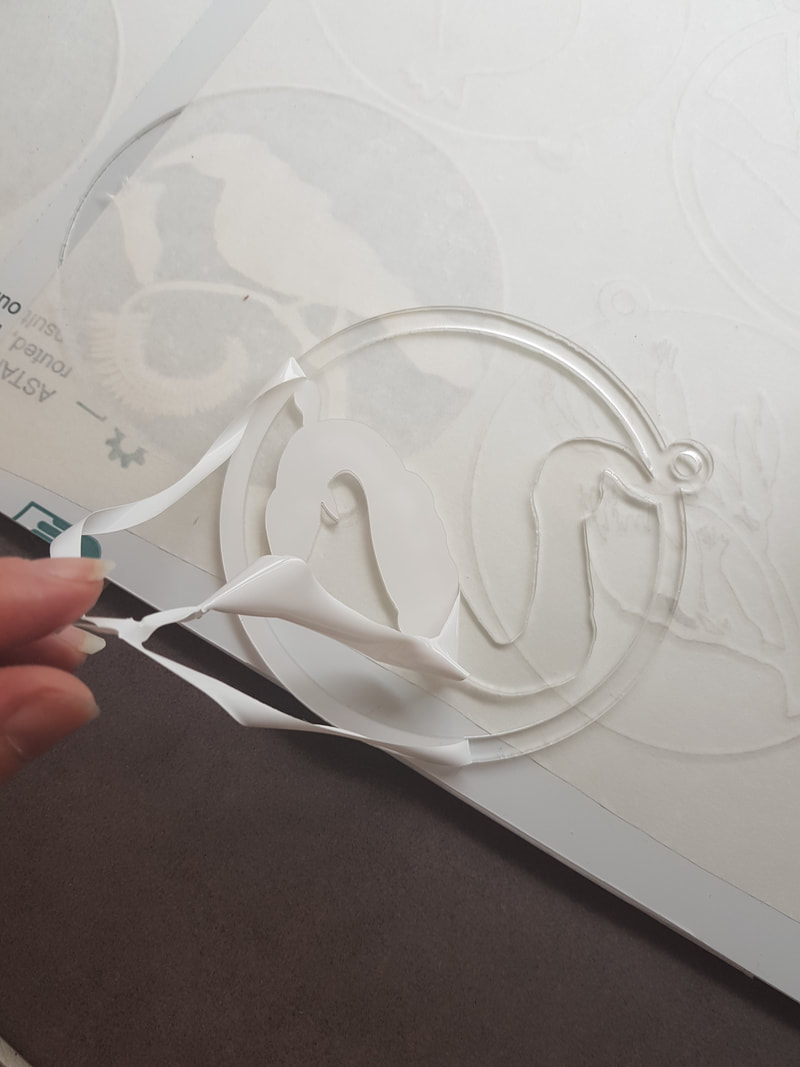
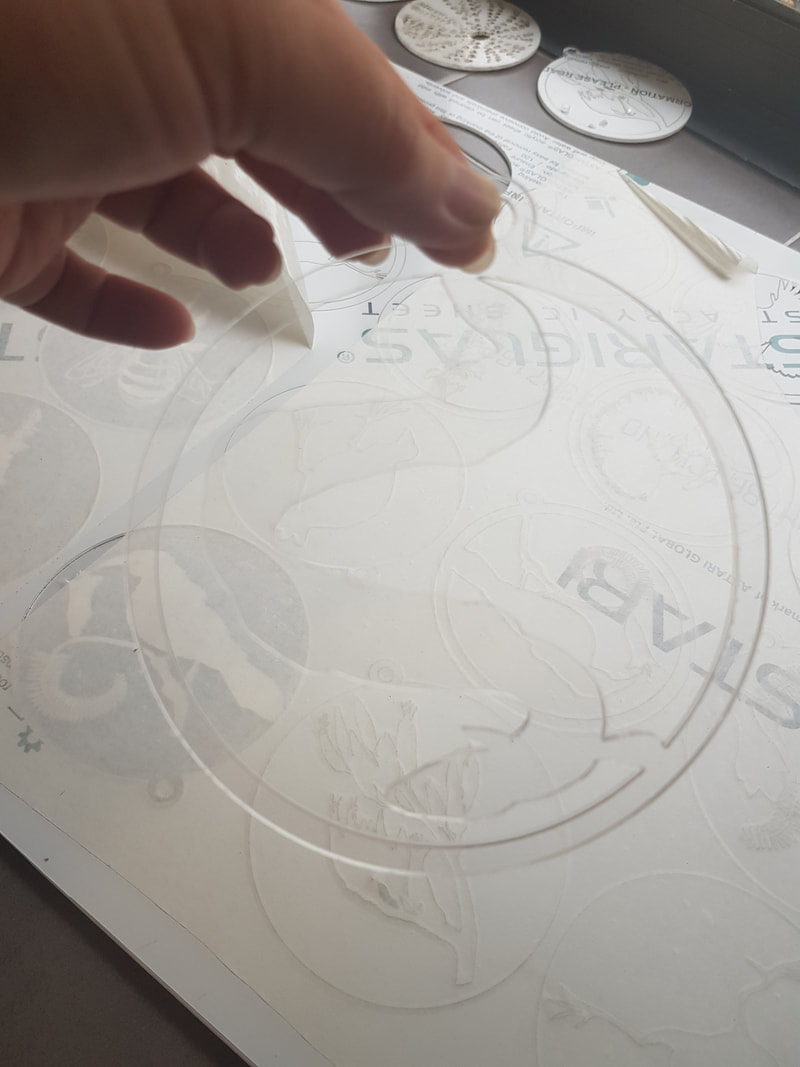
We sent off a test file to Atomik Laser, who cut our previous laser-cut-designs, to have them recommend a suitable material, based on their experience, and give us a quote. They recommended acrylic, and we chose clear as the range of colours available in NZ is frankly disappointing.
This is how we received the sheet, with the protective coating still in place.
They actually look fantastic once they are all peeled and cleaned up – I am really excited to launch these tomorrow!
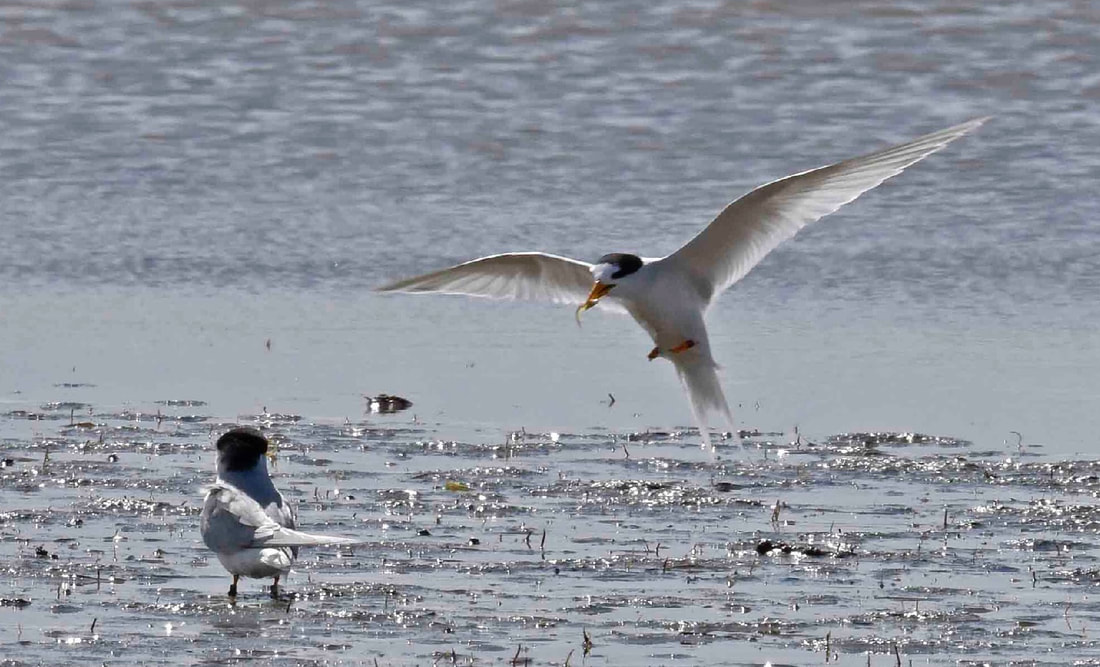
In Te Reo, the names of this bird are tara iti, tara teo, or tara teoteo. “Iti” and “teo” mean tiny. Repeating a syllable is often done in Māori as emphasis. “Tara” means tern, but it also has a lot of other meanings. I like the idea of it being a tiny sharp thing.
Photo Stephen Collins
photo Darren Markin
These photos of courting tara iti come from the New Zealand Fairy Tern Charitable Trust Facebook page. As with all my other posts, click on the link or the photos to go through to the source site.
Sources and resources
The New Zealand fairy tern/tara iti is probably New Zealand’s rarest breeding bird, with a population of around 45 individuals that includes approximately 12 breeding pairs. It is ranked as an endangered species, and carries a ‘Category A’ priority for conservation action. A Department of Conservation Recovery Plan is currently in action.
The New Zealand fairy tern is the smallest tern breeding in New Zealand, and the oldest known fairy tern was 18 years old. Records from the 19th century suggest that NZ fairy terns used to be widespread around the coast of the North Island and eastern South Island, but were not abundant in any one area.
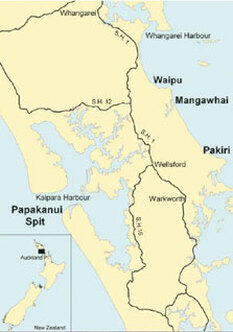
New Zealand fairy terns are now confined to the lower half of the Northland Peninsula. Breeding is limited to four regular sites: Waipu, Mangawhai, Pakiri and the South Kaipara Head.
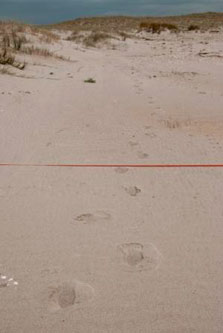
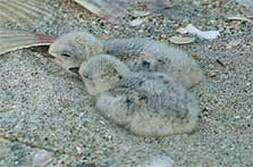
Nesting in a small scrape in the sand, these delicate sea birds are very vulnerable. Nest sites are roped off and signs erected to alert people to the area. Source: DOC
Fairy tern construct their nests on exposed, low-lying areas of shell-covered sand. The nest is a simple scrape in the sand, set amidst the shells.
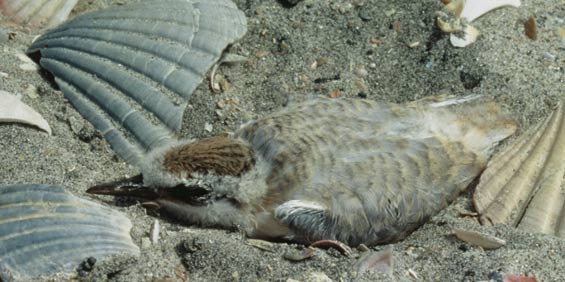
New Zealand fairy tern/tara iti chicks in nest
The tara iti – a description
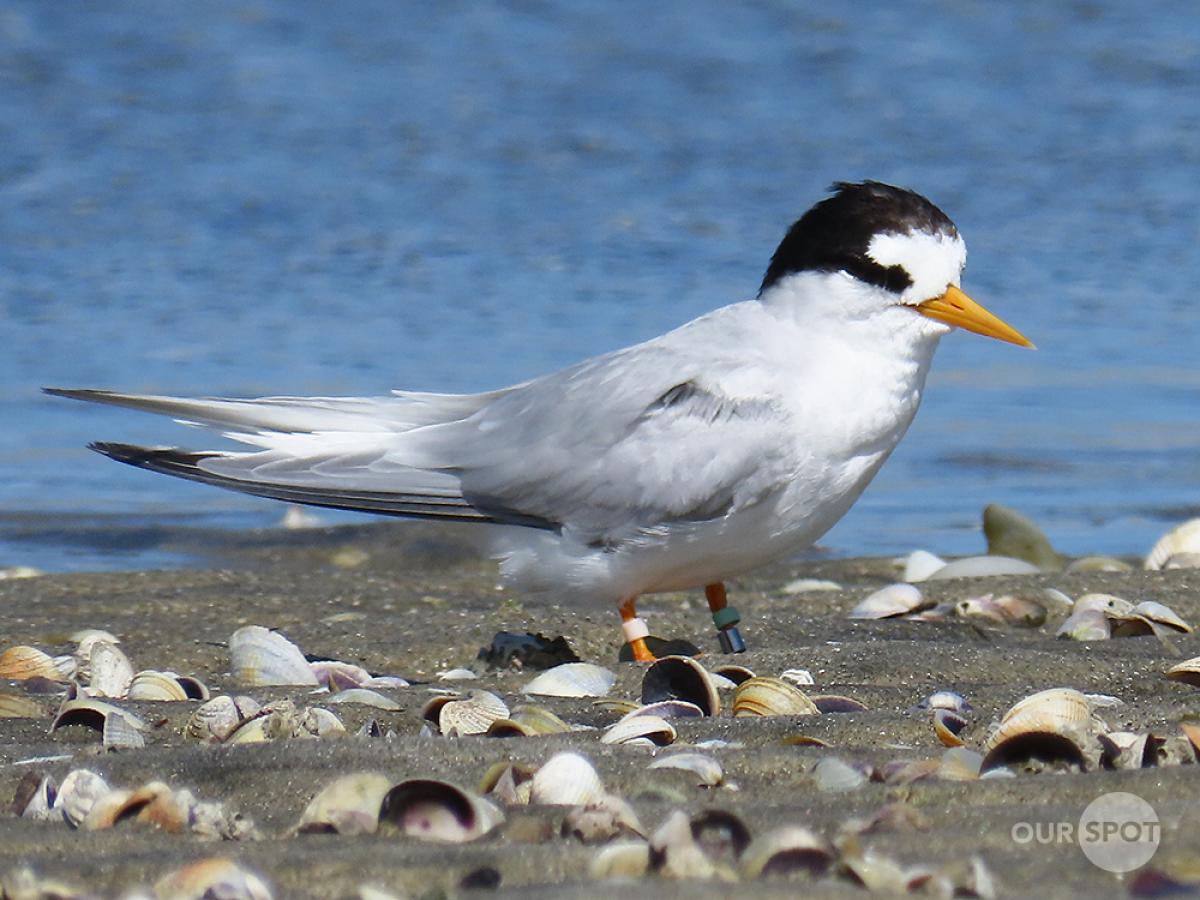
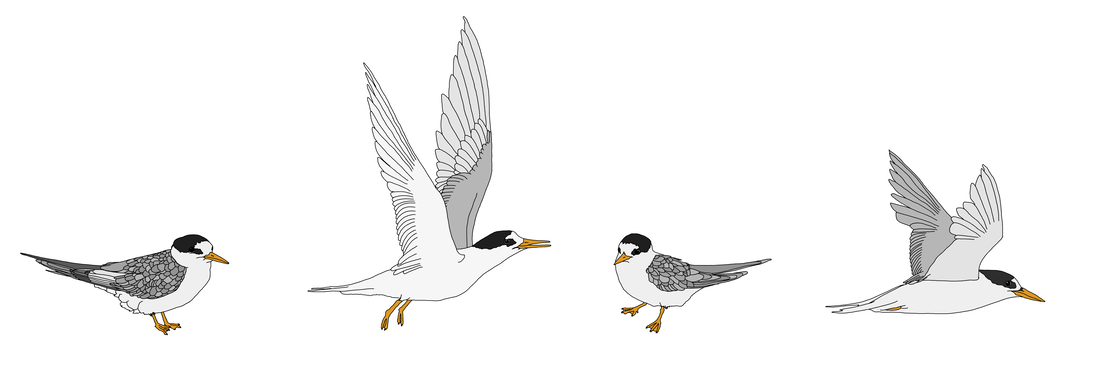
A small tern with pale grey upperparts, white underparts, a yellow-orange bill, and bright orange legs. A black cap covers the crown and nape extending forward to surround the eye, forming an irregular patch in front of it, but never reaching the bill; a rounded white ‘notch’ projects into the black cap above the eye and connects with the white forehead. Source: NZ birds online
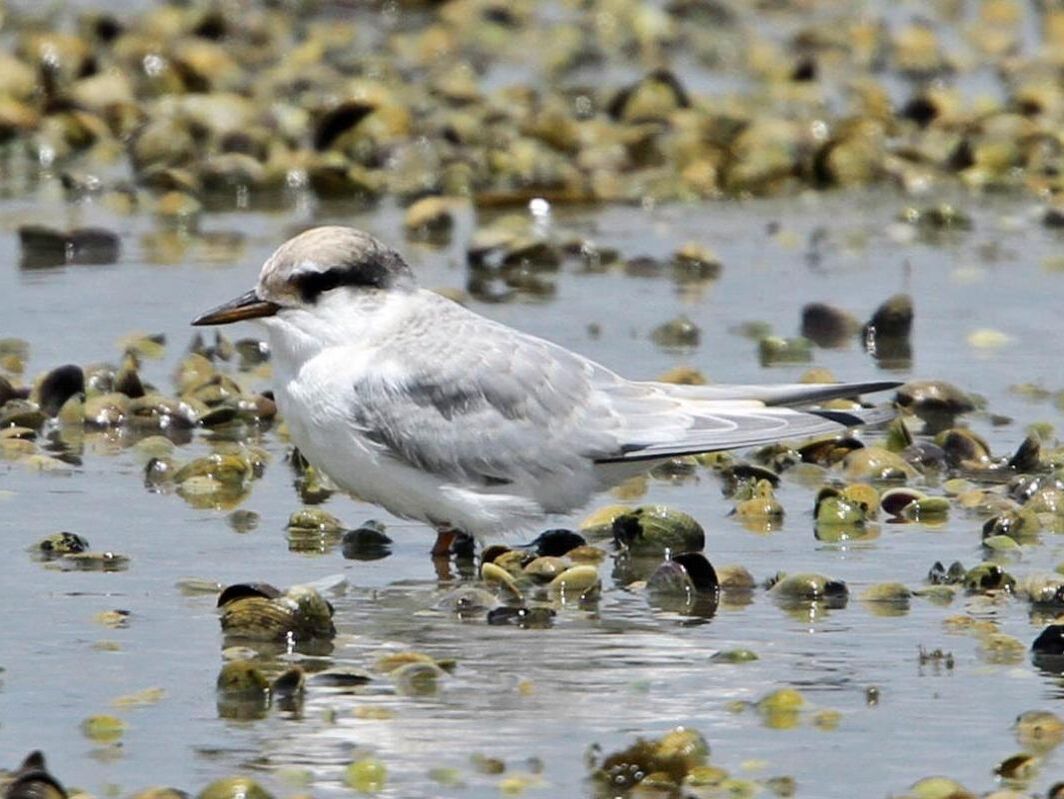
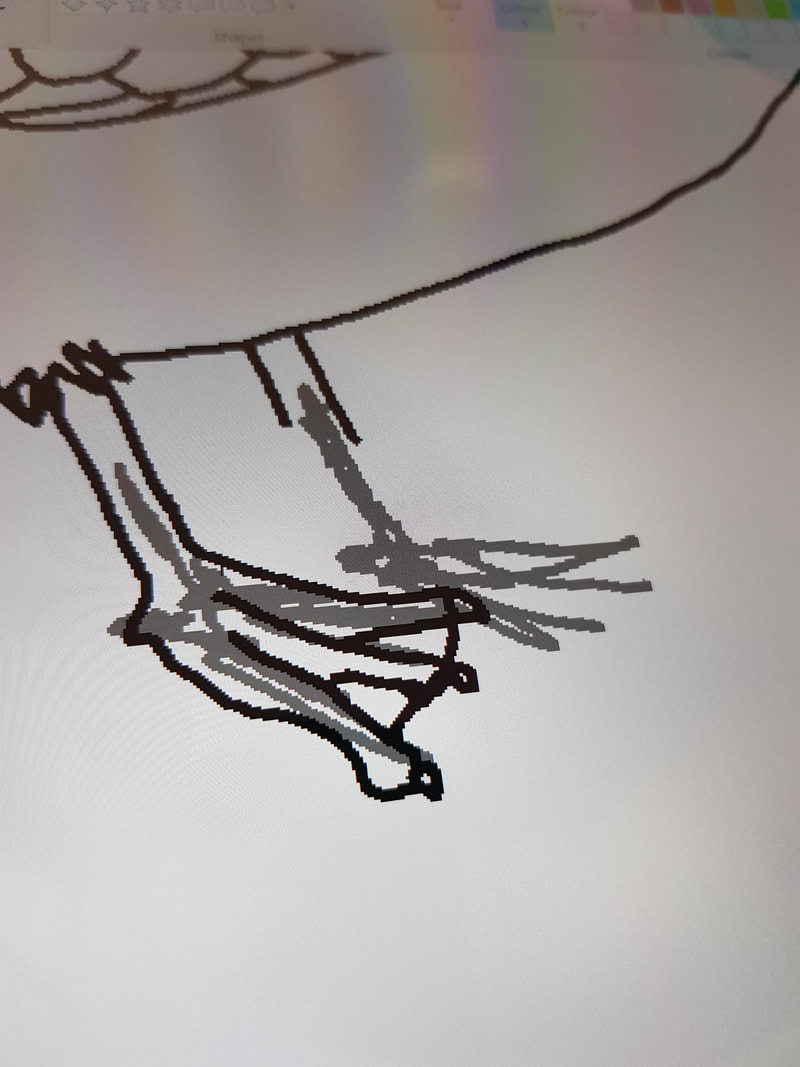
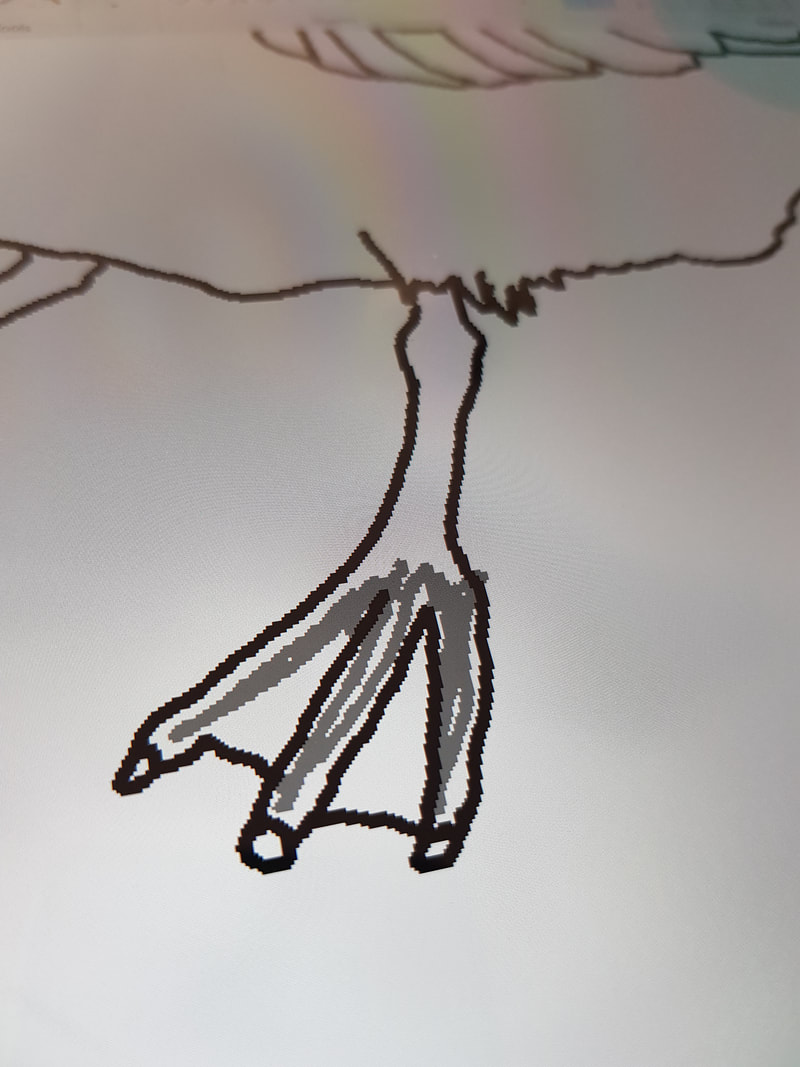
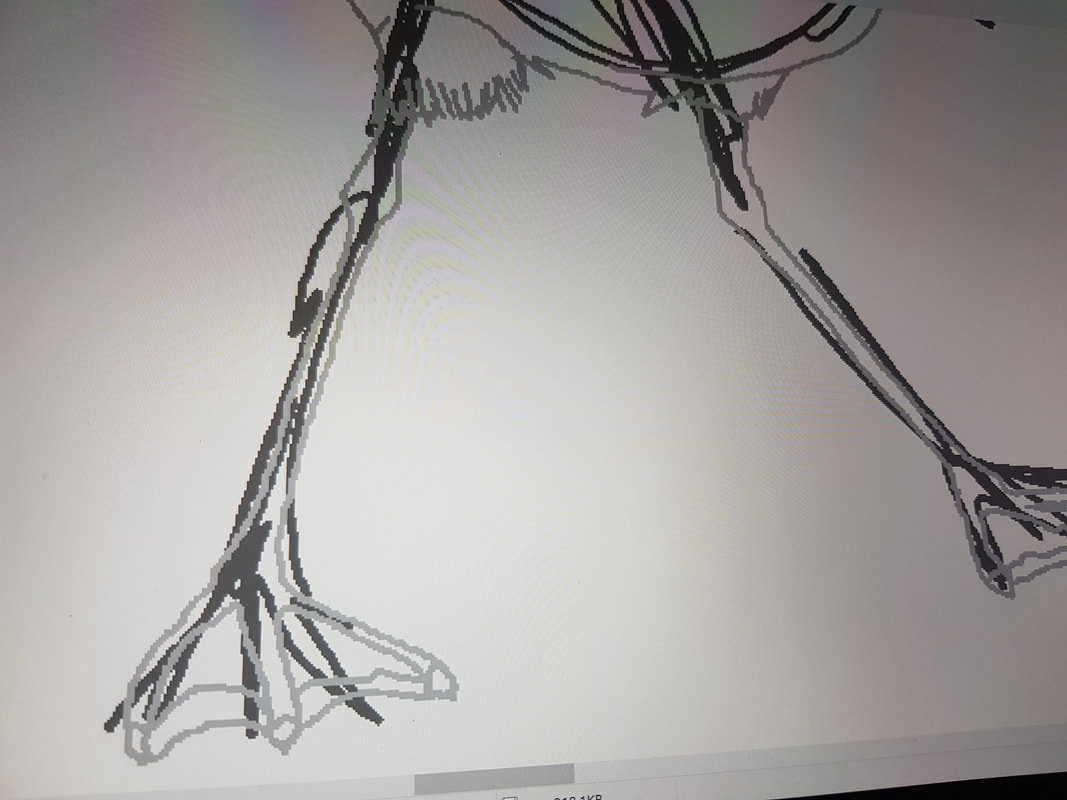
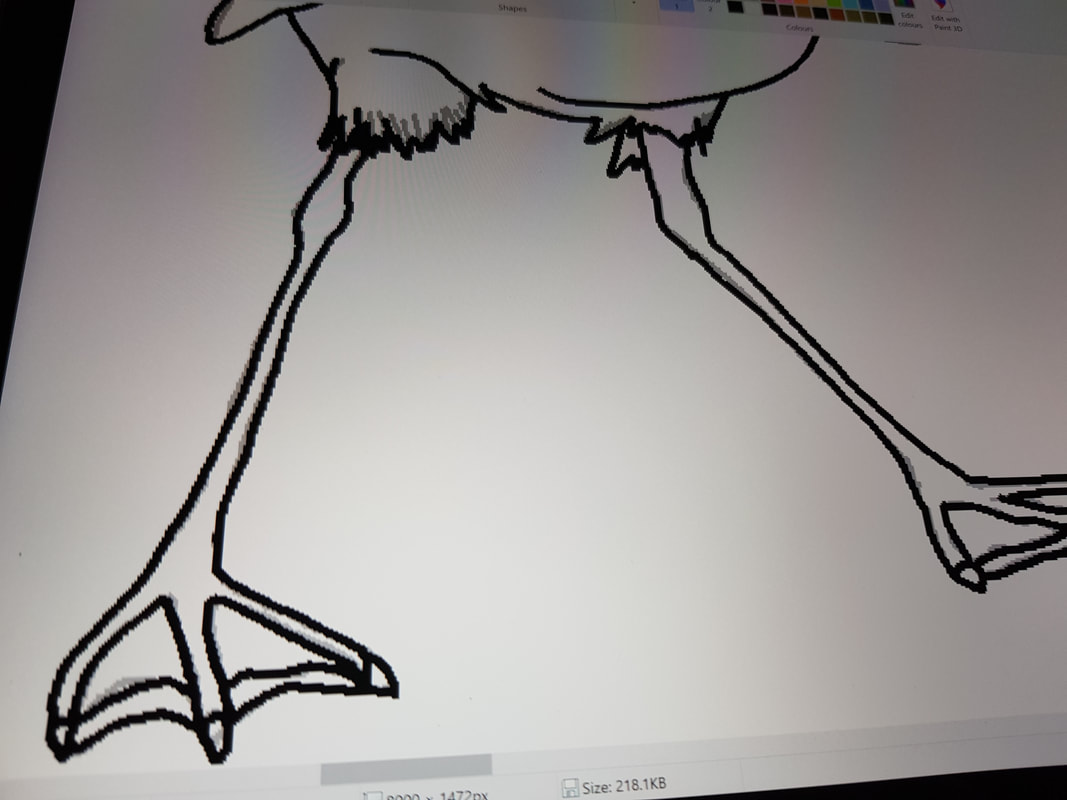
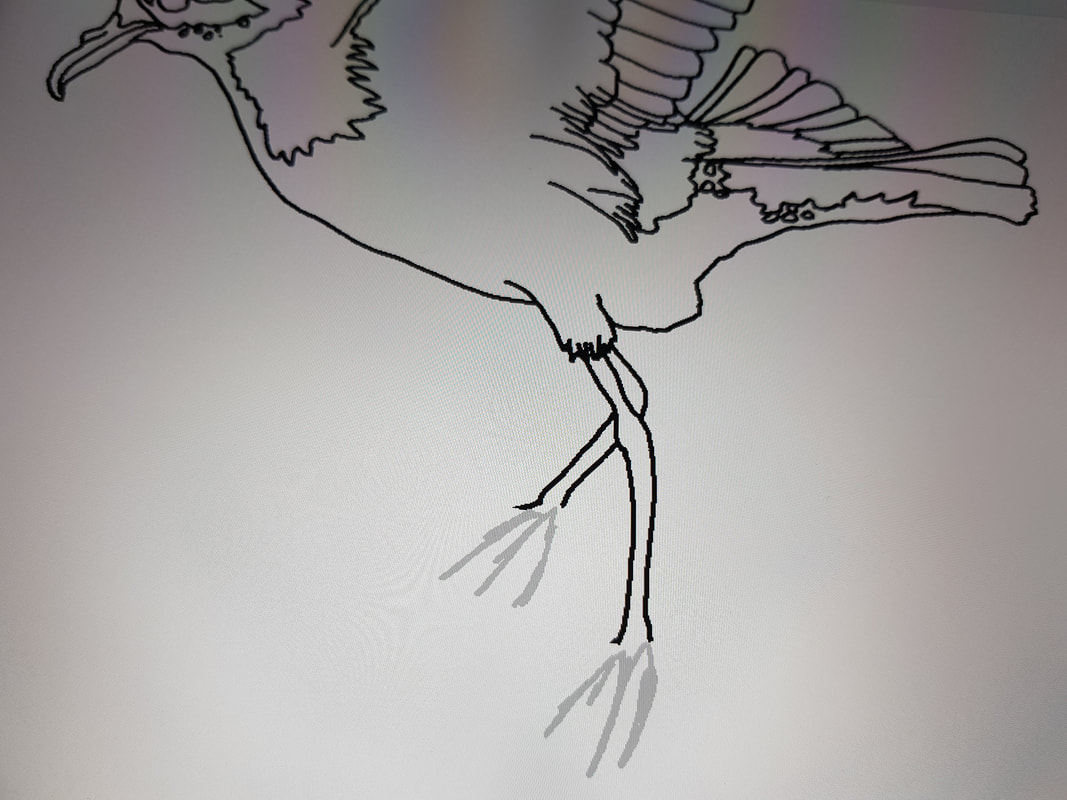
I’m pretty familiar with this general shape of bird now, so these wee beasts were a quick sketch. Getting the eyes and the feet right was the challenge, as usual.
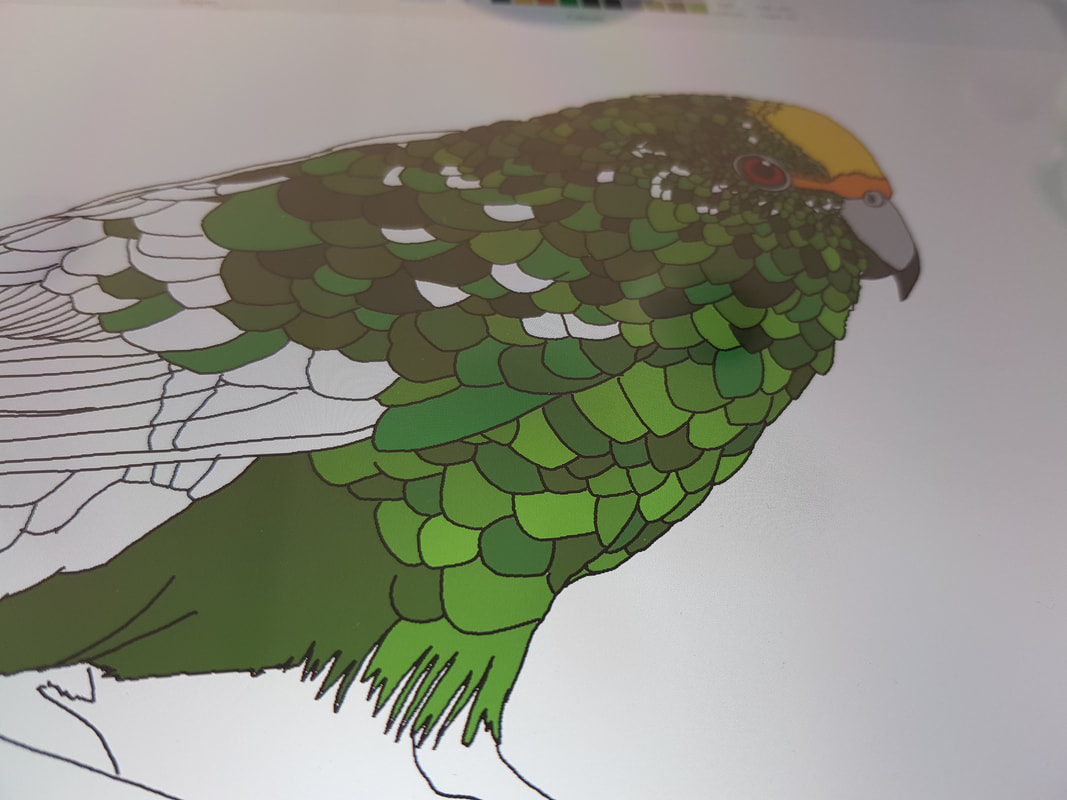
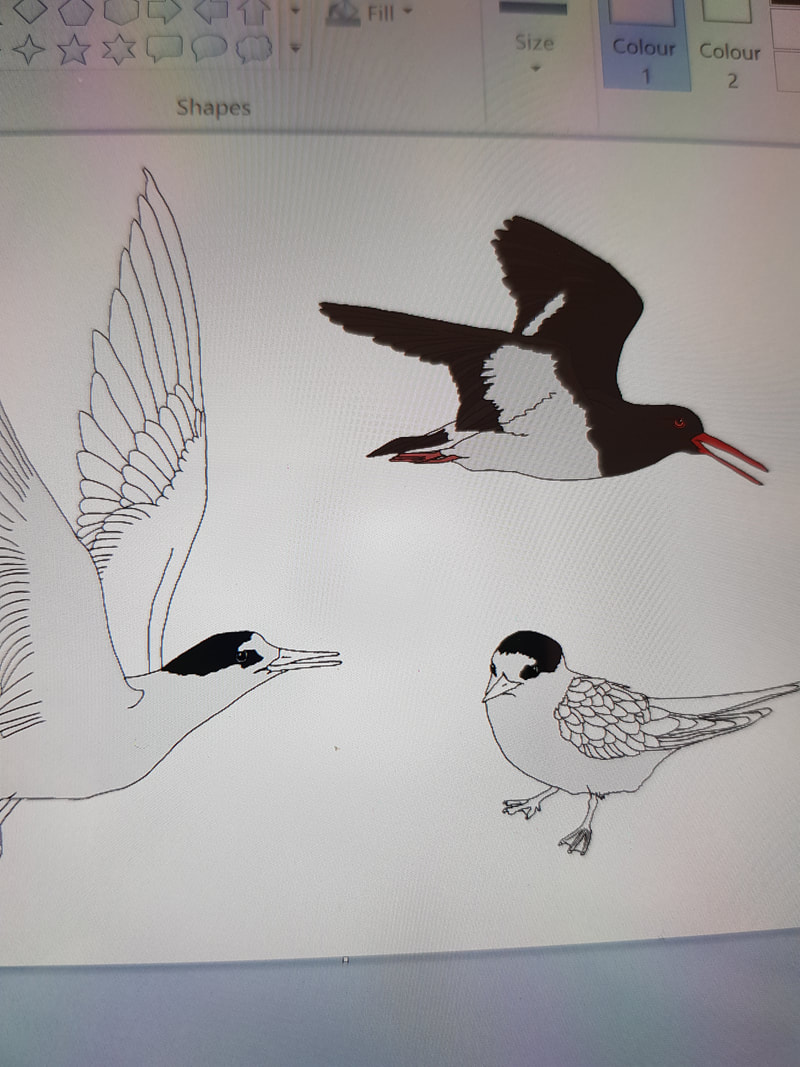
Linework – sorted. Time to colour the birds! Again, I used a mixture of photo references and previous designs, to ensure colour consistency across the range but to still stay quite true to the real colouration of the bird, too.
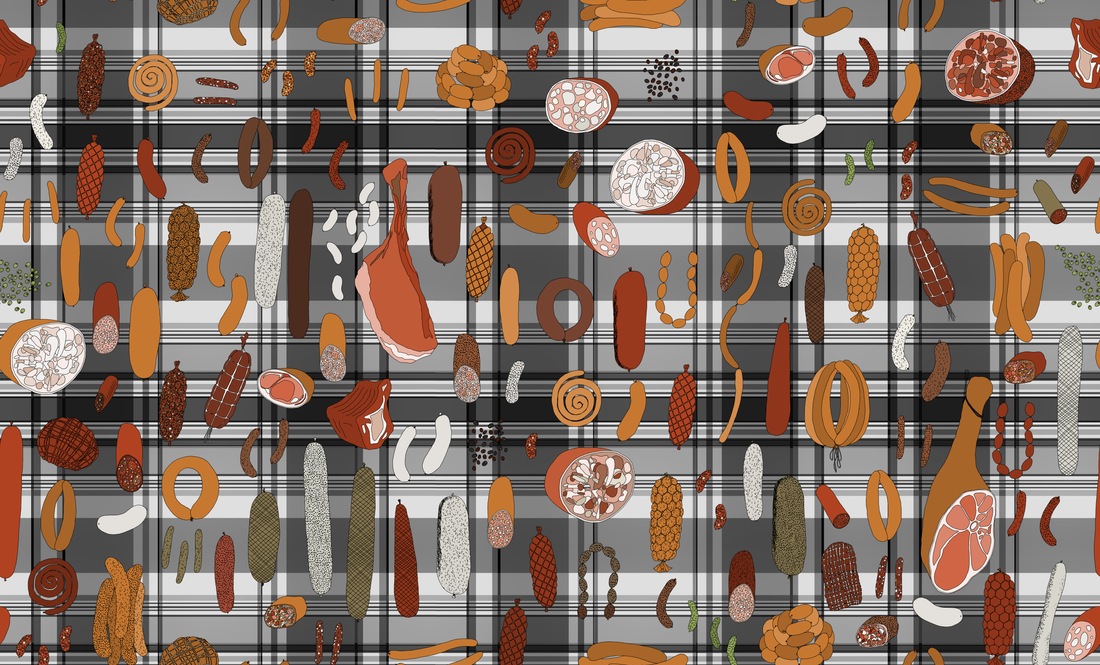
We recently attended one of our favourite markets of the year, the Wellington Polish Christmas Market. As we started ramping up to prepare for our end-of-year markets, I got inspired to do some designs focused around the delights of European food.
I had just finished my fungi of the Pacific Northwest design, and I had also just joined “Show me your charcuterie” on Facebook, so the stars aligned for me to create one of my favourite designs this quarter.
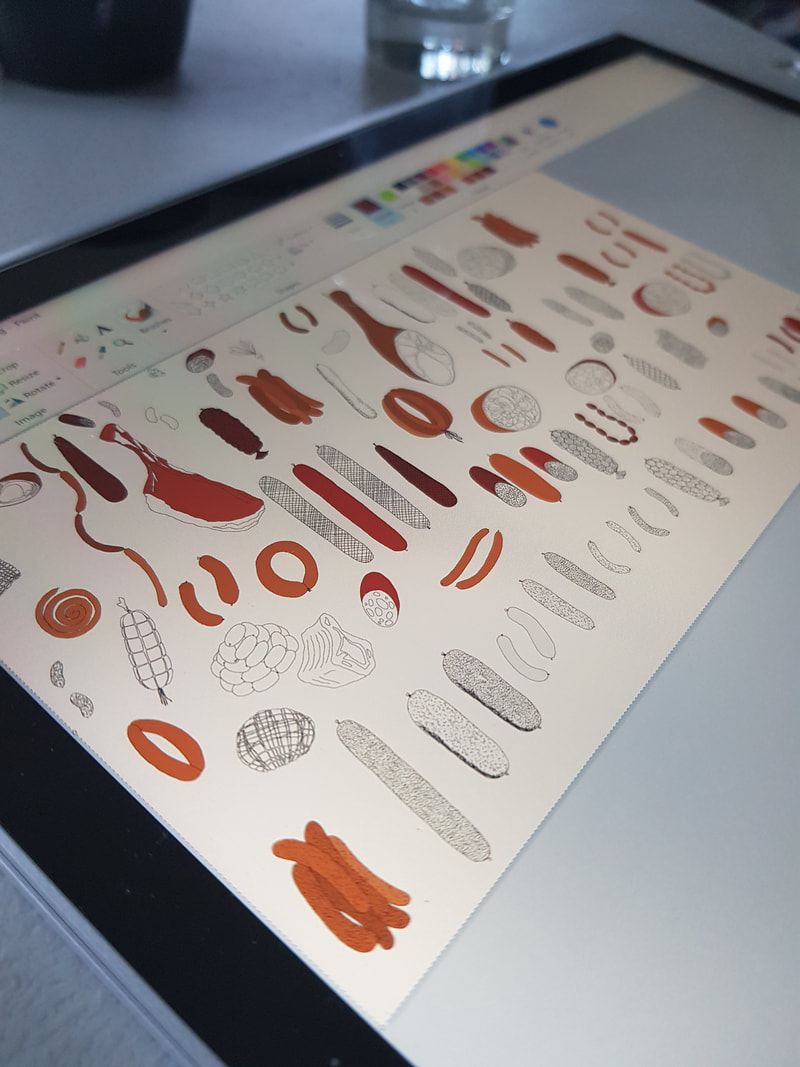
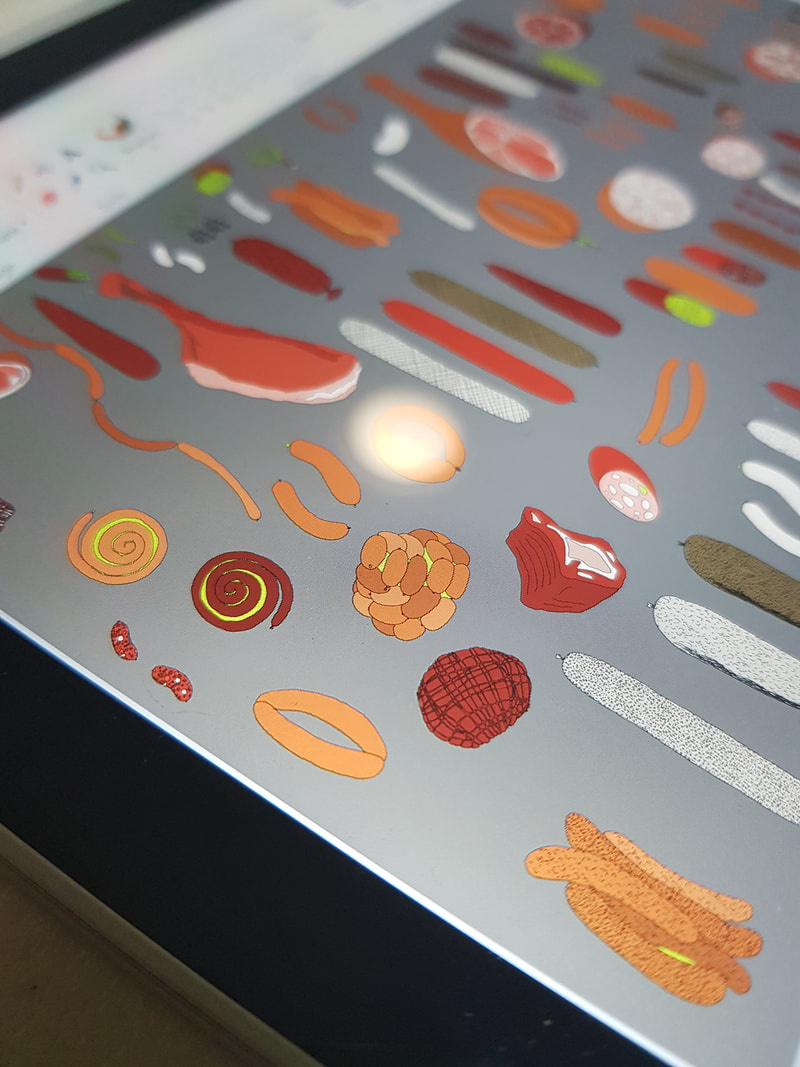
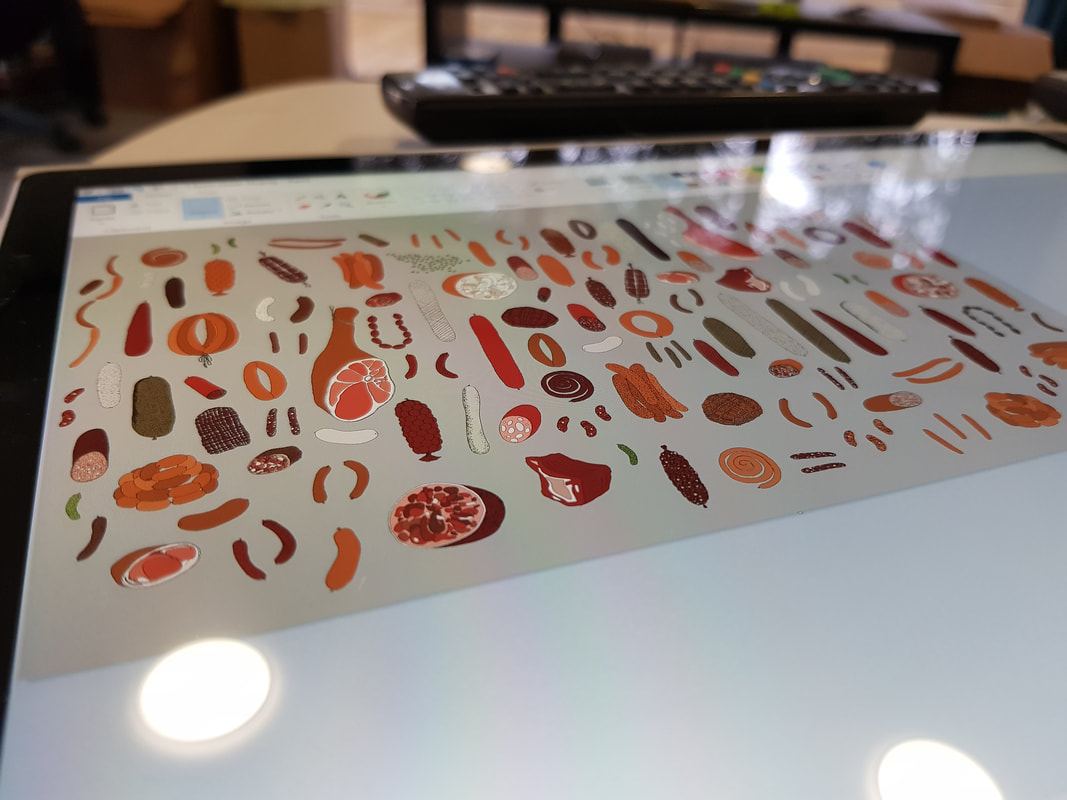
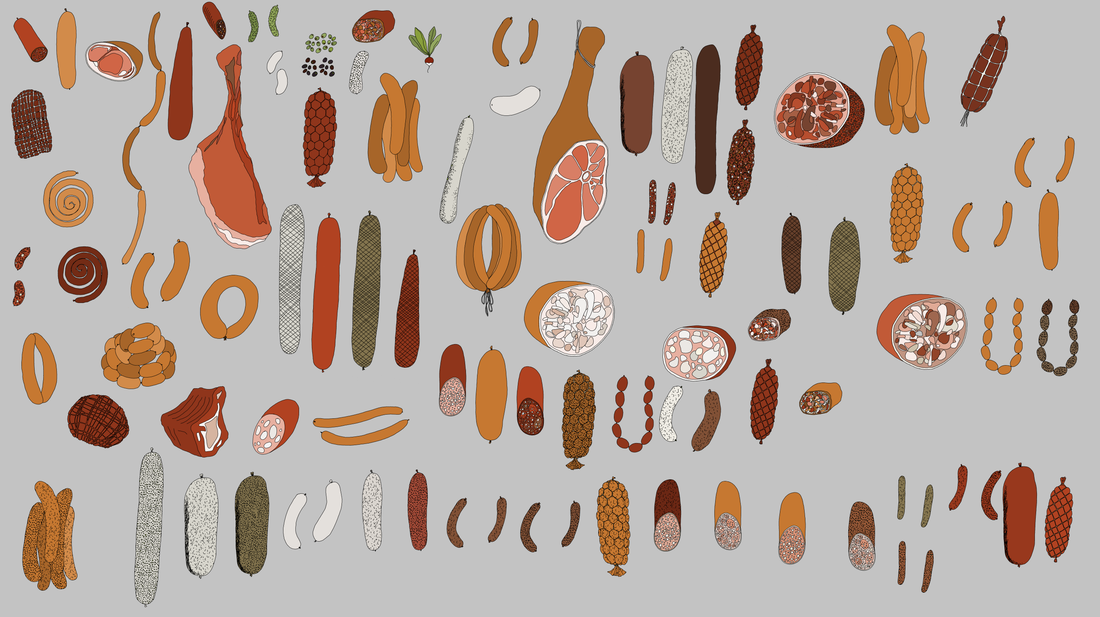
Charcuterie
Charcuterie (pronounced “CHAR-coo-t’ree” or “CHAR-coo-te-ree”, click here to listen), is the branch of cooking devoted to prepared meat products, such as bacon, ham, sausage, terrines, galantines, ballotines, pâtés, and confit, primarily from pork.
Source: Wikipedia
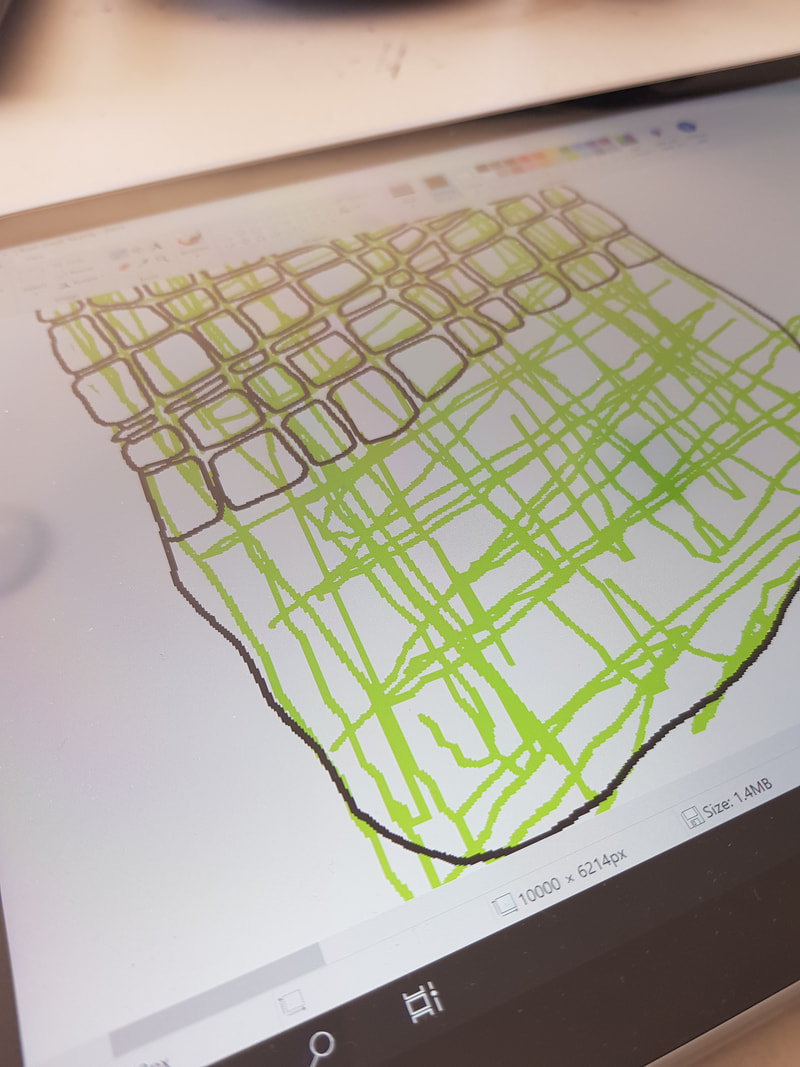
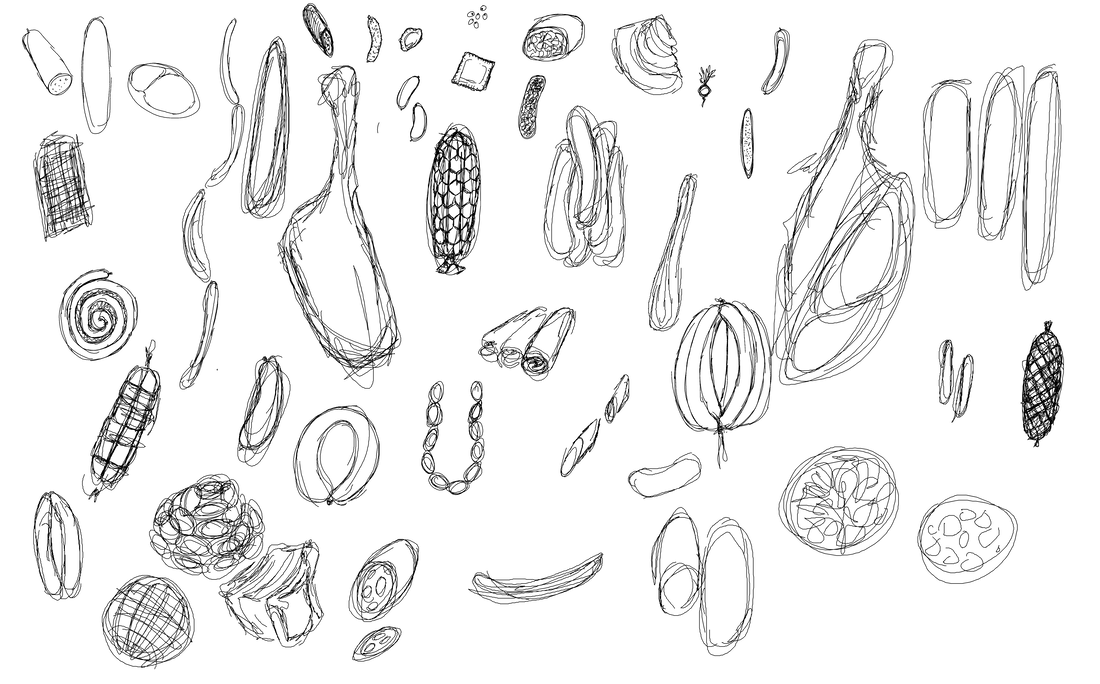
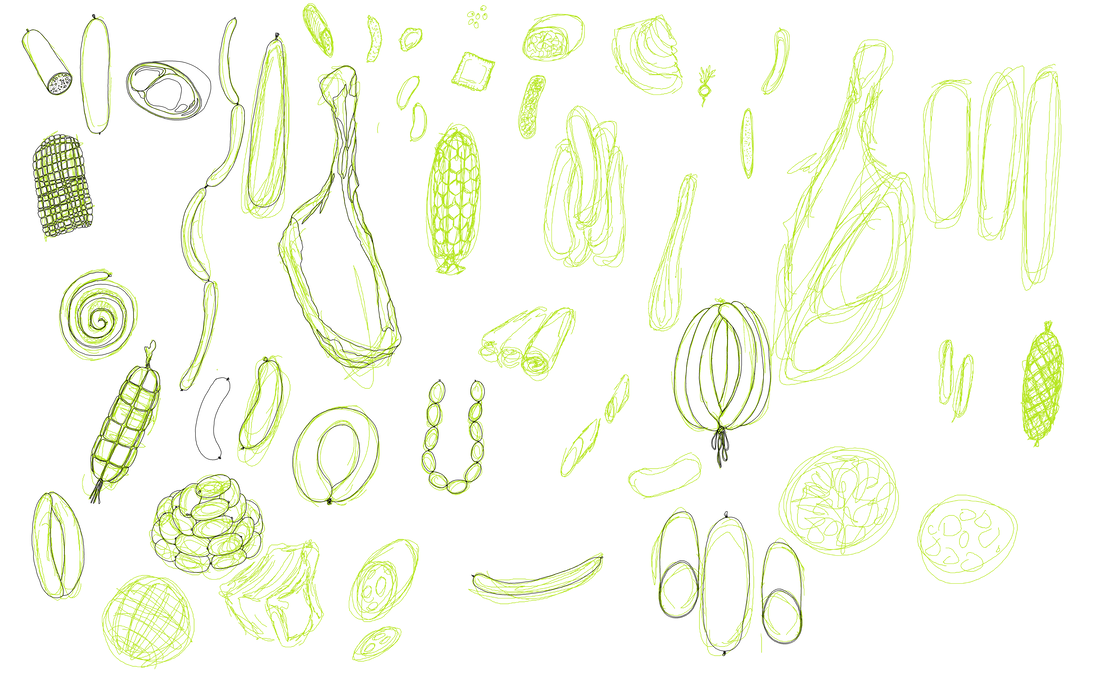
For this design, I worked from my own photos, experience, imagination, and a lot of research online. I started with the sketch, which represents the pencil stage, then I overlay that sketch, changed to green, with plain black lines, which represent the ink stage.
In the first image, below, I have created a diagonal grid texture (in green), which I then use in several of the different meats.
Diagonal grid texture for salami
Creating more textures
That worked really well, so I created several more textured and used them to add variety to several of my other shapes.
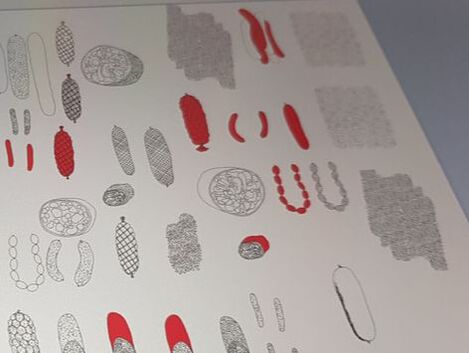
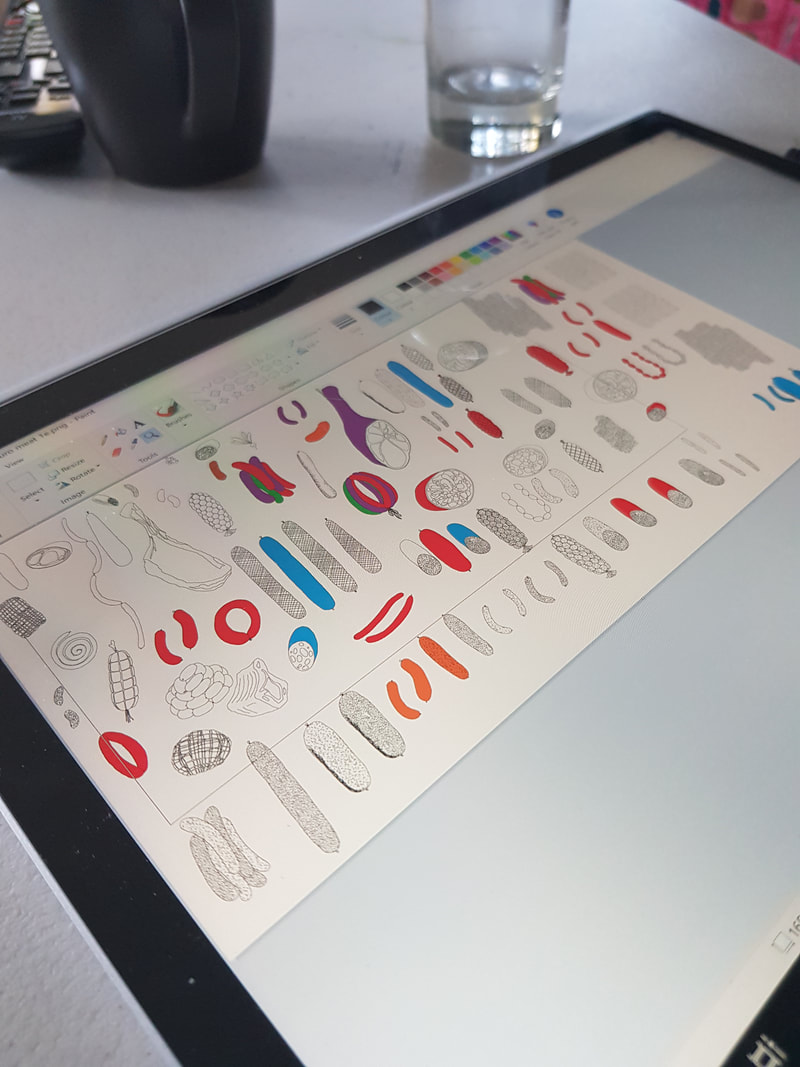
Next, I used some basic colours to represent the different shades of brown, so that I can be sure to get a good dispersal across the different types of cured meats.
I use lime green to help me identify the areas that still need to be coloured.
Right, all coloured – time to build a repeat! I made one that was just meat, and one that’s more of a charcuterie platter – it includes designs from my cheese design, and some extra fruit, olives, a couple of gherkins.
Charcuterie design – Click on this image to shop on Spoonflower
Charcuterie platter design – click on this image to shop on Redbubble
Bonus pic of the huz in the meat shirt at our latest market. You are welcome.
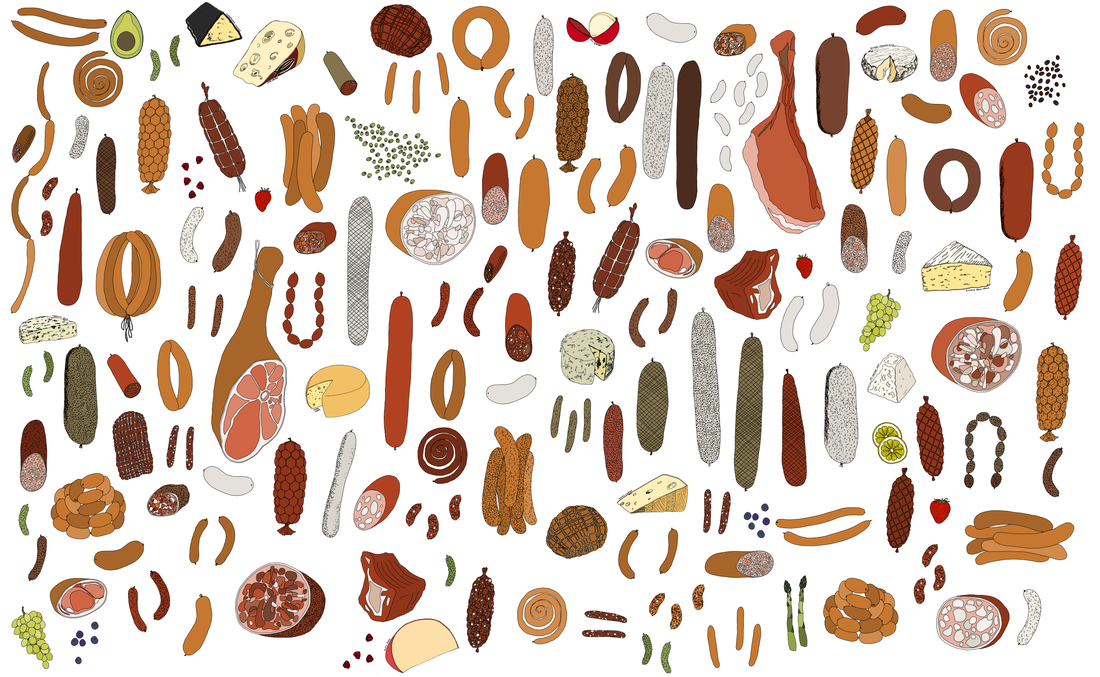
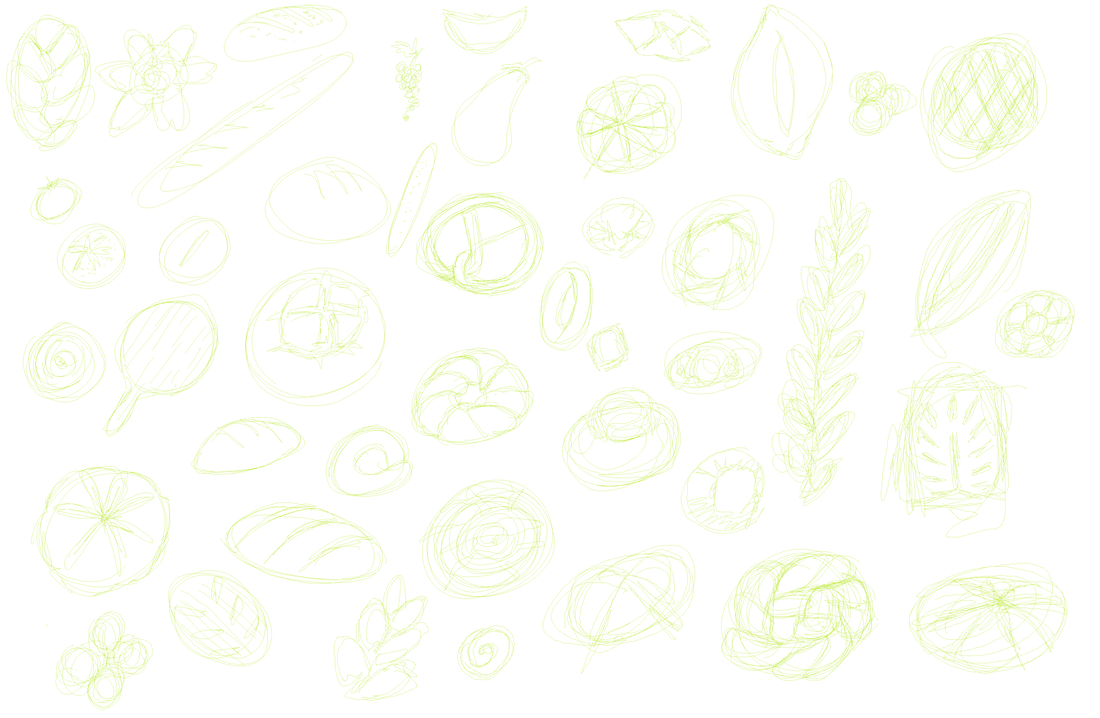
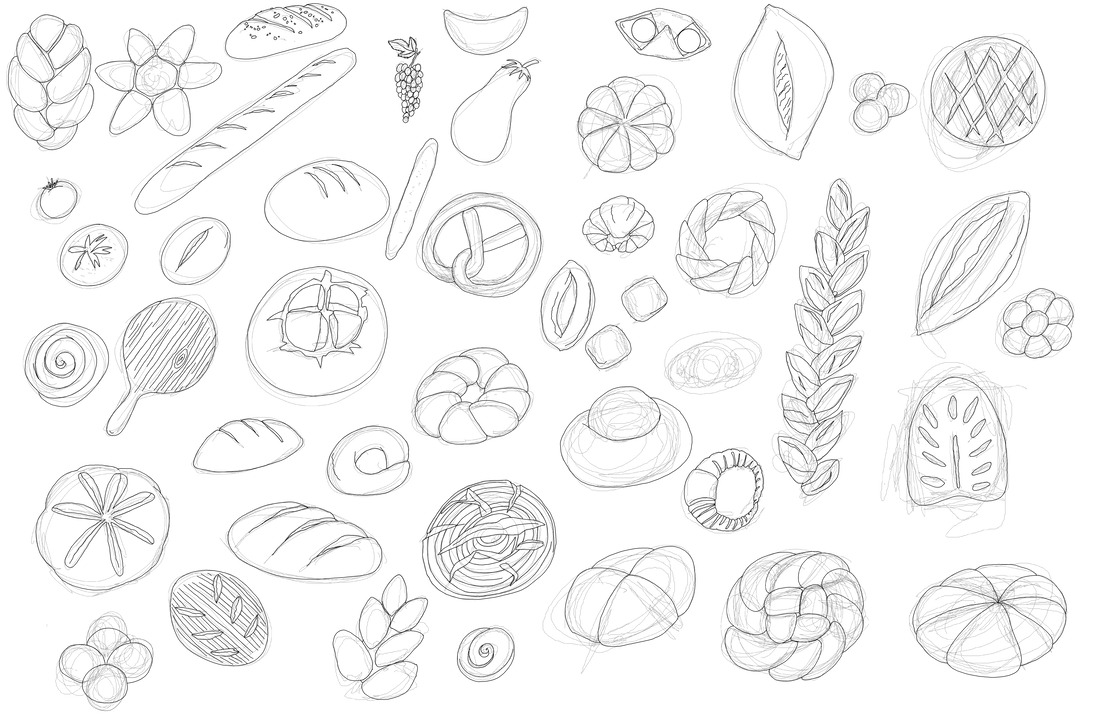
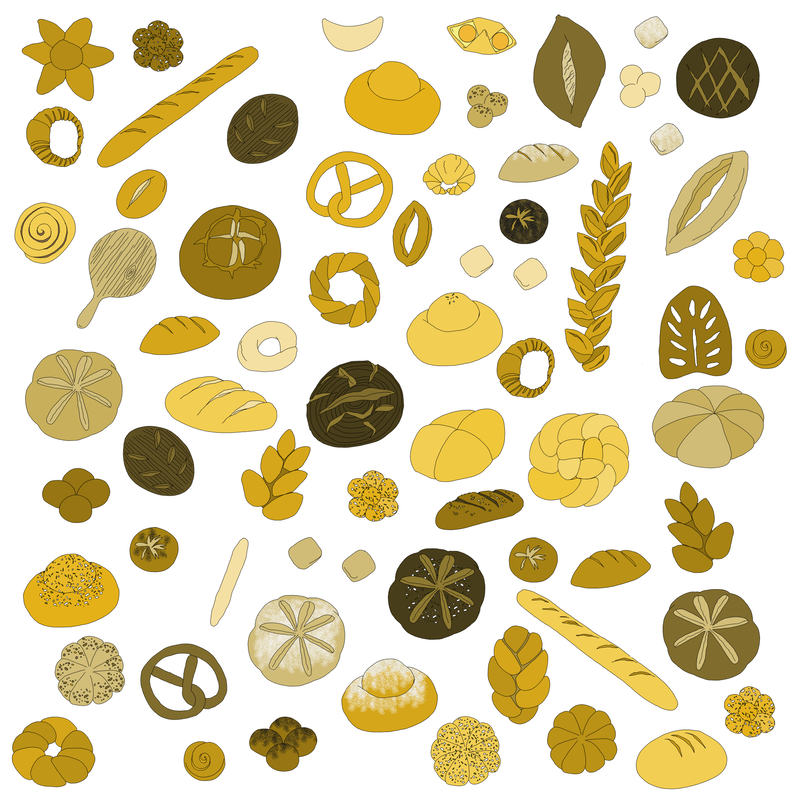
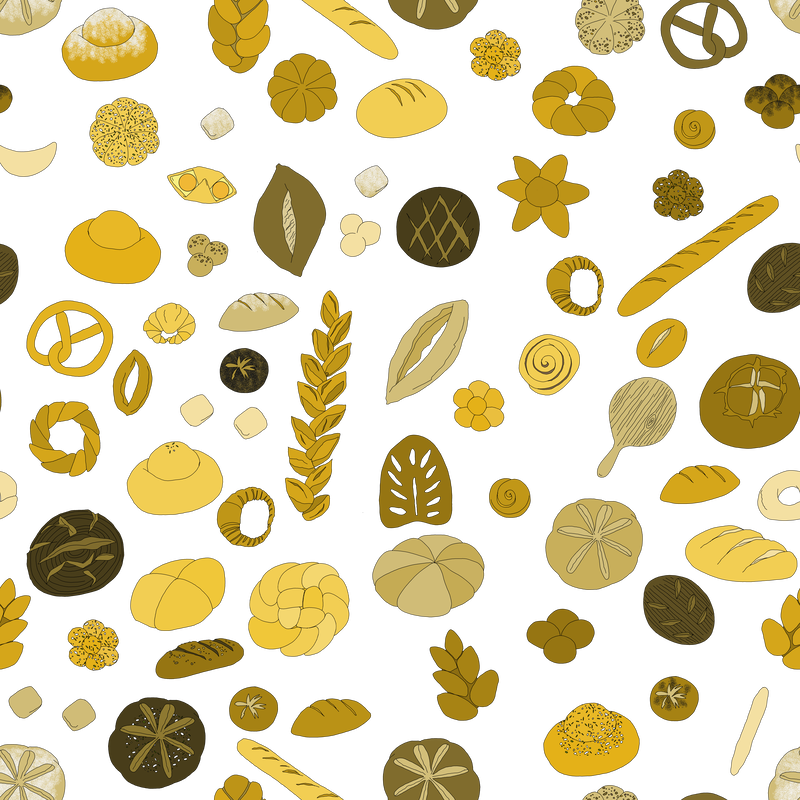
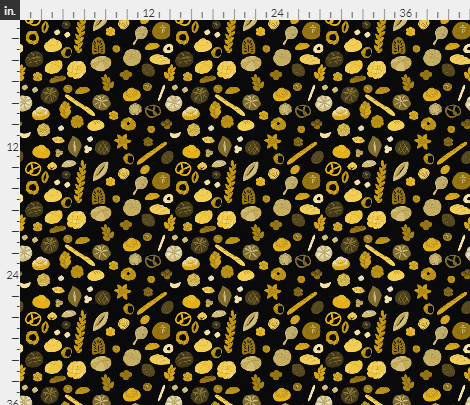
Boulangerie
What are the most important accompaniments to a good cured meat? BREADS, that’s what.
The word “boulangerie” means a bakery in French, so it’s a good word to use for the accompanying design to charcuterie. Again, many of these are breads that I have seen, baked, and eaten myself.
Same process here – “pencil” in green, then “pen” in black.
Here’s an example of a tile layout before and after turning it into a proper repeat.
Click on the image to shop on Spoonflower
Click on the image to shop on Redbubble
These two gorgeous scarves are still unsold at the time of posting – pop us a message through the page if you’re keen to grab one! Every one is unique, handmade, and only $50NZD plus p&p.
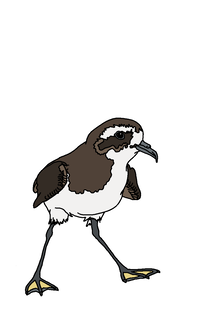
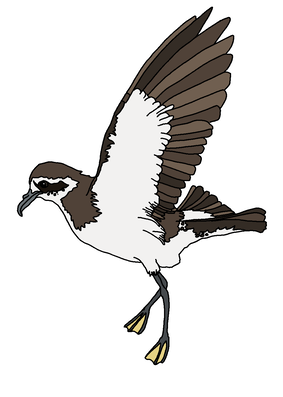
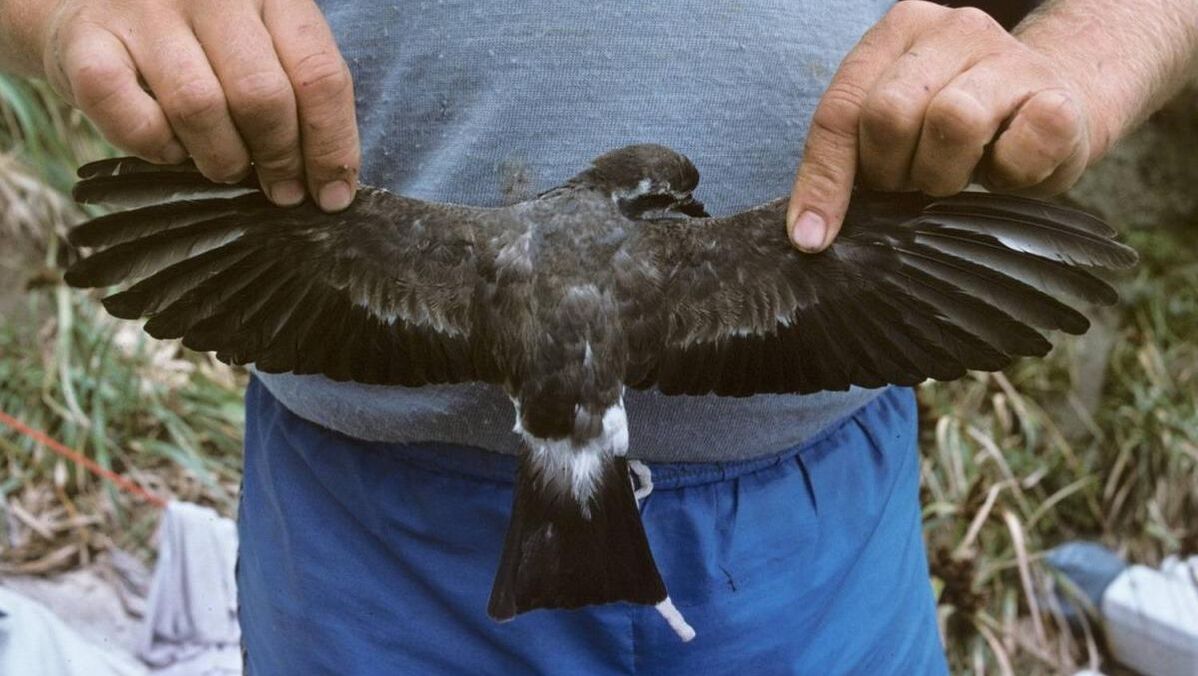
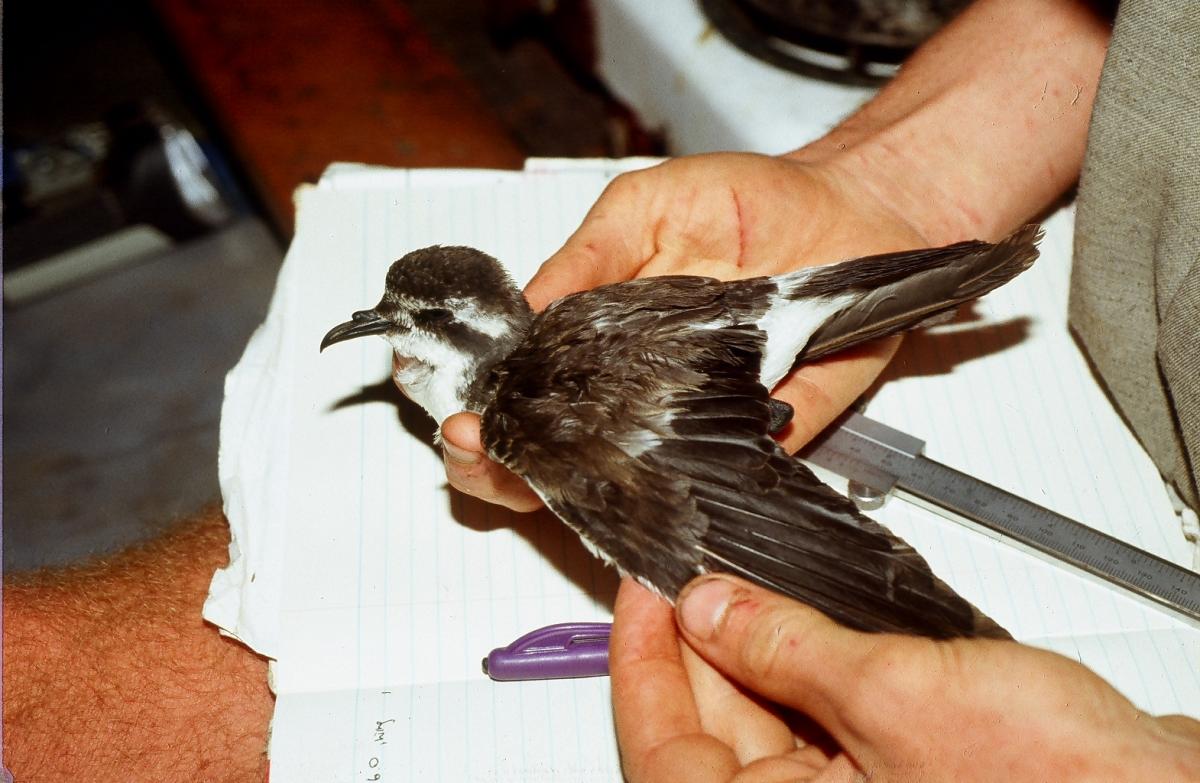
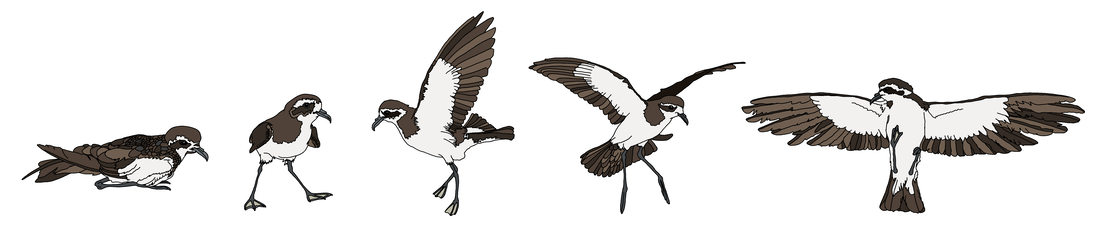
A medium-sized storm petrel, grey above with prominent white rump, dark-grey flight feathers and tail, mainly white underparts, white face with a broad white stripe above the eye, a nearly square cut rather than forked tail when folded, and black legs and yellow webbing. In flight, the wings are broad and the long legs dangling; they move over water in a series of hops striking it with both legs.
Population: perhaps 100-300 pairs. Source: NZ birds online
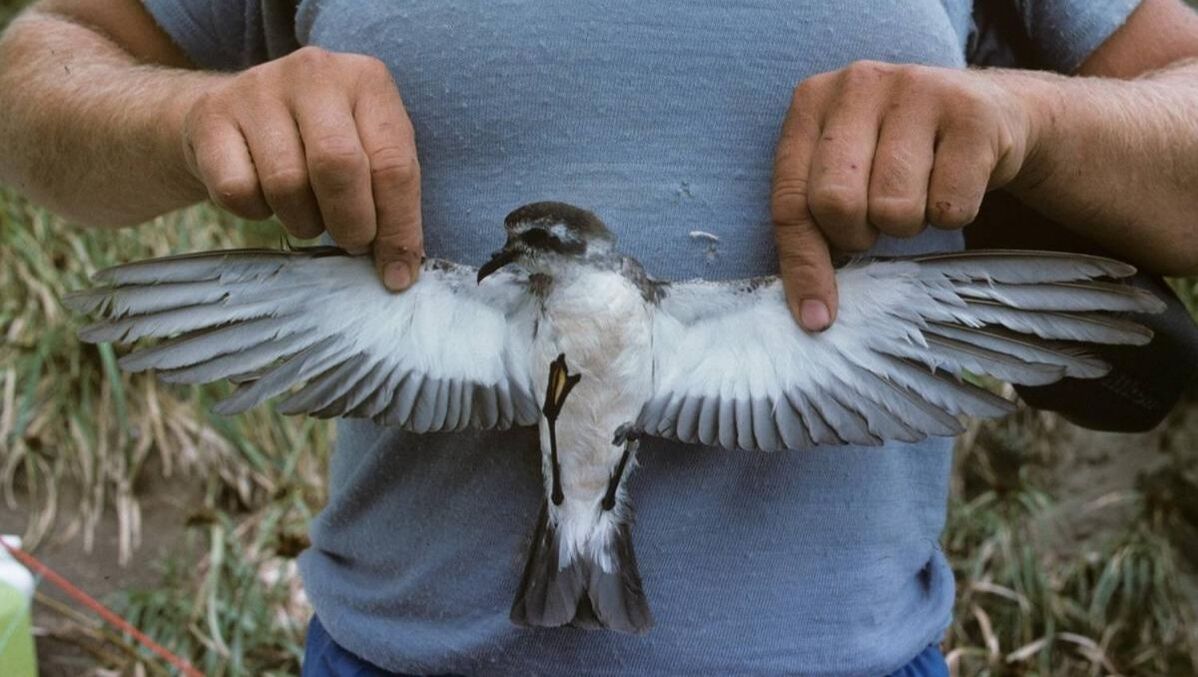
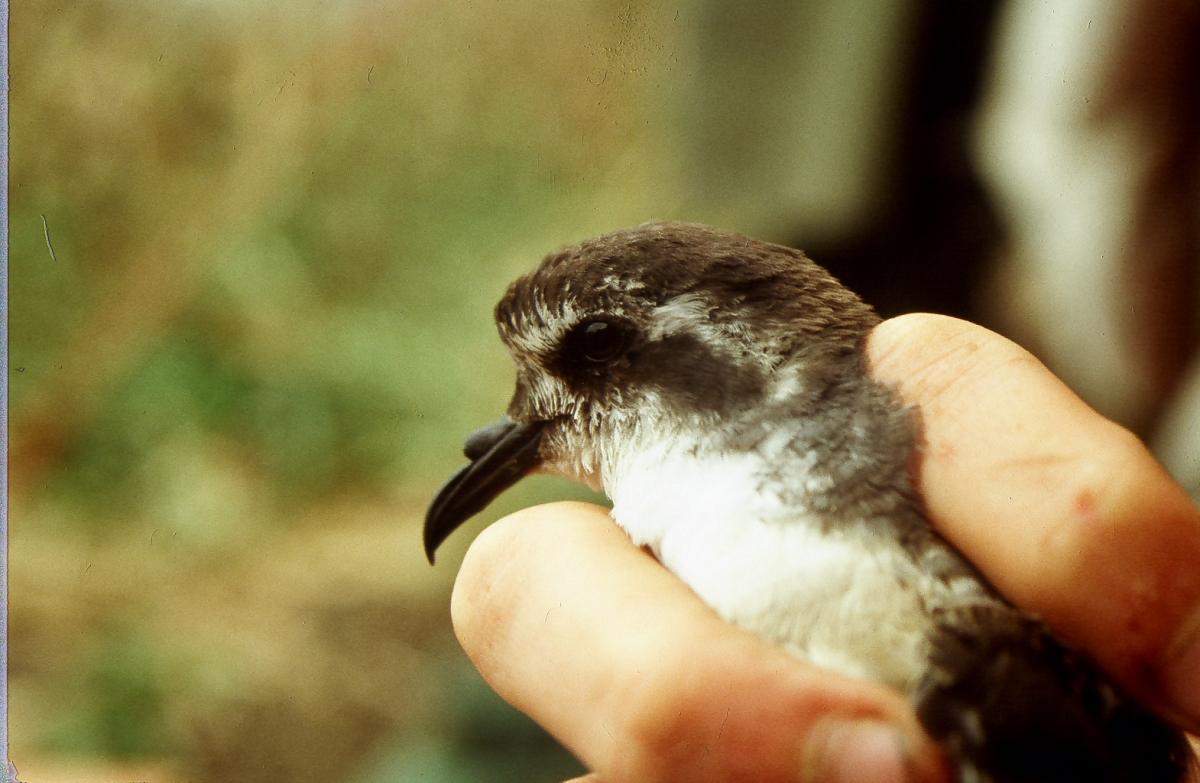
The mysterious Kermadec petrel
The Kermadec storm petrel has been an enigma, only partly solved when a small breeding colony was discovered on the small and inaccessible Haszard Island in the Kermadec group in August 2006.
About 1890, storm petrels were said to be common at sea around the islands, and in 1907 two corpses were washed ashore on Raoul Island. In November 1925, 15 birds were shot at sea around the islands and from these the species was recognised as distinct and named. They were not recorded again until the 1960s and seen more frequently during the 1980s. Most of these records are close the Kermadec Islands but a group of 4 was seen 480 km off the Australian coast.
The inability to locate the breeding site led to the suggestion that they might be unusual Australian white-faced storm petrels rather than a distinct form, but the discovery of a colony of these distinctive birds has settled these doubts.
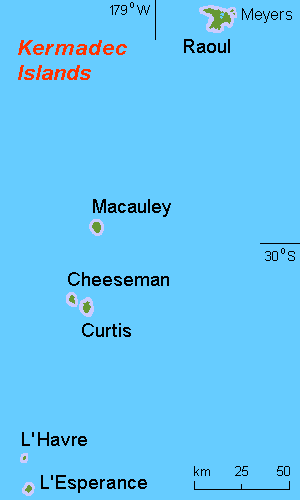
The Kermadec Islands /kərˈmædɛk/ (Māori: Rangitāhua) are a subtropical island arc in the South Pacific Ocean 800–1,000 km (500–620 mi) northeast of New Zealand’s North Island, and a similar distance southwest of Tonga. The islands are part of New Zealand, 33.6 km2 (13.0 sq mi) in total area and uninhabited, except for the permanently manned Raoul Island Station, the northernmost outpost of New Zealand. Source: Wikipedia
By Hobe / Holger Behr – Own work, Public Domain, https://commons.wikimedia.org/w/index.php?curid=2177197
Map of Kermadec Arc north of the North Island of New Zealand.
Kermadec storm petrels look like and fly like a white-faced storm petrel, differing only in their rump colour. They are grey above with dark-grey flight feathers and tail; the under-surfaces are white, and there is a broad white stripe above the eye. The bill and legs are black with yellow webs on the feet. Their main distinguishing mark is a prominent white, rather than grey, rump, a nearly square cut rather than forked tail when folded, and there a little less grey on the sides of the breast. When feeding they move with the same high bounding hops as the white-faced storm petrel. Source: NZ birds online
There are very few images of these rare birds from which to work, so I have also looked at standard white-faced storm petrels to understand their types of pose and movement, then referred back to the few authenticated photos for their colouration.
That’s the drawing all done, time to colour them in!